Overview
Please review our merchant processor integrations on a separate page.
This article will review:
Settings and Navigation
You can find settings for your merchant processing in Control Panel > Integrations > Payments tab.


Set Up
Step 1: Check the box for Credit Cards/eCheck?
Step 2: Select your payment provider from the drop down menu
Step 3: If you have been approved for ACH/eCheck payments by your merchant provider, check the box that says "eCheck?"
Step 4: Check/uncheck any other checkboxes on this page to your specific preferences.

Testing the Credit Card Integration
In order to test your credit card integration, you'll need to have at least one contact and one service that is invoice-able. Follow these steps to create an invoice, apply a credit card payment and then verify that it worked.
-
Create a test contact with your information.
-
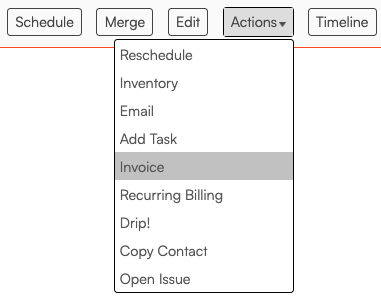
Click on the Invoice button in the Actions menu on the contact details page.
-
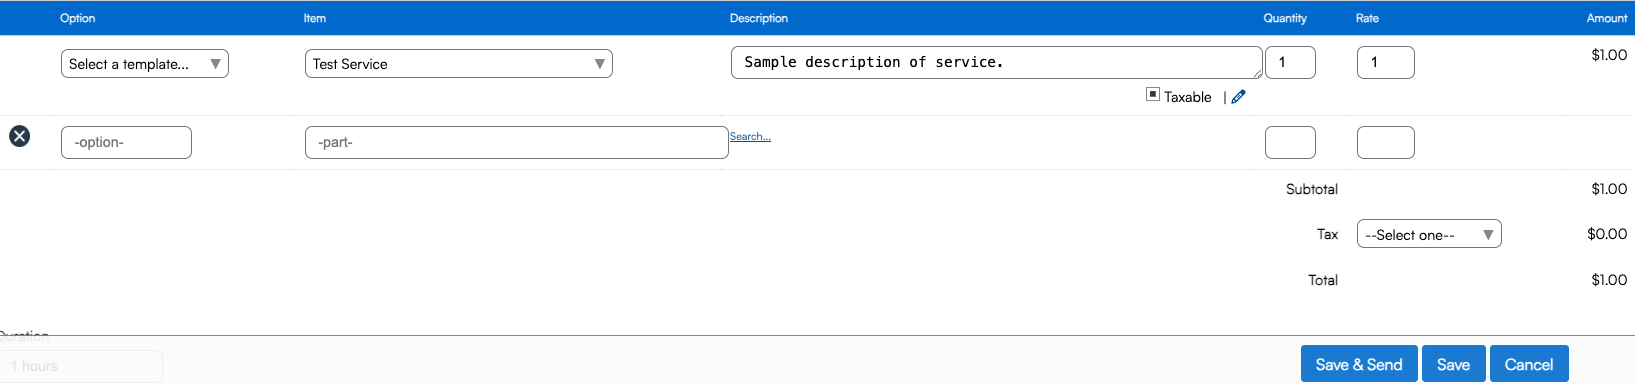
Select a service from your list of services and then change the price to $1 and click Save.
-
On the invoice page, click the Pay link to add a payment. Select Credit Card from the list of payment methods. You'll then be presented with inputs for the card number, expiration date, verification code and billing address info.
-
Save the payment. You should then see a new payment on the invoice (for $1) and since it's a credit card payment, there will be an authorization code in the Reference field.

-
Log in to your merchant processing provider's account (the portal they have where you can see your credit card transactions). If you see the $1 transaction in your merchant processing providers portal that means you are good to go!
If you don't, then something's not set up correctly. If you get any error messages while adding the payment or you don't see the transaction, click Help at the top of the serviceminder page, then the Got a Question tab. Open a support ticket with us and provide us as much information as possible so we can assist in getting this corrected.
-
You now need to void this transaction on the invoice in serviceminder. Find the test contact and click on the test invoice and click Refund on the transaction, follow the steps on the screen to process the void. You can now void the test invoice.


You're now ready for clients to start processing payments online!
Once you process your first live customers card, make sure to check your bank account in a few days to ensure the funds have been deposited into your account.
Changing Your Provider Credentials
You may occasionally need to update the credentials for your payment gateway. If your gateway account is the same and you just have new keys or credentials, then you can just put them in the same way you did the first time. This will preserve any payment-on-file information.
Changing Payment Gateway Account
If you are setting up a new account for your current payment gateway, you will not get prompted to clear our your payment-on-file tokens and you may run into errors with your new payment gateway account due to those old tokens. To ensure your tokens are cleared out when setting up a new payment gateway account, follow these steps:
-
Switch your payment gateway to any random provider using the Payment Provider dropdown menu. In the required fields enter in random characters. (If you are not able to switch, it is most likely because you have open installment payments. Open a support ticket and we can assist you with that.)
-
Hit Save and you'll get a prompt to confirm you want to clear our your payment tokens. Select Yes.
-
Now switch back to your desired payment gateway. Enter in your new credentials. Hit Save and when prompted, you can select Yes again (though since you did this already, that's optional).
-
You may now test your integration by running a $1 charge and ensuring that it flows end-to-end.
If you want to migrate your payment on file tokens to the new gateway, use this download to extract your current tokens with our Contact ID. If you do this, then we'll be able to match your new tokens to your existing contacts. If we have to match tokens based on names, emails and addresses, there will always be misses because those won't necessarily match in all cases.
Click here to download a CSV file of your current tokens: serviceminder.io/reporting/custom/cardtokens
FAQs
What Payment Processors do you integrate with?
Click here to view many of the Integrations supported by serviceminder.
How can I control if customer's cards are automatically charged?
You can read more about Auto Pay on this help page.
An additional consideration is to make Invoices auto generate as Unapproved. That means, you will need to review and approve invoices before they are sent. This allows you to reach out to the customer or update invoices before they are charged.
If you are interested in adjusting these settings, there are 2 options:
- The Master Setting is in Control Panel > Invoices. Change it to Unapproved Invoice. This setting is for each invoice created for any service and any customer.

- To do it via a particular Service, you will go to Control Panel > Services > Invoicing section > Invoicing Mode > Change to Manual. This will only affect the invoices for the service that you update the setting on.
More information on this and the other Invoicing Modes can be found here.
