Overview
Scheduling configurations will determine the frequency of appointments you are offering, how appointments display on your calendar, whether or not customers can schedule their own appointments in the contact portal and much more. This article will give you an idea of the general scheduling settings you have to choose from.
This article will review:
Settings and Navigation
The Scheduling page, found in the Control Panel, gives you options to control the calendar display, scheduling, communications, cancel reasons, online scheduling and other miscellaneous options. You can also configure organization-level holidays on this page.

These settings are default, master settings for your organization. You can specify more details and preferences on each individual Service as well.
Presentation
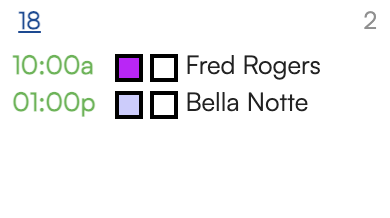
- Configure Color Blocks on your calendar to make it easier to get a quick overview of your schedule. Color blocks can be assigned to Services, Service Agents, and/or GeoZones. They display as small squares next to the contact name on the calendar.
- Collate Covers: Collate covers when printing
- Day Click Action: Set the default view when clicking on a specific date on the calendar.
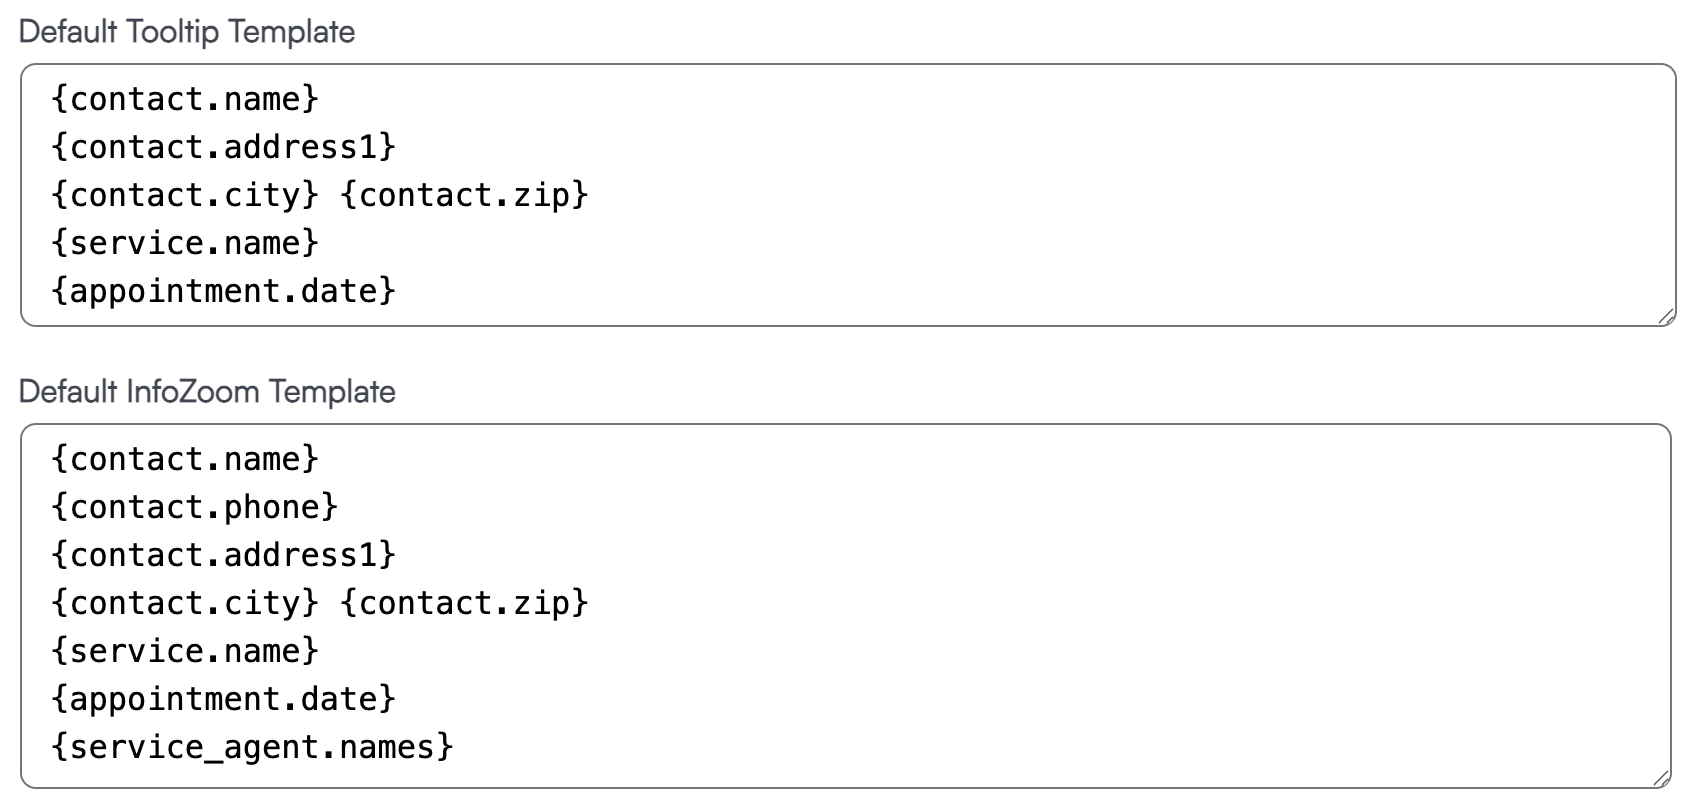
- Default Tooltip Template: Use shortcodes to customize the information that appears when you hover over an appointment on the calendar month view.
- Default InfoZoom Template: Use shortcodes to customize the information that appears when you click on the tooltip and open an expanded "InfoZoom" card.
Scheduling Options
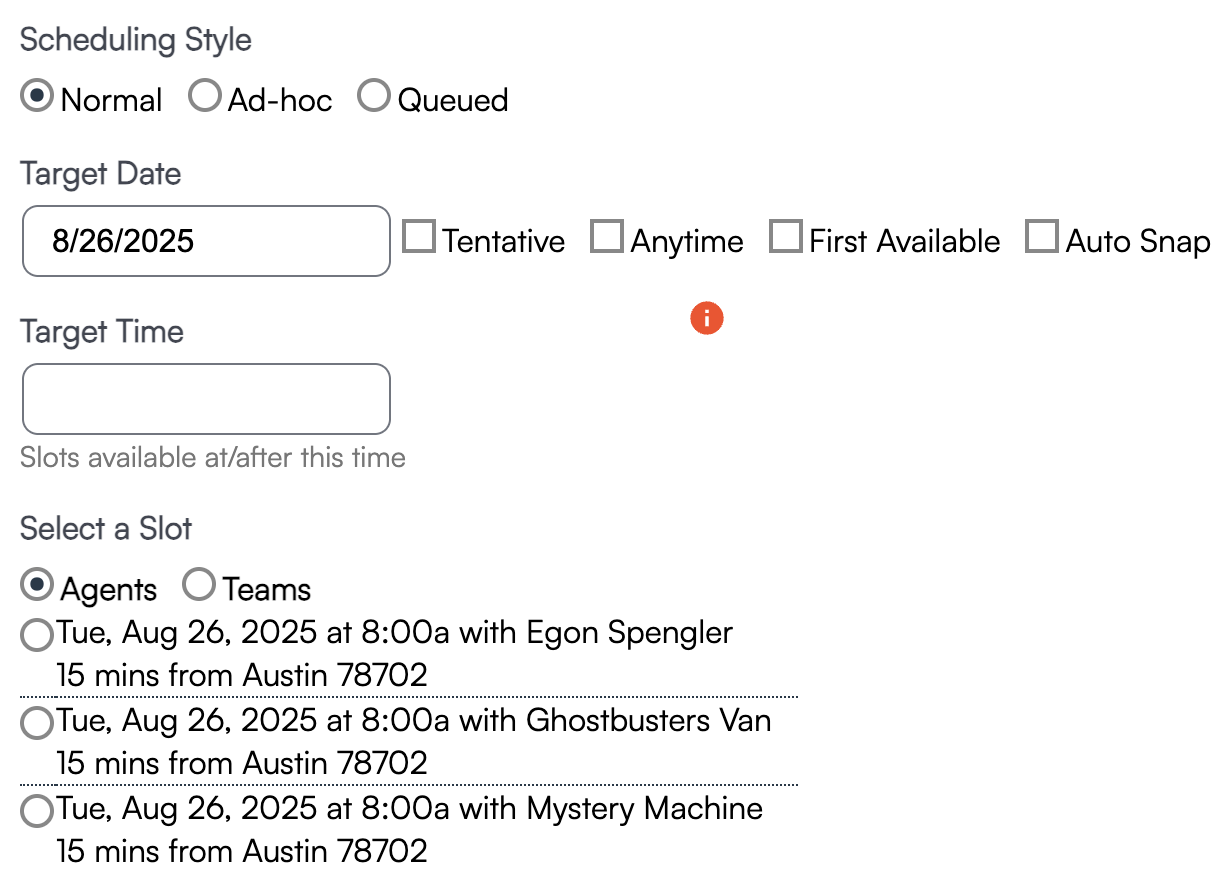
- What do you want the scheduling mode to default to?
- Default Tentative: If you use a call center service, for example, you can use scheduling options to make all your appointments Tentative by default. This will allow you to approve all appointments before sending any confirmations to contacts.
- Default Ad Hoc: Perhaps your business is outdoors and appointments depend on weather conditions, so you prefer that everything defaults to Ad Hoc so you can manually set time slots and agents for appointments.
- Options Default: Selecting this option will automatically select any options on the appointment. There is a similar setting for Proposals as well.
- Open Time Granularity: Defines the space between appointments offered when using the Normal Scheduling Style. If you type 30 in this box, for example, you will be shown appointments every 30 minutes when scheduling. If left blank, you will only see the first available appointment of each day.
- Lead Time Hours/Days: Allows you to set a minimum amount of "heads up" time you require before an appointment can be scheduled. For example, if you need 24 hours notice for scheduling an appointment, you can either set the Lead Time Hours to 24 or the Lead Time Days to 1.
- SchedulingGranularity: Rounds up the appointment start times to the nearest 5, 10, or 15 minutes.
- Drive Time Granularity: Rounds up the drive time between appointments to the nearest 1, 2, or 5 minutes.
- Time Slot Sorting: Determines how the available timeslots are sorted, prioritizing date or distance.
- Exclude Tentatives: Treats appointments marked as tentative as "off the calendar."
- Appointment Window: determines how many days in the future appointment slots will display when scheduling.
- Nearby Radius: Radius for displaying nearby appointments when scheduling.
- Nearby Count: Maximum nearby appointments to show.
- Include Nearby: Choose to include nearby queued and/or scheduled appointments in results
- Auto-Select Slot: Automatically select the best appointment slot when scheduling.
- Contact Owner: Assign the Service Agent as the Contact Owner when booking (if not already assigned)
Communications
-
Clipboard Copy Format
-
Contact's Schedule Window: this applies to how far in advance a customer can see their upcoming appointments in the contact portal. This would primarily apply to recurring appointments that are on the calendar months in advance. If you do not have the contact portal enabled, you can disregard this setting.
Hide Past Appointments: Hides past appointments from the contact's online schedule page. Contacts will only see future appointments when this checkbox is enabled.
Approximate Times : Check this box in order to communicate approximate appointment times (like "mid-morning") instead of exact times in client-facing messages. The windows are as follows:
- Before 10am: Early Morning,
- 10 am - 12pm: Morning
- 12pm - 3pm: Early Afternoon
- 3pm - 6pm: Afternoon
- After 6pm: Early Evening.
Using shortcodes in email templates we can also take a scheduled time and calculate/display a range of time, like 8:30-10:30 for an appointment scheduled at 9:30. See our shortcode help page for more information.
- Confirmation/Reminder Reply Email : You can configure an alternate email for confirmation/reminder replies. For example, if you have an "administrative" email address which multiple associates can access, where you want customer responses to flow (i.e. Admin@BobsHandyman.com)
- Service Agent's Email:
Proposals and Invoices
- Show Schedule Dates: These options control subscription and recurring appointment schedules displaying on proposals and invoices.
- Expired Subscription Date Mode:
- Do Nothing
- Pro-Rate
- Call Us
- Disclaimer Text: Optional message to attach to scheduled dates section of the proposal/invoice.
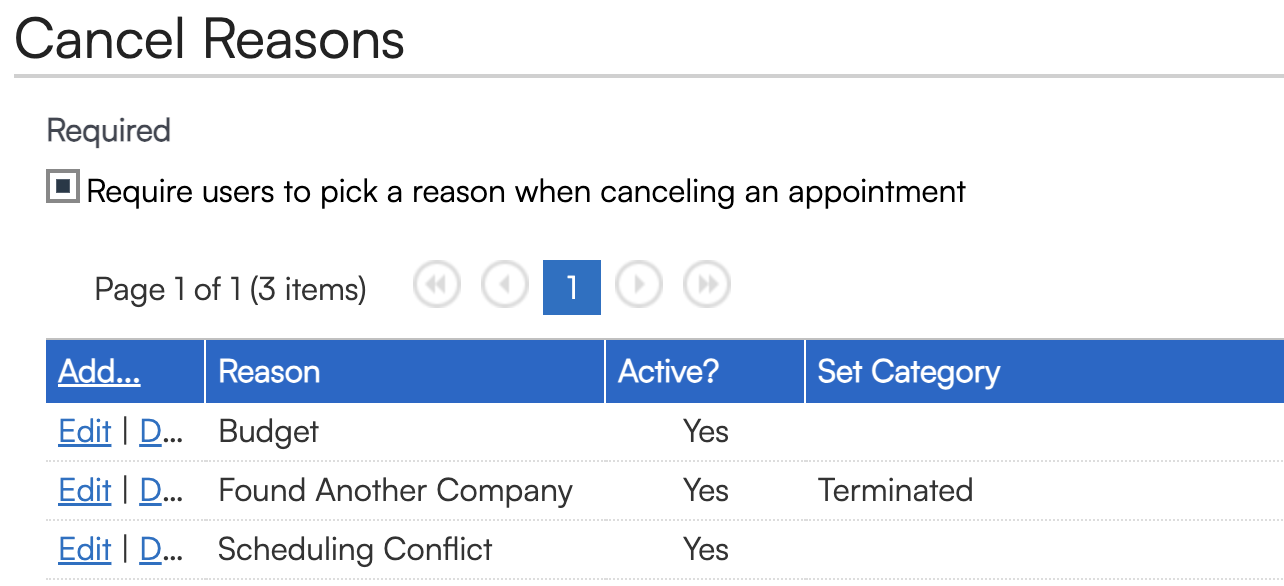
Cancel Reasons
- Use this grid to manage your available cancel reasons
- If customers cancel an appointment, you can automatically set their customer category.
- You can also require users to pick one of these cancel reasons when cancelling an appointment - a great thing to track!
Online Scheduling
Use this to enable and control various aspects of the online scheduler.
- Enable Online Scheduling and/or Account Creation.
- Online Scheduling enables the ability for customers to schedule appointments via the online scheduler tool
- Account Creation enables the ability for customers to log in to an account to review proposals, invoices, and appointment notes
- A dropdown menu allows you to choose a previously-configured scheduling API Key
- Share the Scheduling URL or Account URL in your communications or on your website and social media.
- Self Service Radius: The maximum distance (in miles) from your warehouse that someone can schedule a service using the online scheduler.
- Cancellation Hours: The minimum number of hours for free cancellation of an appointment.
- Cancellation Fee: The fee you charge for cancellations within within the window of time you have set.
- Show Team Slots Only: Only show Team time slots and not individual agent time slots when scheduling online.
- Exclude Internally: Hides Self Service services from the dropdown menu when creating appointments or proposals internally.
- Self Service Phone: Set an alternative phone number to display on the self service scheduler page.
- Hide Queued Appointments: If a contact creates an account, they can view the dates of their appointments. Check this to prevent them from seeing queued appointments.
- Confirmation Redirect URL: Redirects to this URL upon completion. Supports any appointment shortcodes.
- Contact Me Redirect URL: Redirects to this URL when contact requests to be contacted for scheduling options.
- Custom Fields: Allows you to select which custom fields should be visible to the customer in the online scheduler.
- Proposal Templates: Allows you to select the proposal templates that are available for contacts to select from in the online scheduler.
Operational Options
- Recurring Appointments for Teams: Set whether or not updates while in Team View will update future recurring appointments.
- Optimize Drive and Start: Enable drive and start time optimization when dragging and dropping in Team View.
- This feature is similar to auto-snap. If you turn this off, it will affect every appointment. You can drag and drop appointments around and when you update, the system holds the order of appointments based on start time (not based on whatever changes you've made). The time will never update - even if you click Update on the Calendar.
- You will most likely want to leave Optimize Drive and Start setting turned on.
- Appt Start Proximity and Duration Alert: Set alerts for internal users regarding how appointments are started/finished. You can alert your Service Agents if they are starting an appointment outside of the expected proximity or if the appointment duration is much shorter than expected.
- Require Confirmation: Require user to confirm when starting outside proximity
- Require Internal Note: Require user to add internal note when finishing
- App Gallery Upload Limit: This area is also where the Photo Upload Limit (for Mobile App users) setting lives. If this field is left blank, the default photo upload limit on the Mobile App is 5 photos.
- Send Internal Note Alerts : Sends an alert when appointments are completed and have Internal Notes.
- Global Appointment Flash : Displays this flash message on all appointments in the app. This is useful for cases where a regulatory warning or other message must be displayed for all users working appointments.
Miscellaneous Options
These options control various global settings.
- Auto-Close : With this option enabled, the system will automatically update the status of any incomplete appointments to "closed" at the end of each day. You can use this if you are not normally starting/finishing or Quick Finishing appointments.
Note: The Auto-Close process does not send any notifications to clients, nor does it trigger any automations such as invoices, email drips, or completion emails. Automations and notifications that are set to fire upon appointment completion will not activate if the appointment is closed via the auto-close feature; they only trigger when an appointment is manually finished by a user.
- Show Part Summaries : This controls whether part summaries are displayed on the appointment list on the contact details page.
- Expired/Expiring Service Windows : These control how many days in advance contacts that are approaching or have passed their Next Service Date are displayed on the Expiring Service Grid. This is most commonly used for services that have a specific service interval configured, such as a maintenance or warranty window.
- Backlog/Future Window : This controls how far into the future appointments are displayed on the Backlog appointment grid.
- Default Capacity Units : This is the default units that will be displayed for all demand capacity displays.
- Default Rate per Hour : Configuring this will set new proposal durations based on the value of the proposal. For example, if you set this to 100, then a proposal valued at $400 will have a duration set to 4 hours. This only applies to services/parts that do not have a duration already configured. The duration is always rounded up to the next hour.
Holidays
Use this grid to create organization-level holidays. These override all availability. To mark your location closed for all scheduling, just add a new Holiday. See our Block Calendar Time article for more information.

FAQs
Is it a setting where I can say no address is requested to schedule an appointment?
For services like that, that don't require a service address for the contact, you can update it to be "Fixed Location" and that should allow for slots to show in Normal scheduling mode in Control Panel > Services. A fixed location will set the appointment address as the organization's warehouse address instead of the contact's. It's good for in-office consultations or virtual meetings/phone calls.
Should I be using auto-close for appointments?
It helps keep the backlog cleared but if the appointments aren't actually being worked then they may want to turn it off.
Auto-close doesn't trigger the usual finish action to generate an invoice or anything, it just updates the status. The appts might need to be reverted back to scheduled status, depending on the situation or what needs to be done.
Otherwise, they can be invoiced manually.
