Overview
This article will review:
Settings and Navigation
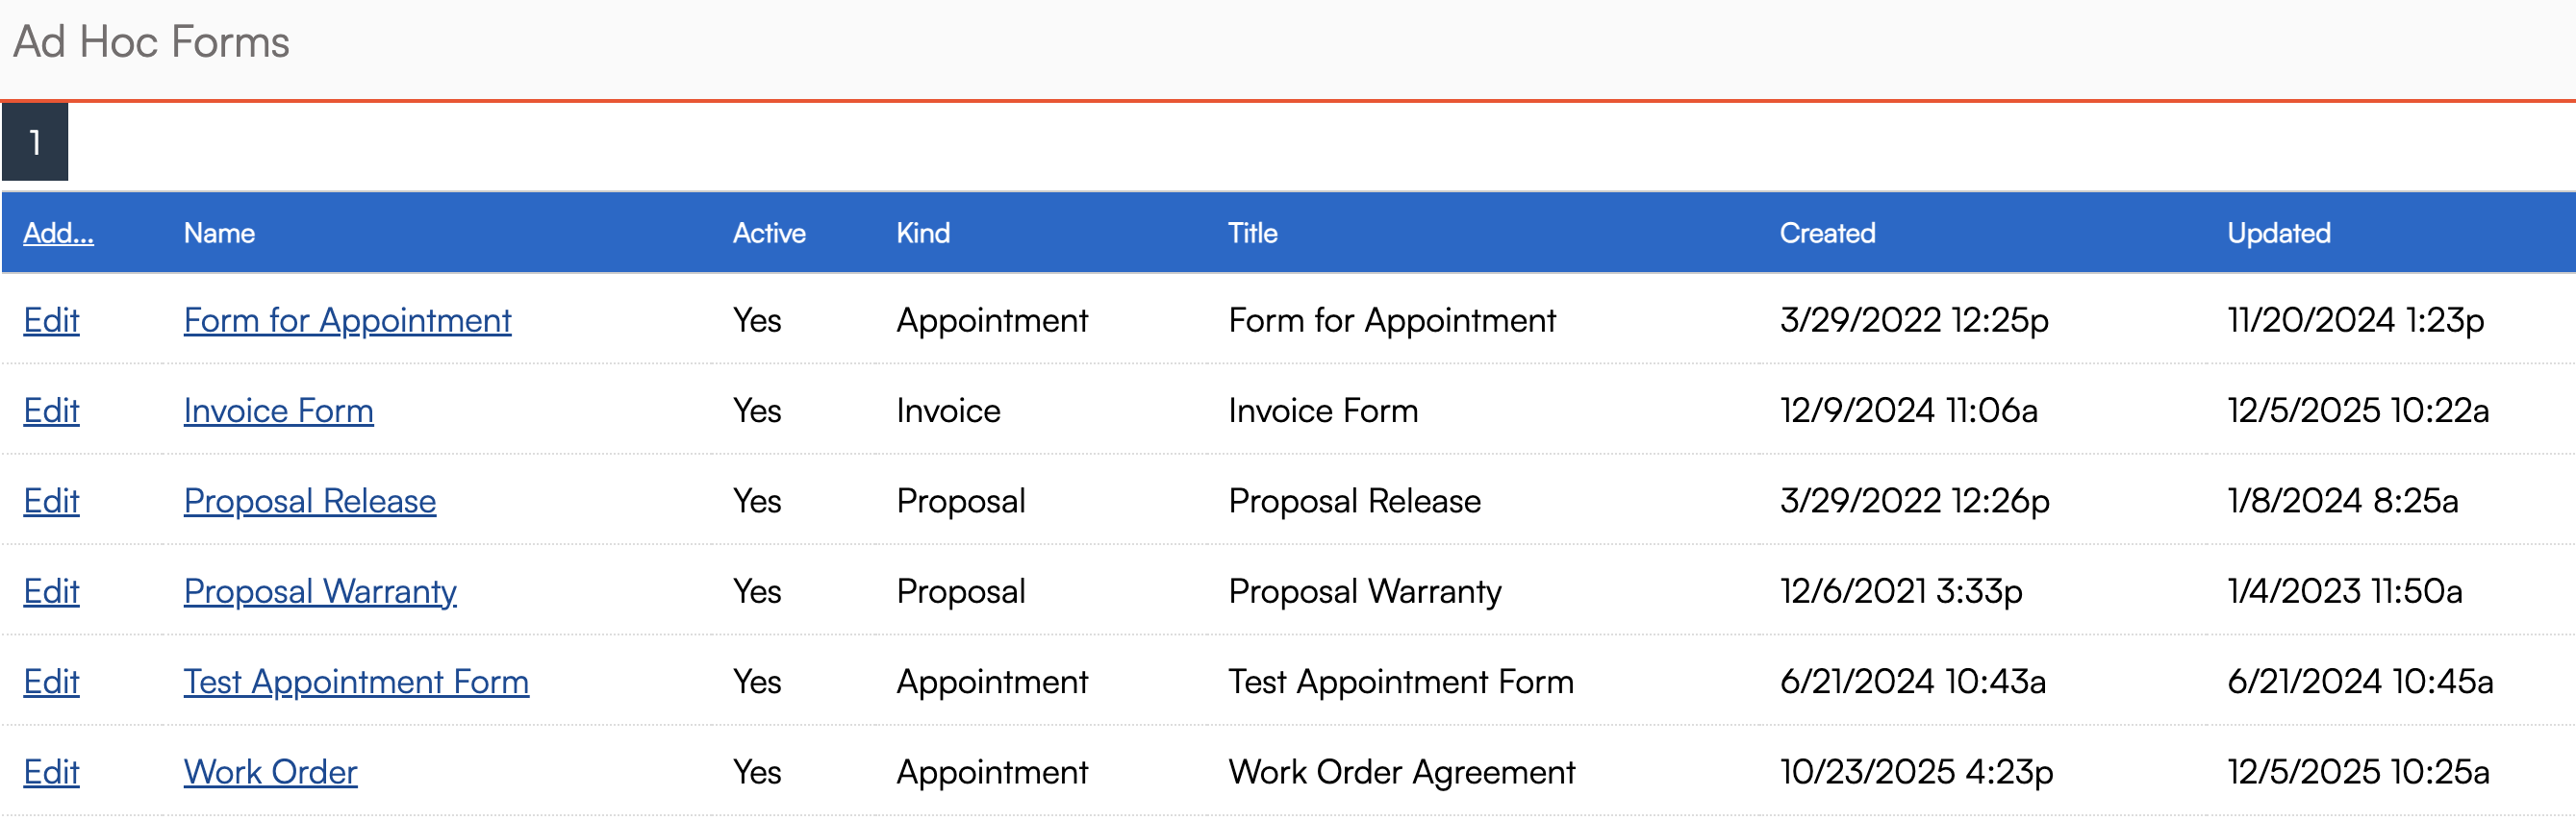
To add or edit Ad Hoc Forms, navigate to Control Panel > Ad Hoc Forms.
From here, you can choose Add to create a new form, select Edit to make changes to an existing form, or click the name of a form to view a preview.
Create an Ad Hoc Form
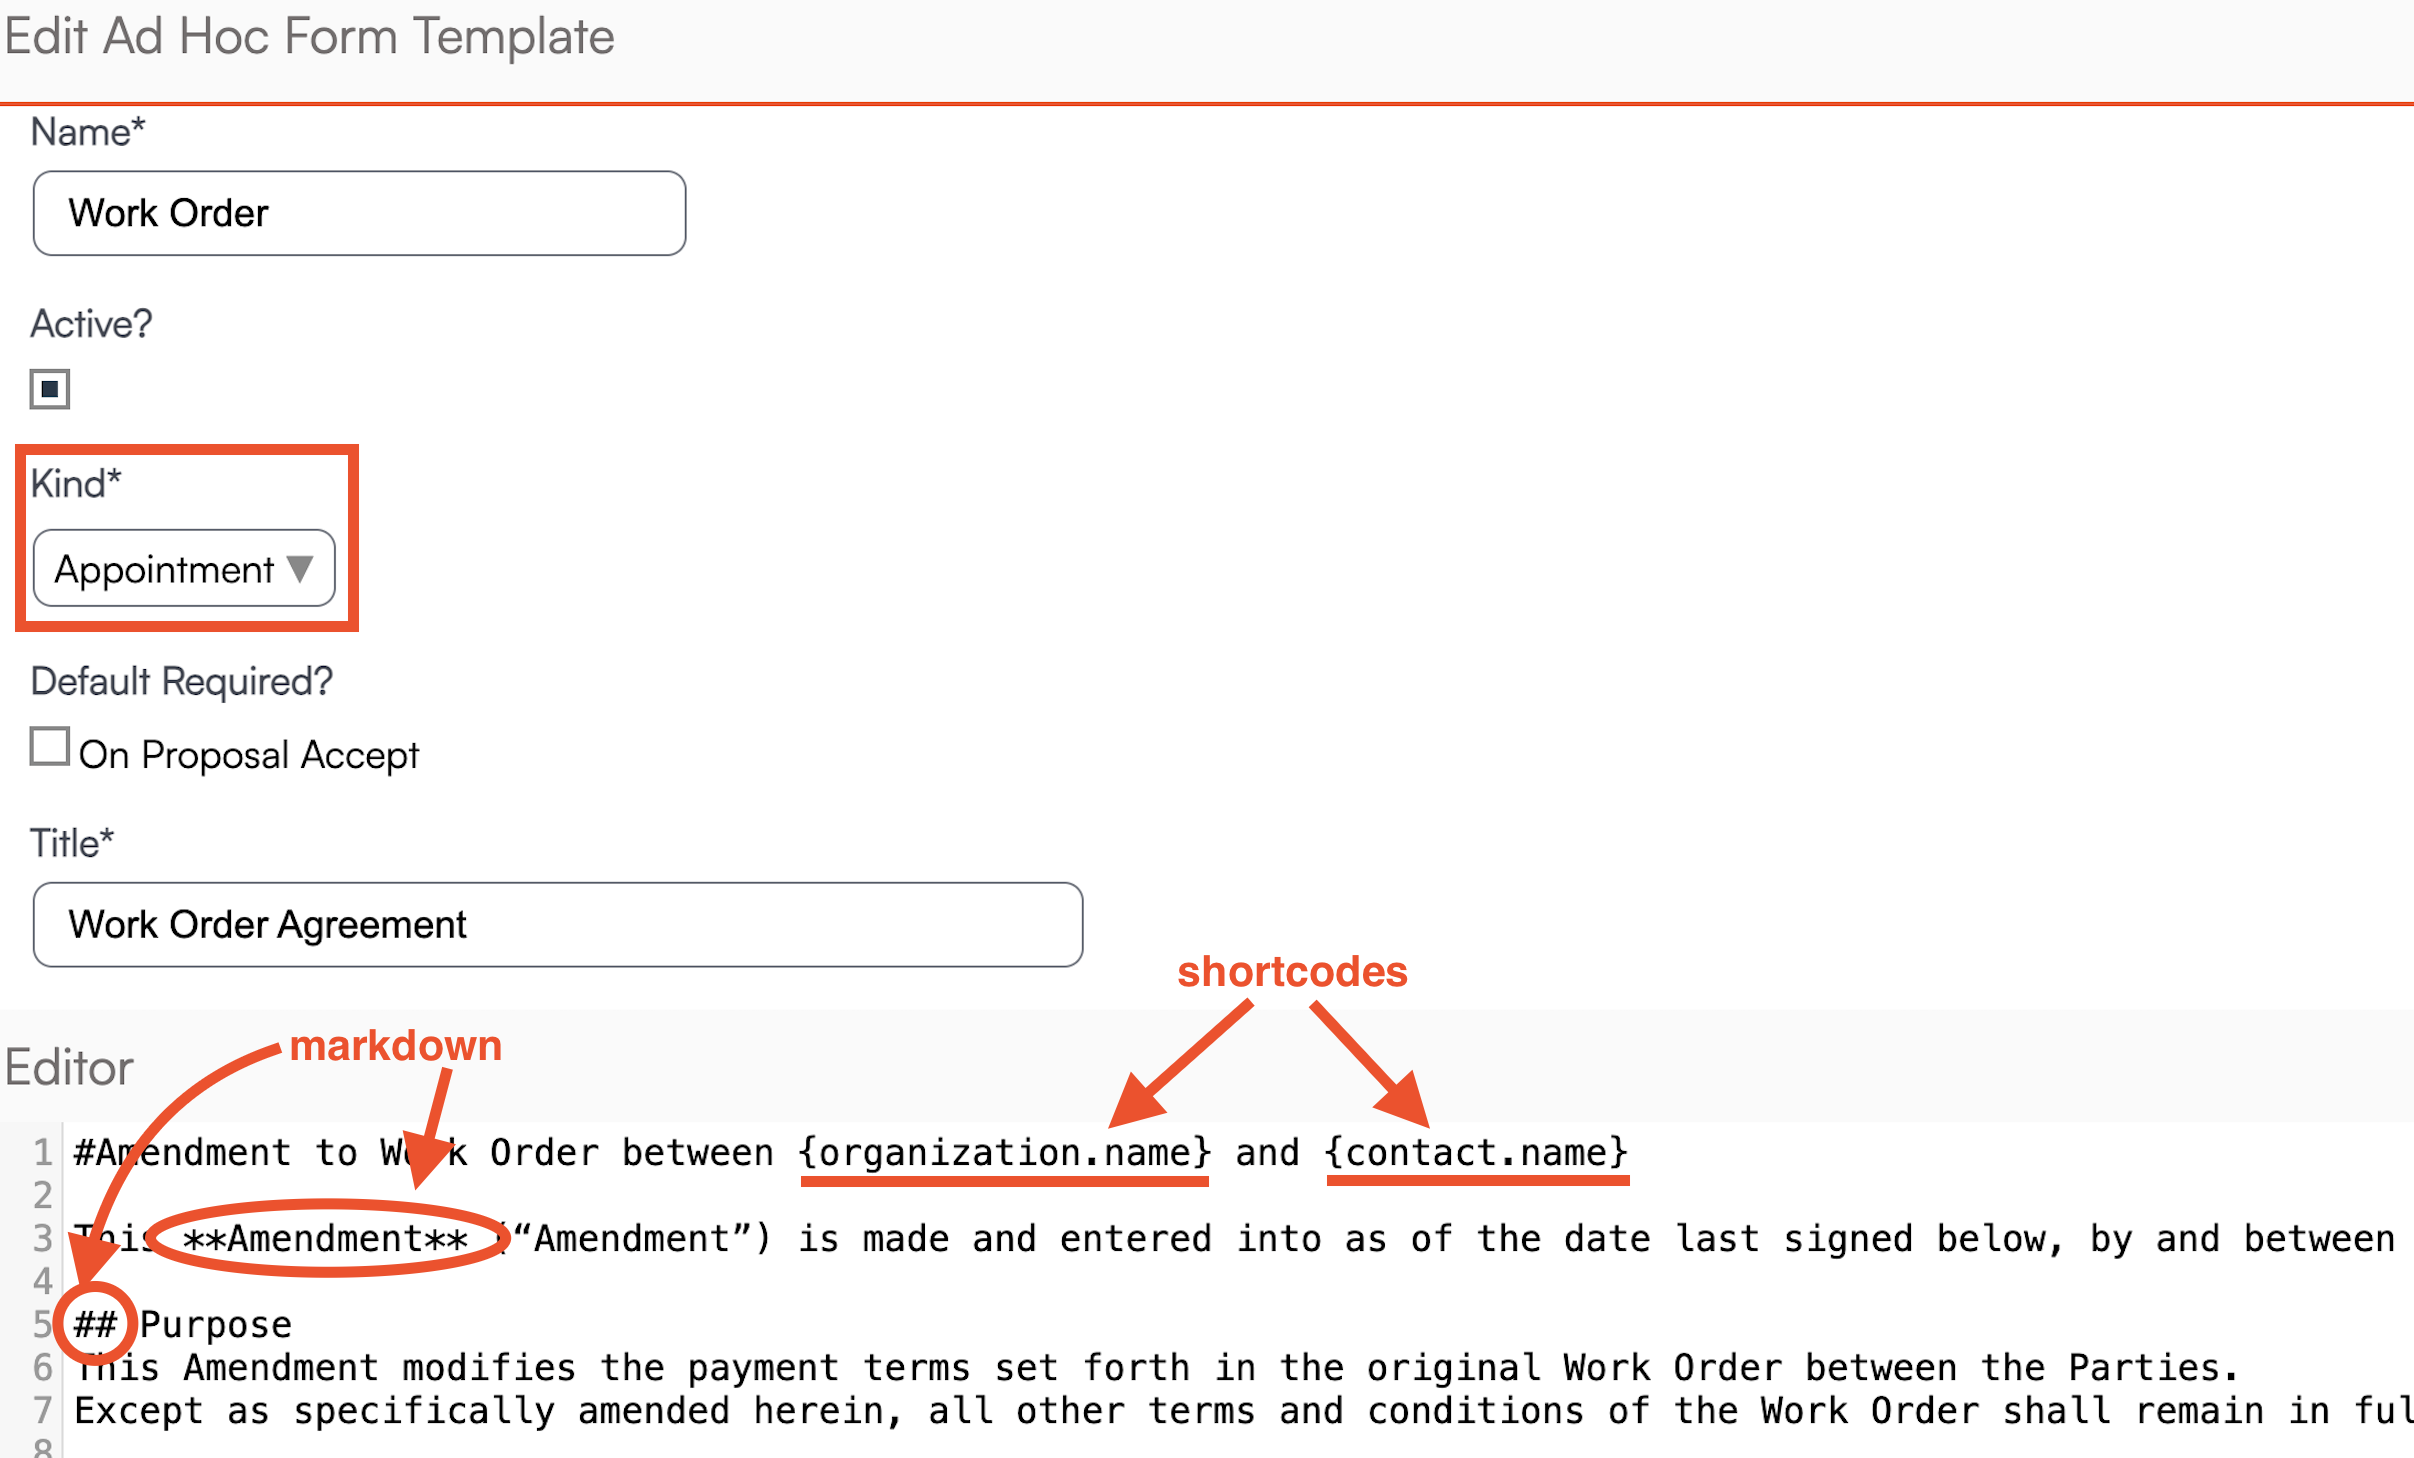
Click Add to create a new Ad Hoc Form and complete the following fields:
- Name: This is an internal name for your reference when choosing forms to add to items in the system.
- Active: Make sure this box is checked so the form can be used.
- Kind: Designate this form to be used on Proposals, Appointments, or Invoices (this dictates which shortcodes will be compaitble with the form).
- Default Required: You have the choice to set this form as required upon accepting the proposal.
- Title: This is the customer-facing name for the form.
In the Editor field, draft the body of the form.
- Use Shortcodes to automatically populate information in the form.
- Use Markdown Scripting to control the formatting (i.e., make text bold or create headers).
Using Ad Hoc Forms
Add a Form to a Proposal or Invoice
On a proposal or invoice details page, locate the Ad Hoc Forms section on the right side of the screen. Click Add.
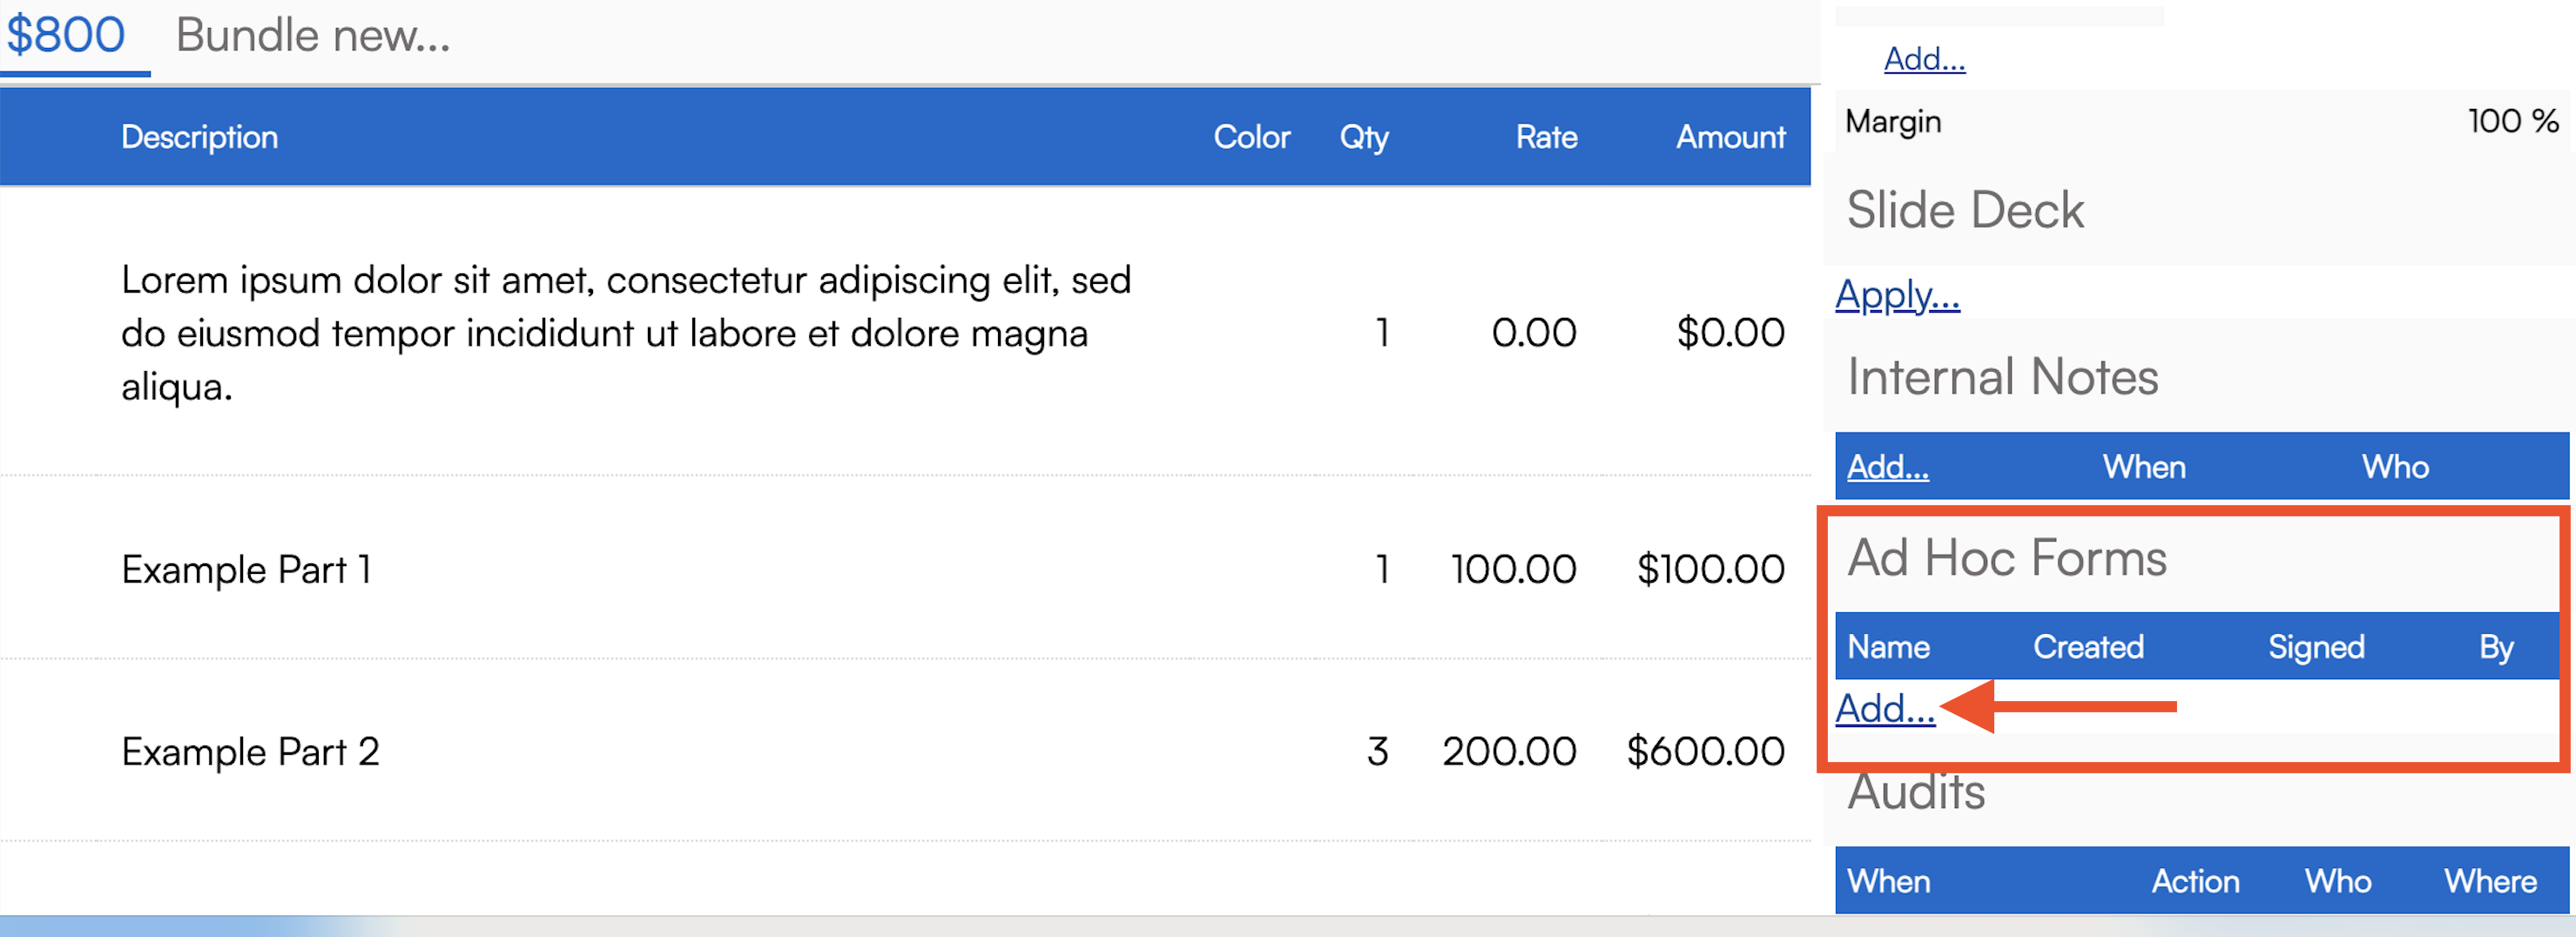
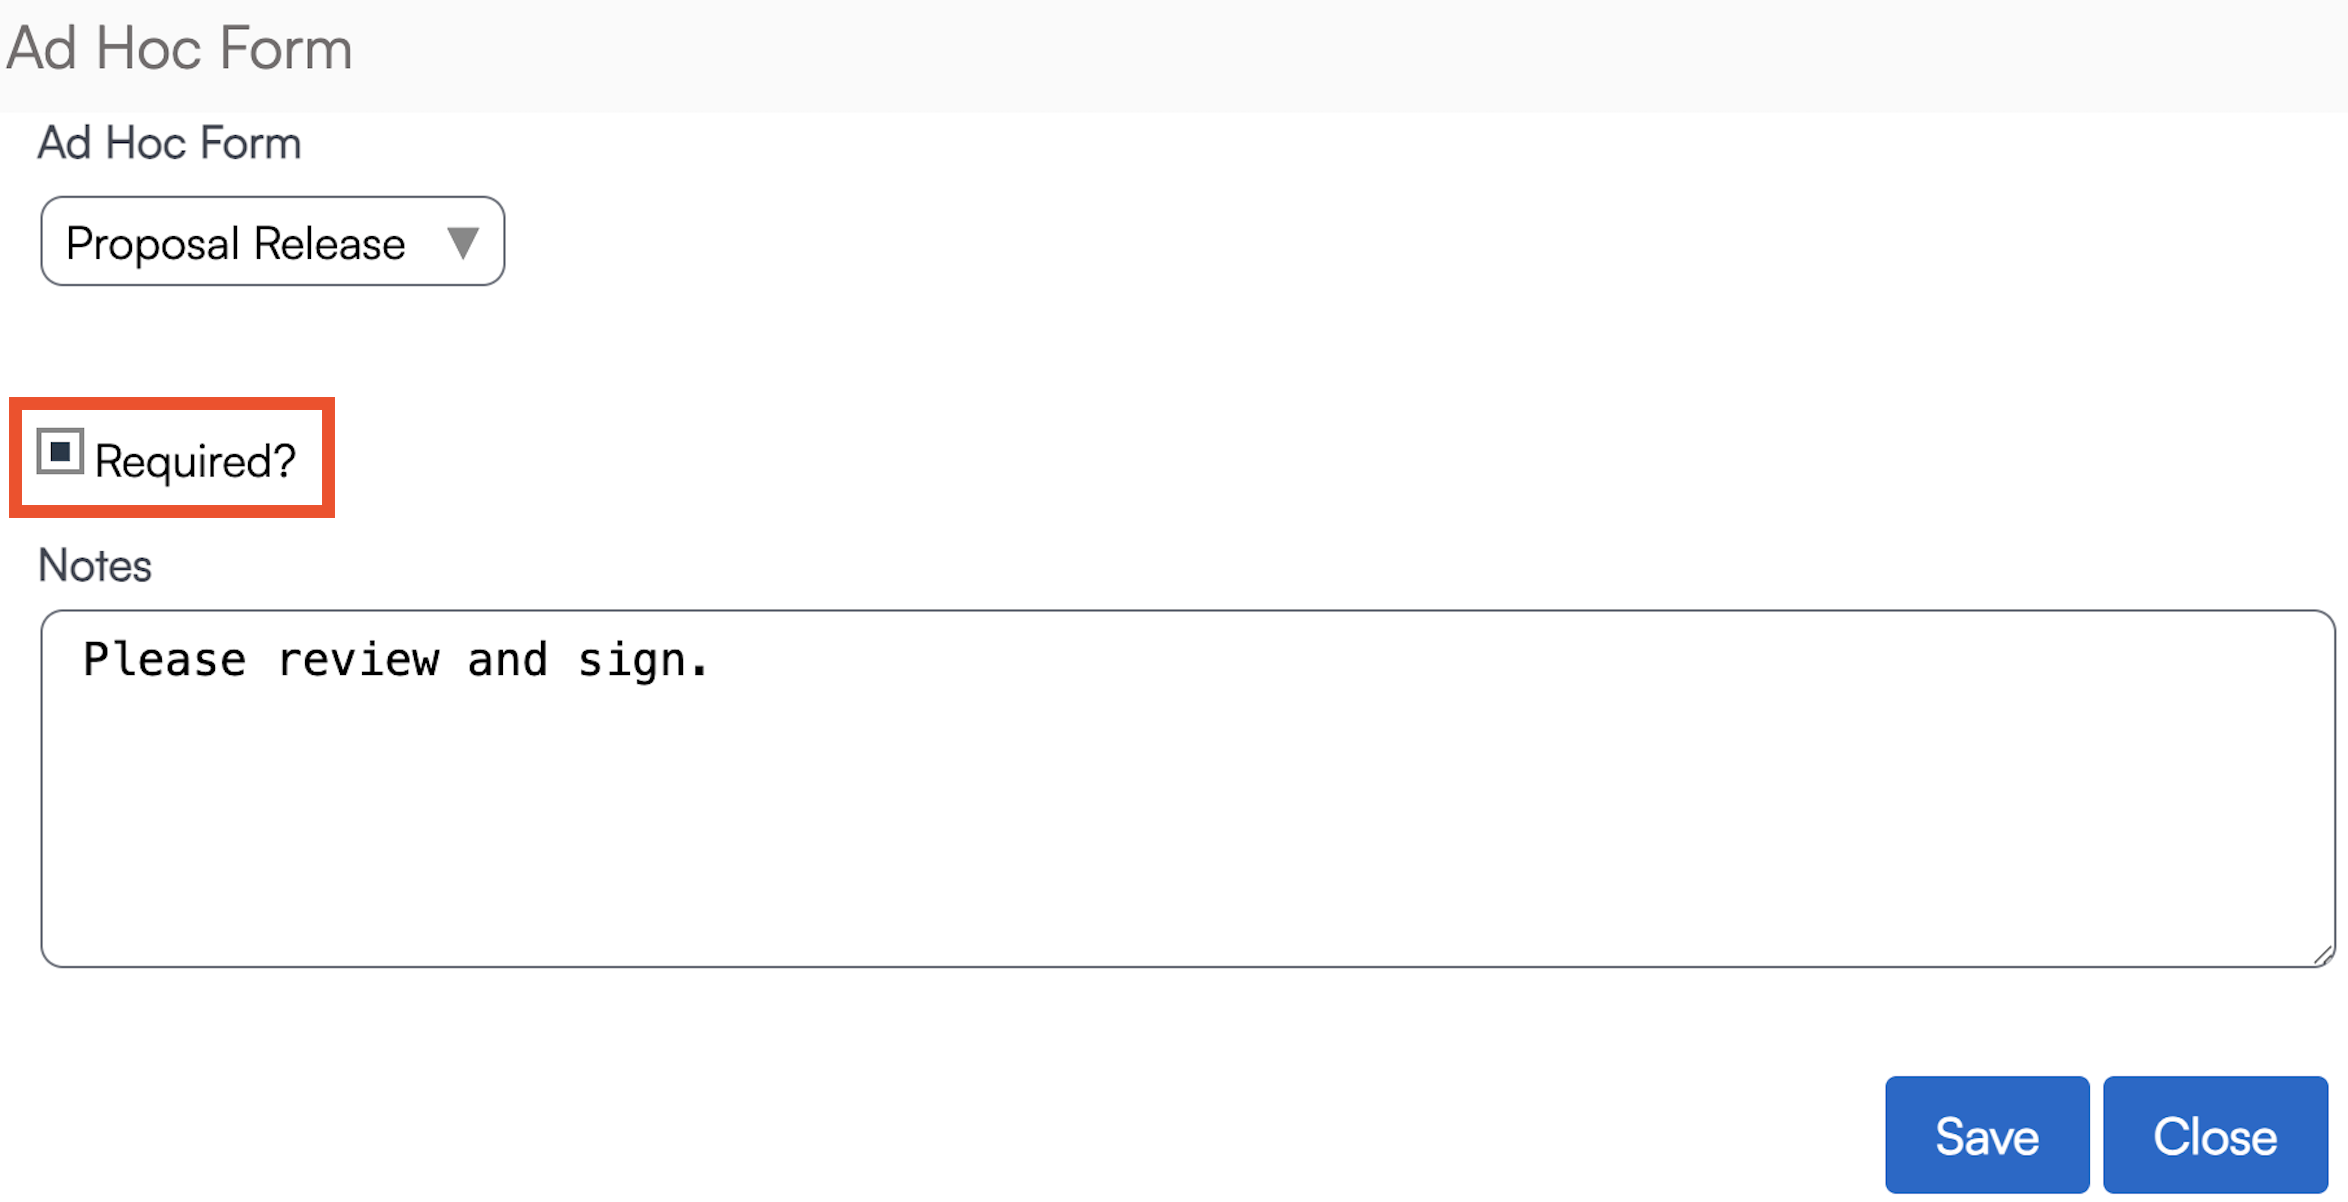
Choose the form you want to use from the dropdown menu.
- Check the Required box if you want the form to be mandatory.
- Use the Notes field to leave any notes to your customer about the form.
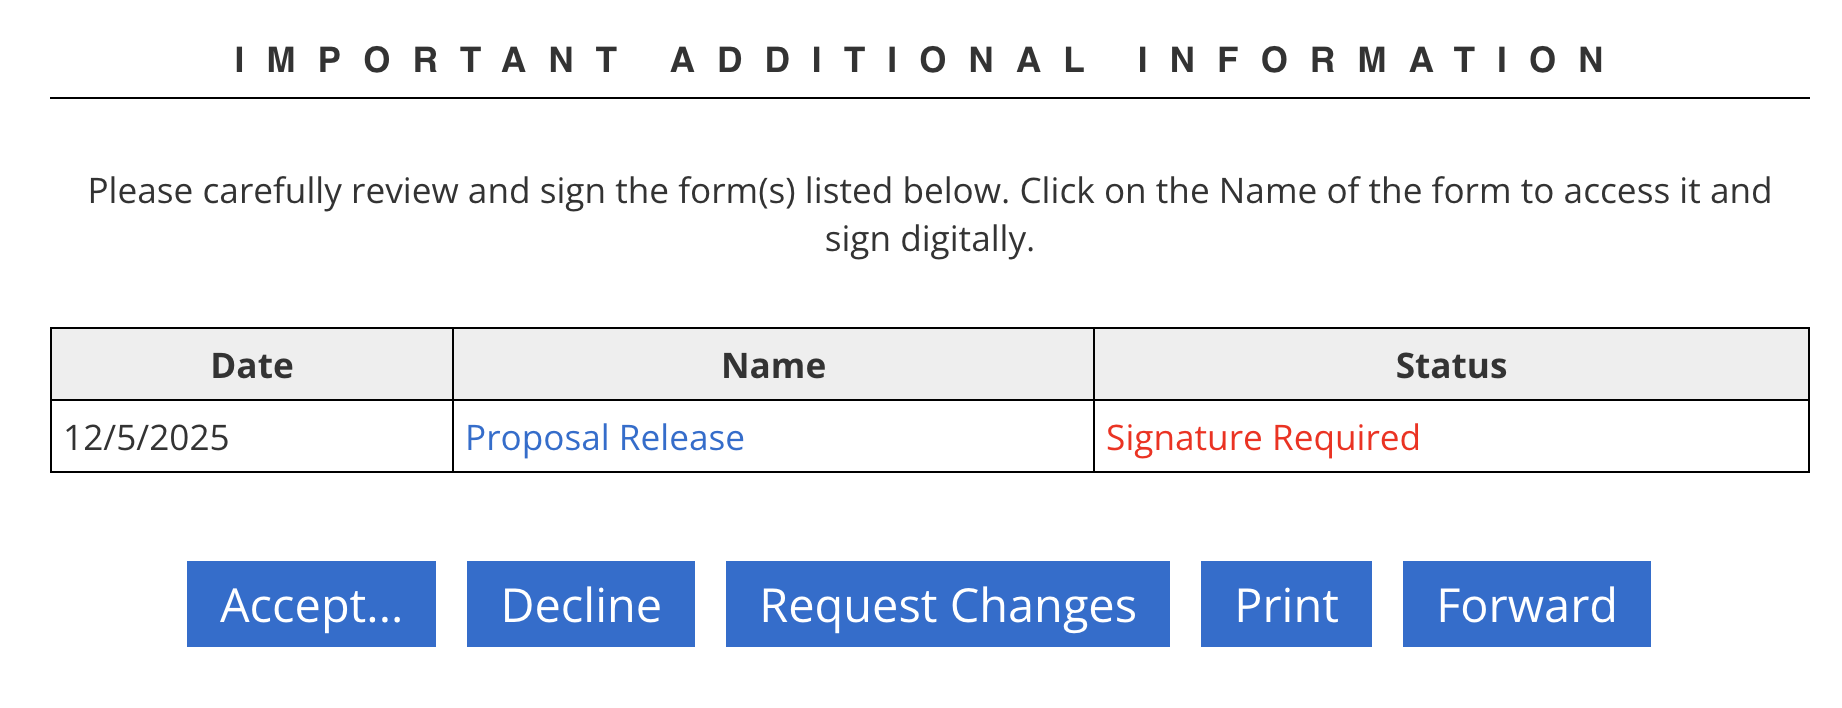
The form will appear in the Important Additional Information section. The customer can click the hyperlinked name of the form to open and sign. If marked as required, the status will say "Signature Required" and acceptance of the proposal and/or payment of the invoice will be prevented until that is complete. If not required, the status will say "Ready to Sign."
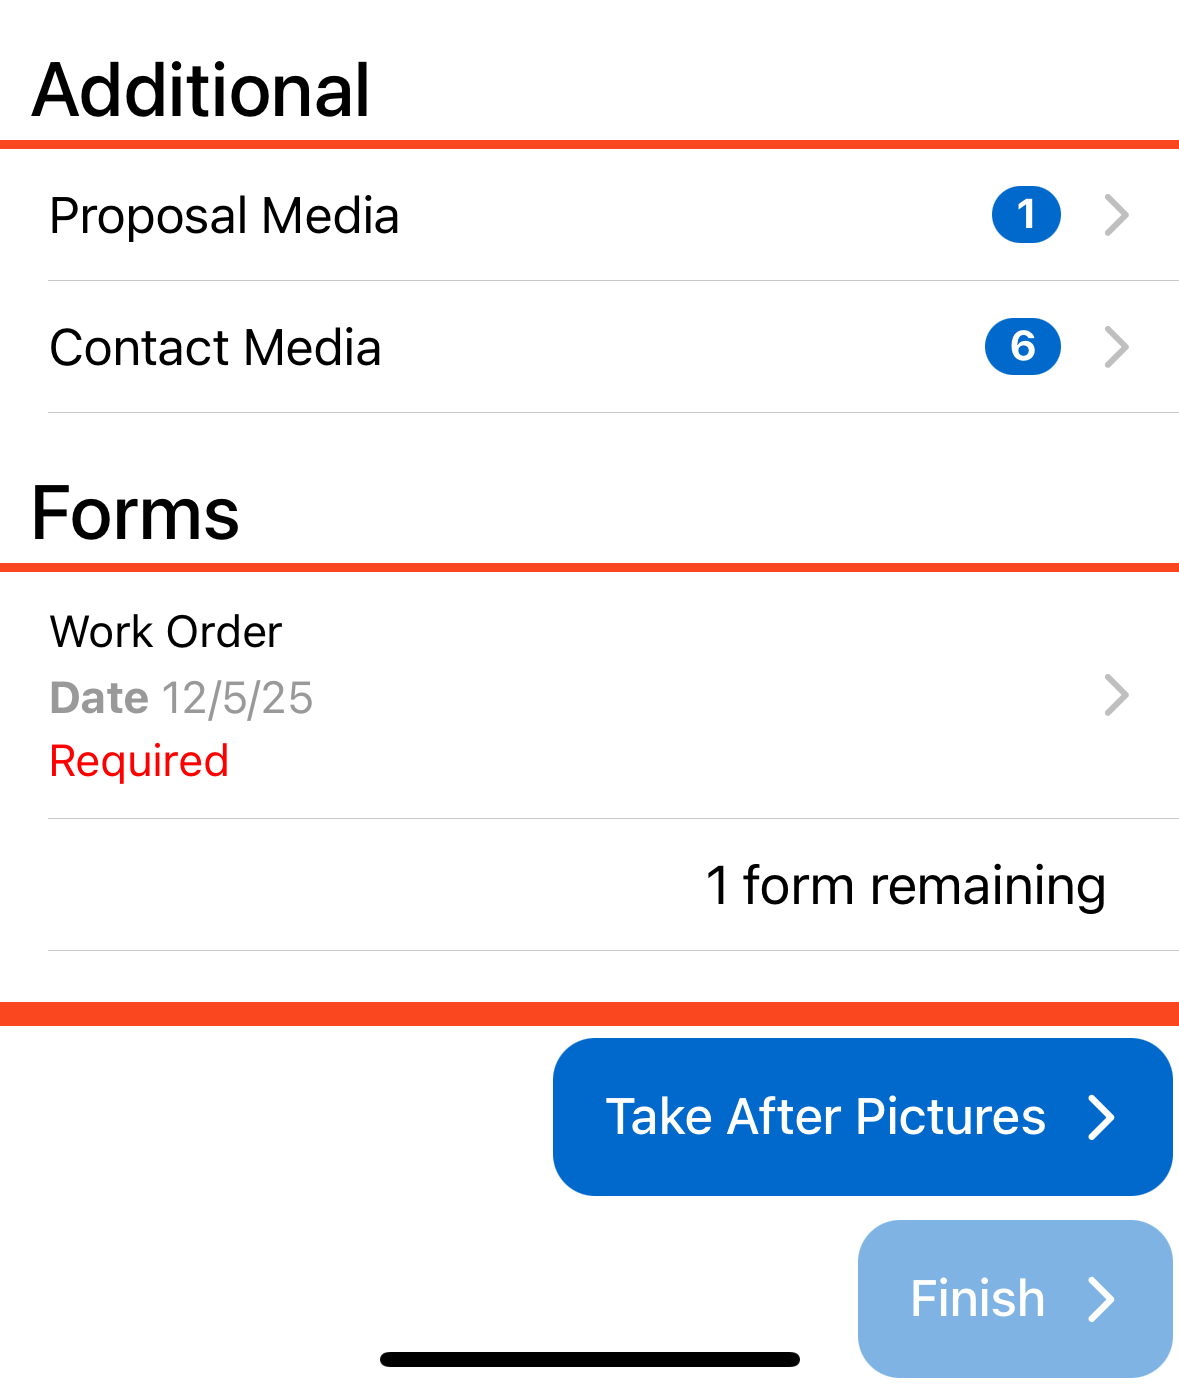
Add a Form to an Appointment
Once an appointment has been created, locate the Additional Details section and select the Forms tab. Click Add.
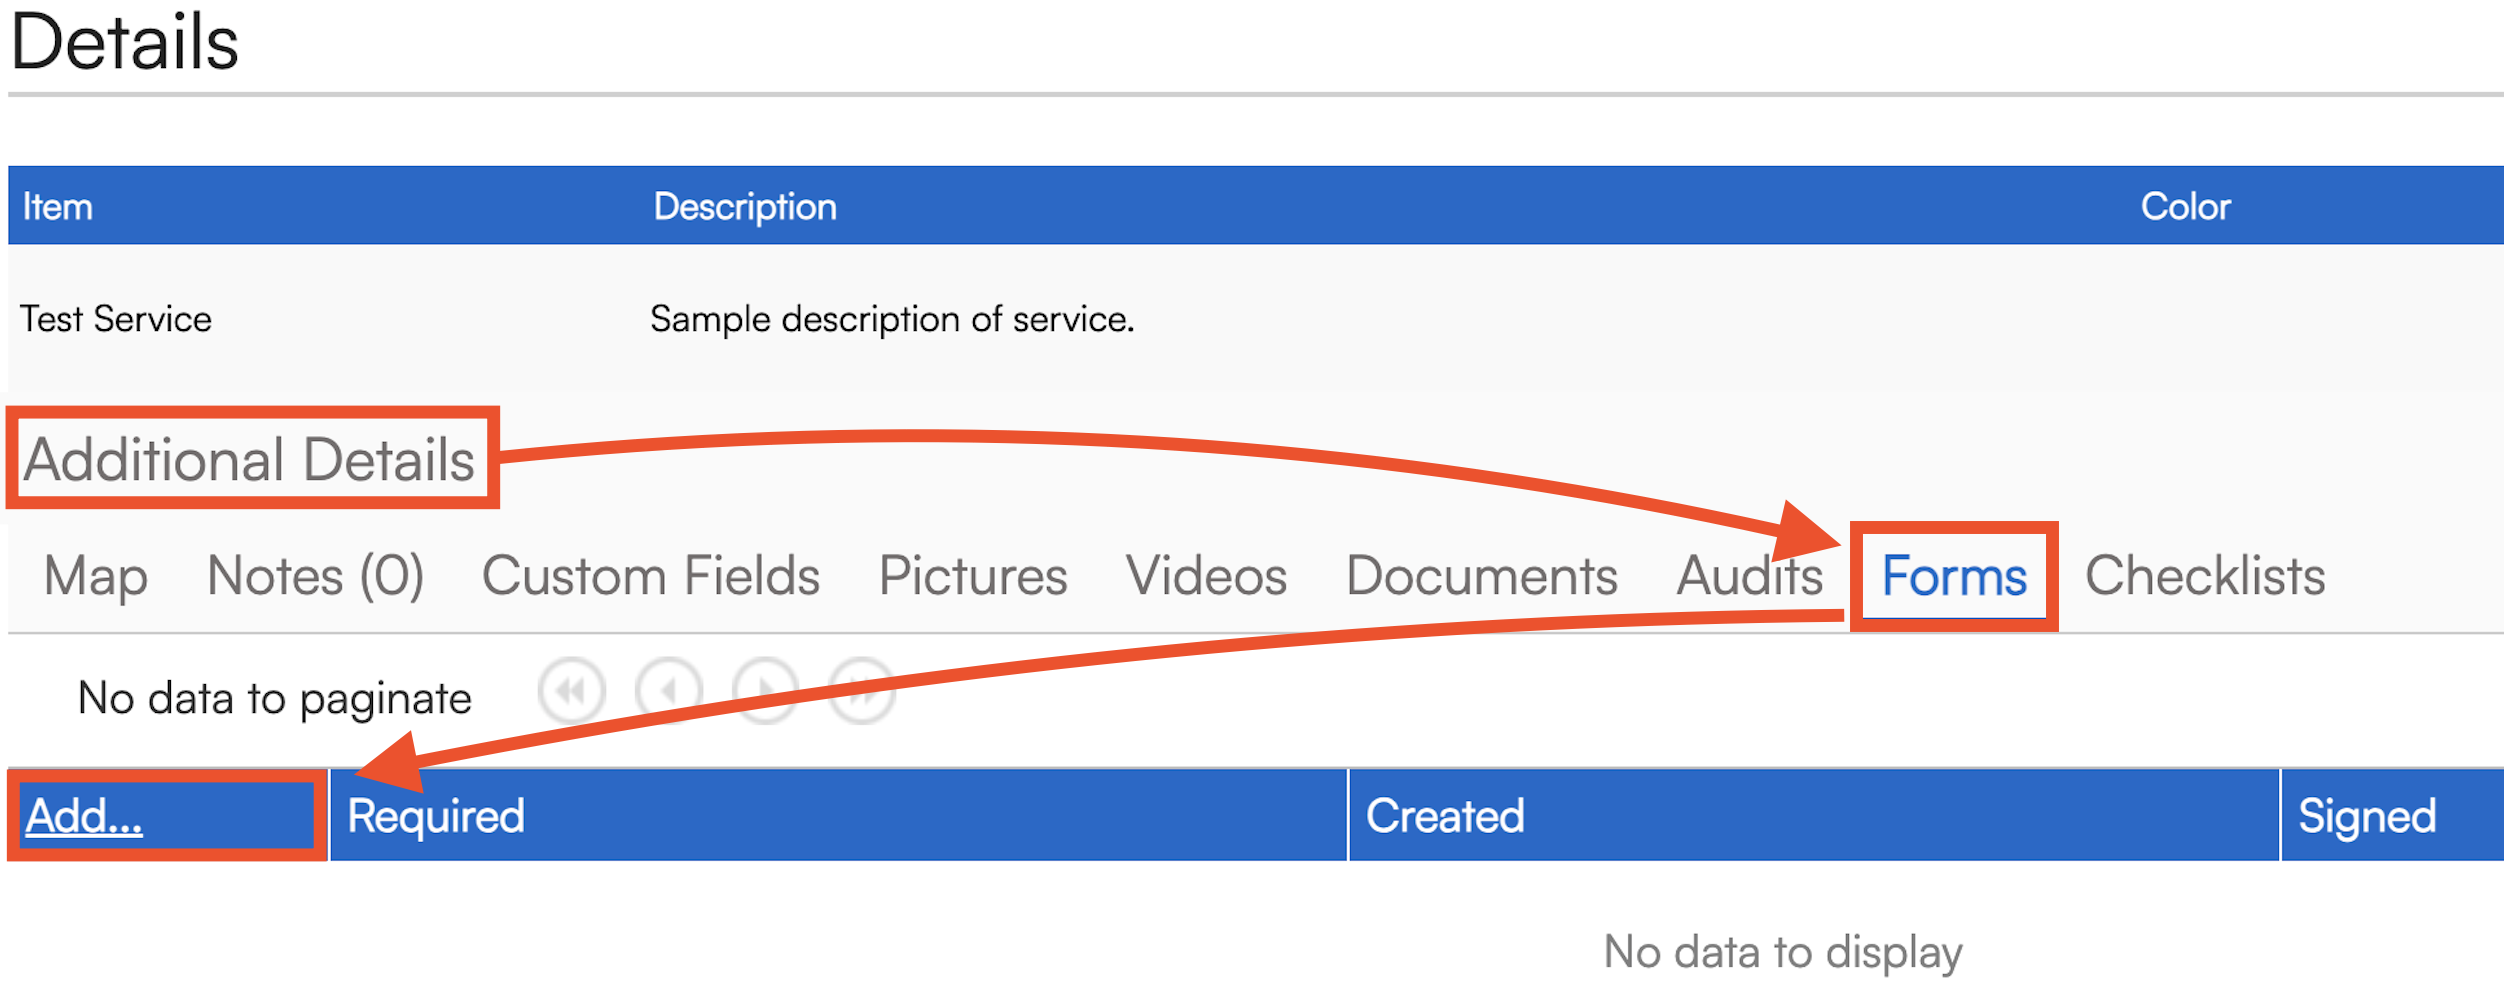
The same fields will be available as the Proposal form. Choose from any of your Appointment-kind forms using the dropdown menu. Check the Required box if it must be completed during the appointment. The Notes field is optional.

Forms will appear on the appointment for the Service Agent to review with the customer. The Finish button will not become available until all required forms are completed.