Overview
Invoices are the final bill within serviceminder. Depending on your workflow, they may be created automatically when a proposal is accepted or when an appointment is completed. Sometimes you may need to create a an invoice manually. This article will review that process, as well as all of the things you can do on an invoice details page.
This article will review:
Settings and Navigation
Invoice Settings can be found under Control Panel > Invoices.

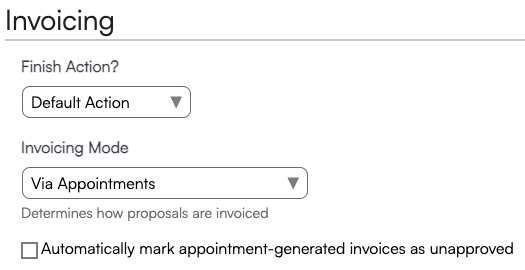
You can also configure when invoices are automatically generated by editing the invoicing settings on each service. Navigate to Control Panel > Services > Edit or Add —look for the Invoicing Mode.
Each service can be customized to trigger invoice creation at different phases of your workflow, depending on how your business operates. These options allow you to align invoicing behavior with your operational process
User permissions for invoicing are located in Control Panel > Users > Edit > Permissions tab. Ensure users have the appropriate invoice permissions.

Additional settings for invoice notifications can be found in Control Panel > Notifications, under both the Settings tab and Turn Notifications On/Off. These settings will control which automatic notifications are sent out to contacts (customers) and users (employees).
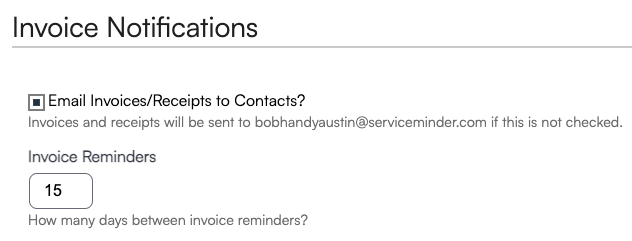
If the "Email Invoices/Receipts to Contacts?" box is not checked, invoices and receipts will be sent to your organization's email address and NOT to contacts. This checkbox allows you to get all of your settings configured how you like them before "going live" and emailing bills to customers.

You can turn Invoice notifications, as well as notifications for Invoice Receipts and Invoice Reminders, on/off for contacts and for users. User notifications will follow ownership logic - if you have that enabled in your organization. Learn more about that here.
Invoices push to QuickBooks Online (QBO) and automatically apply deposits from the associated proposal.
Until then, deposits remain in QBO’s “Undeposited Funds” account.
Creating an Invoice from a Proposal
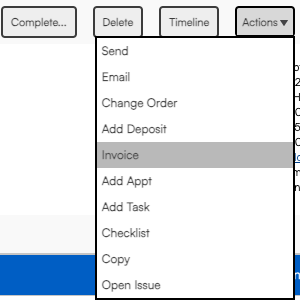
Users can manually create invoices from accepted proposals—either before or after the project is completed.
To do this:
-
Click Invoice in the Actions menu at the top of the page.
-
Select the amount of the proposal you want to charge on this invoice.

-
- Full – Invoices the entire proposal amount.
- Select Lines – Choose specific lines to invoice (ideal for long-term or phased projects). Already-invoiced lines will appear grayed out.
- Percentage – Invoice a percentage of the total proposal amount.
- Amount – Invoice a specific dollar amount.
The Invoice option will only appear if the user has the Invoice permission granted and the proposal has a balance greater than $0.
3. Click Create Invoice to proceed.
4. Review the line items and delivery method. Optionally apply a payment.
5. Save vs. Save and Send
-
-
Save – Stores the invoice without notifying the contact.
-
Save and Send – Sends an email with a link to the invoice.
-
Recording Payments
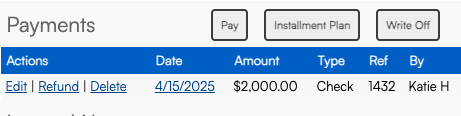
In the Payments section of an invoice, you'll find:
-
Pay – Record a payment (credit card, ACH, check, cash, or any other custom Payment Method you've configured).
-
Installment Plan – Attach an available Payment Plan (if configured).
-
Write Off – Mark the balance as uncollectible.
You can also move a payment to another open invoice for the same customer by following these steps:
- Click on the hyperlinked date of the payment to open up the payment details.
- Click the Move button.
- Select the invoice number from the Move To dropdown menu. Then click Move.
Merging Invoices
Open the invoice you want to merge into and click Merge.
- Select from the list open invoices for the same customer. These invoices will be merged into the invoice you are working from. Merged invoices will be voided but remain in the audit trail of the final invoice.
- Determine if you want to combine line items with the same part, unit price, and taxable status. This feature is most useful if you are merging two invoices with similar or identical line items and you want to streamline the appearance of the invoice.
- Click Merge.

Settings Button
This button takes you to a menu where you can configure invoice-specific settings:
-
Invoice Date – Change the invoice date.
-
Email – Select one or two email addresses to send the invoice.
-
Customer Note – Message visible to the customer.
-
Job Number – Internal reference.
-
Invoice Terms – Choose which terms and conditions apply.
-
Total Payment Limit – Restricts how much a customer can pay. (Useful for progress payments.)
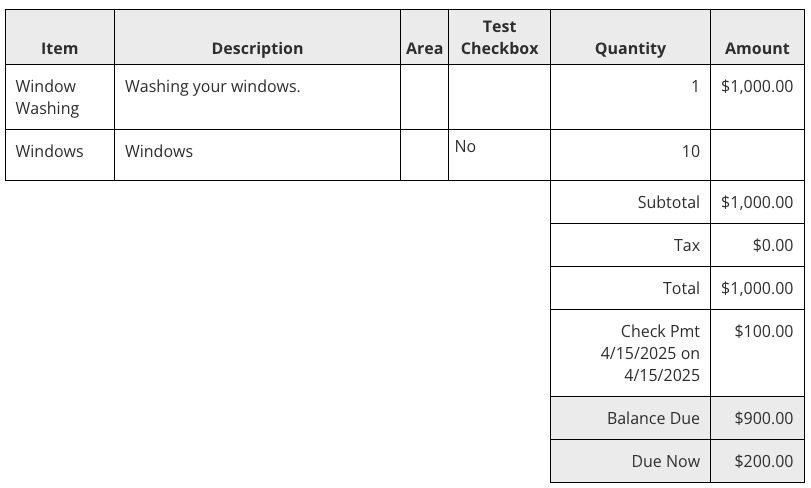
Use the Total Payment Limit field to cap how much a customer can pay toward the invoice at one time. You can enter a specific dollar amount or a percentage of the Max Amount, which is the total value of the invoice. Note that this does not factor in any prior payments—it’s based solely on the invoice total.
Example: If the invoice total is $1,000 and the customer has already paid $100 (10%), and you want to collect another $200, you would enter 30% or $300 as the payment limit (because $100 + $200 = $300).
- Max Amount: $1,000
- Payments made so far: $100
- Due Now (the amount you want to collect now): $200
- Total Payment Limit: $300

Checkbox Options:
-
Approved – Mark invoice as ready to send.
-
Voided – Mark the invoice void (can also use the top toolbar).
-
Downloaded – Marked when downloaded.
-
Summarize Pricing – Rolls up pricing to service or option lines.
-
Exclude from End of Month Report – Exclude from royalty reports (if permission granted).
Other Invoice Options
- Split: Divide the invoice into multiple ones.
- Finance Charge: Add a finance fee for late payments or installment plans.
- Print: Click Print on the invoice to open a printer-friendly version in a new tab. You can then save or email the PDF.
- Copy: Creates an exact copy of the invoice for that customer. You'll be taken to the invoice editor to adjust line items before saving or sending.
Credit Hold
Credit Hold is an internal flag to identify overdue customers. When enabled:
-
A red banner shows on their contact profile.
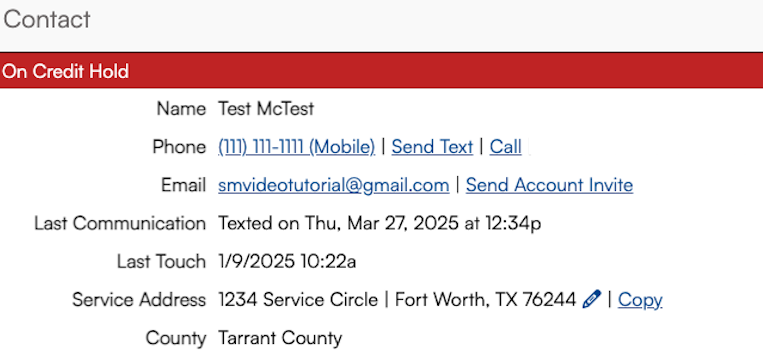
-
Their name appears in red on the calendar (desktop only).
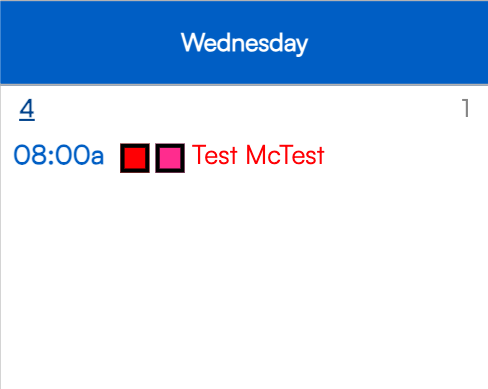
- If using Route Optimization or Fleet Routing, the name will also appear in red there to remind you not to include that customer in the route.
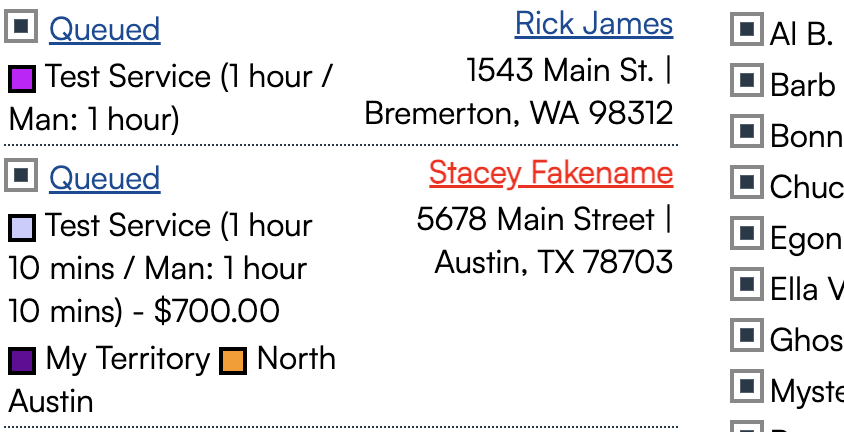
-
Credit Hold does not block scheduling—it’s just a visual indicator.

This identifier can be manually enabled by a serviceminder user when creating or editing a contact.

FAQs
Q: Why don’t I see the Invoice button on a proposal?
A: Make sure the following are true:
-
The proposal has a balance greater than $0.
-
The user has Invoice permissions.
-
Q: How do I transfer a payment from one invoice to another?
A: Follow these steps:
-
Go to the invoice with the payment.
-
Click the payment date (top-right corner).
-
Click Move and select the correct invoice.
-
Void the original invoice.
-
Q: Why can't I merge certain invoices?
A: Only open invoices without payments can be merged. If there's a payment, move it first, then merge.
Q: How can we prevent a duplicate invoice when finishing an appointment?
A: Remove the pricing from the appointment:
-
Click the blue pen icon on the service or part line.
-
Remove any base/unit pricing.
-
Q: Why can’t I edit line items on a completed appointment?
A: If the invoice is merged and/or paid, the appointment is locked and cannot be edited.
Q: Why is the appointment completed, but there is no invoice or payment?
A: Go to the Audit tab on the appointment. If it was auto-closed (not manually finished), it won’t generate an invoice. Click Invoice on the appointment to create one manually.
Review the Finish Action and Invoicing Mode for the associated service. If the appointment was valued at $0 and the Finish Action for the service is Default Action, then an invoice will not automatically generate. If you want $0 invoices to automatically generate when an appointment is finished, set Finish Action: Generate Invoice and Invoicing Mode: Via Appointments.
Q: Why aren’t invoices appearing in the Unapproved Invoice tab?
A: Only invoices created automatically from Finished Appointments with the Service setting “Mark Invoices Unapproved” will appear. Check for this setting under Control Panel > Services > Edit > Invoicing.
Q: Why isn’t the customer receiving invoice receipts?
A: Go to Control Panel > Notifications. Ensure Invoice Receipt is turned on and the Email Invoices/Receipts to Contacts? box is checked.
