Overview
In ServiceMinder, a Grid refers to an interactive, spreadsheet-style list used to display and manage large sets of data. Grids allow you to quickly sort, filter, and take action on items—such as launching an email campaign, tagging contacts, or generating proposals.
You'll find Grids across many parts of the system, but these are the most frequently used:
- Contacts Grid
- Appointments Grid
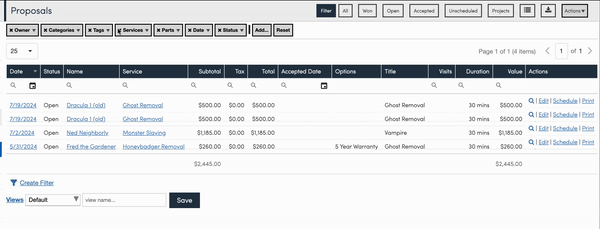
- Proposals Grid
- Invoices Grid
All grids share a set of core features for customization, filtering, and bulk actions. This guide walks through the common tools available across all grids, so you can work more efficiently.
This article will review:
Settings and Navigation
The primary grids can be accessed directly from the Navigation menu.

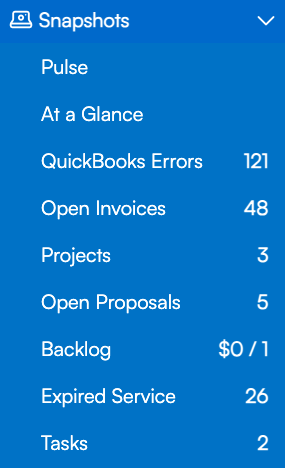
The Snapshots section has quick access links to many pre-filtered grids for common purposes, like reviewing open proposals or backlog appointments.
Universal Grid Features
Column Customization
Drag & Drop: Rearrange columns by dragging headers to your preferred position.
Resize Columns: Hover between columns and drag left or right to adjust width.
Fix (freeze) Columns: Right-click on a column header to “Fix” it to the left or right side of the grid—ideal for keeping key info visible while scrolling.

Column Sorting
Click any column header to sort:
First click = ascending order
Second click = descending order
Right click = choose sort order
A small arrow in the column header shows the sort direction.

Filtering Options
Search Bar: Any column that has a magnifying glass icon below the header has search capabilities. Start typing in the search field to filter results quickly.
Magnifying Glass: Click directly on the magnifying glass to open advanced filtering (options vary by column).
Calendar Icon: Filter the Date column by a specific date range by clicking on the calendar icon.

- Filter Builder: Click the Filter button at the top of the page to build a custom combination of filters.
- To add more terms, click Add and choose from the dropdown list of terms. Click the X on the term to remove it from the set.

Each filter condition is combined using AND logic, meaning all conditions must be true. However, within a checkbox list (like Tags or Services), multiple selections use ‘any of’ or ‘none of’ logic—returning results that match at least one (or exclude all) of the selected options
- Custom Filters: Some grids offer a Create Filter link at the bottom for compound filtering:
- Use the + icon to add multiple conditions
- Define comparisons like equal, greater than, between, etc.
- Enter specific values and apply

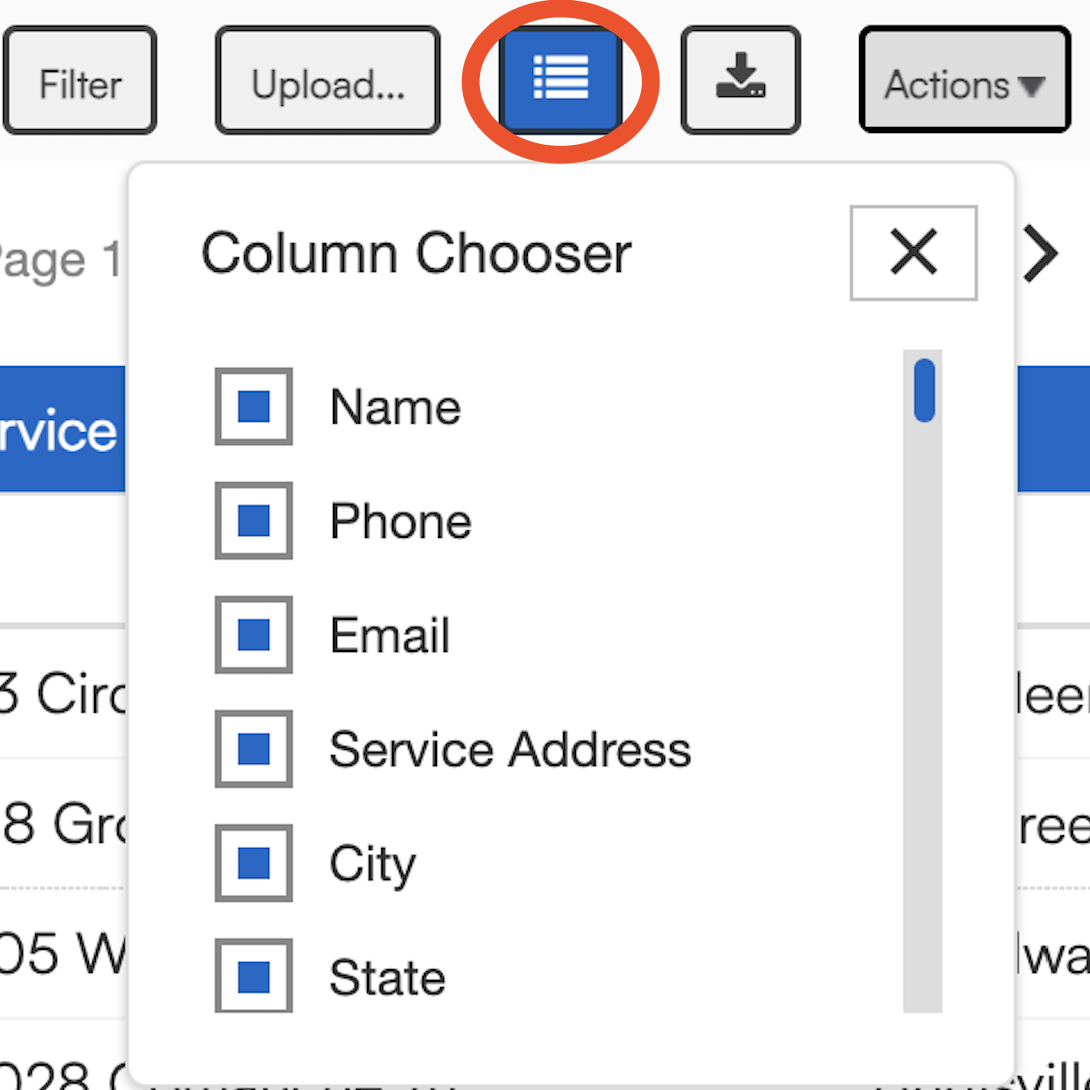
- Column Chooser: Use the Column Chooser in the top-right corner to select which fields to display. Customize your layout to show only the most relevant data. These settings are remembered per user.

The appointments grid is designed to optimize performance by limiting the number of custom fields displayed and loaded at one time. When a user visits the appointments grid for the first time, up to 50 custom fields are displayed by default. This limit ensures faster load times and smoother navigation.
- To view additional custom fields, use the Column Chooser to select the fields you’d like to add.
- Once a you customize your grid view, your selections are saved and will be remembered for future visits.
- If you’d like to return to the default view, select Views > Reset. This resets your grid to the initial 50-field layout.
Actions Menu
The Actions menu—found at the top right of every grid—gives you powerful tools to apply changes or perform bulk operations on the records currently displayed. The options available will vary depending on which grid you’re viewing.
Actions Available in All Grids
These core actions are consistent across Contacts, Appointments, Proposals, and Invoices:
- Add Tag – Apply a tag to all items in the filtered grid.
- Remove Tag – Remove a tag from all filtered items.
- Launch Email Campaign – Start a targeted Email Campaign using the current filtered results.
Contacts Grid Actions
- Update – Make bulk updates to selected contact records.
- Schedule – Create appointments for all filtered contacts.
- Print – Print the contact list or details.
- Generate Proposals – Create proposals for all selected contacts.
Appointments Grid Actions
- Bump – Reschedule appointments to a later date.
- Cancel – Cancel multiple appointments at once.
- Count Appointments – Get a quick total of how many appointments are in view.
- Recalculate Durations – Re-run appointment durations if service details have changed.
- Mark Complete – Mark all selected appointments as completed.
Proposals Grid Actions
- Update – Edit proposal details in bulk.
- Renew Season – Reissue seasonal proposals.
- Generate – Generate proposal documents.
- Accept – Manually mark proposals as accepted.
- Print – Print all proposals currently in view.
- Duplicate Proposals – Copy selected proposals to reuse for the same or other contacts.
- Mark Completed – Indicate that the proposals have been fulfilled or finalized.
Invoice Grid Actions
- Apply Finance Charge -
- Approve
- Count Invoices - Counts the number of invoices currently displayed on the grid. Helpful for validating if you are making bulk-adjustments to the correct number of records.
- Close Invoices - This automation will close the selected invoices.
- Void Invoices: This automation will void the selected invoices.
- Publish Invoices to QuickBooks - Publishes invoices to QuickBooks along with payments on said invoices. Useful if the invoices have not yet been published/out of sync. Safe command to use
- Apply Open Credit Memos -
Saving Views
Create a shortcut for a grid that you’ve organized with specific views. All grids have the option to save "Custom Views" and also to update, by user, the "Default View" so a user or a team can easily access the grid information they find most important.

You can create and save as many Views as you would like for Proposals, Contacts, Invoices, and Appointments. Wherever you see the blue Views link, you can use this functionality.
You can even Save these views in your Navigation panel for easy access. Click on Views and check the Shortcut box.

Then it will appear in your Shortcuts section.
FAQs
Is there a way to display contacts in alphabetical order?
If you click on the column header "Name", it should sort by alphabetical order by ascending. If you click it a second time it will sort by descending. The arrow indicator on the right side of the column will indicate which setting it is on (up or down arrow).
Do custom fields show?
Yes, if you have custom fields attached to your Contacts, they can be displayed on this grid to assist with adding tags, emailing, or sending proposals.
When I use filters, will this page remember my settings if I exit the Contacts Grid?
For the top filtering options, yes, the Contacts Grid will remember your prior settings. However, there is a better way of making sure that your specific views are saved. If you look at the bottom of the screen under the Contacts Grid, you will see options for “Views”. You can specifically organize everything the way you want it and save it as a “View”. You can also edit the “Default” view.
