One of the hardest challenges with staying engaged as a brand on social media is generating content. Rallio simplifies social media management by integrating with serviceminder, allowing you to quickly upload and share photos of your work from Lightbox for easy editing and promotion, making it faster and easier to showcase your business.
Don't Have Rallio? Visit rallio.com and request a demo!
Setting Up Your Integration
- Create a Rallio account.
- Email support@rallio.com and tell them you want to add serviceminder.com to your account
- Once confirmed, go to Control Panel > Integrations > Marketing and enter your Rallio login email.

Note: Only one Rallio email can be connected per serviceminder account.
Using Rallio
Photos don't automatically sync to Rallio, so you don't have to worry about photos uploading that shouldn't. You select which photos you'd like to upload.
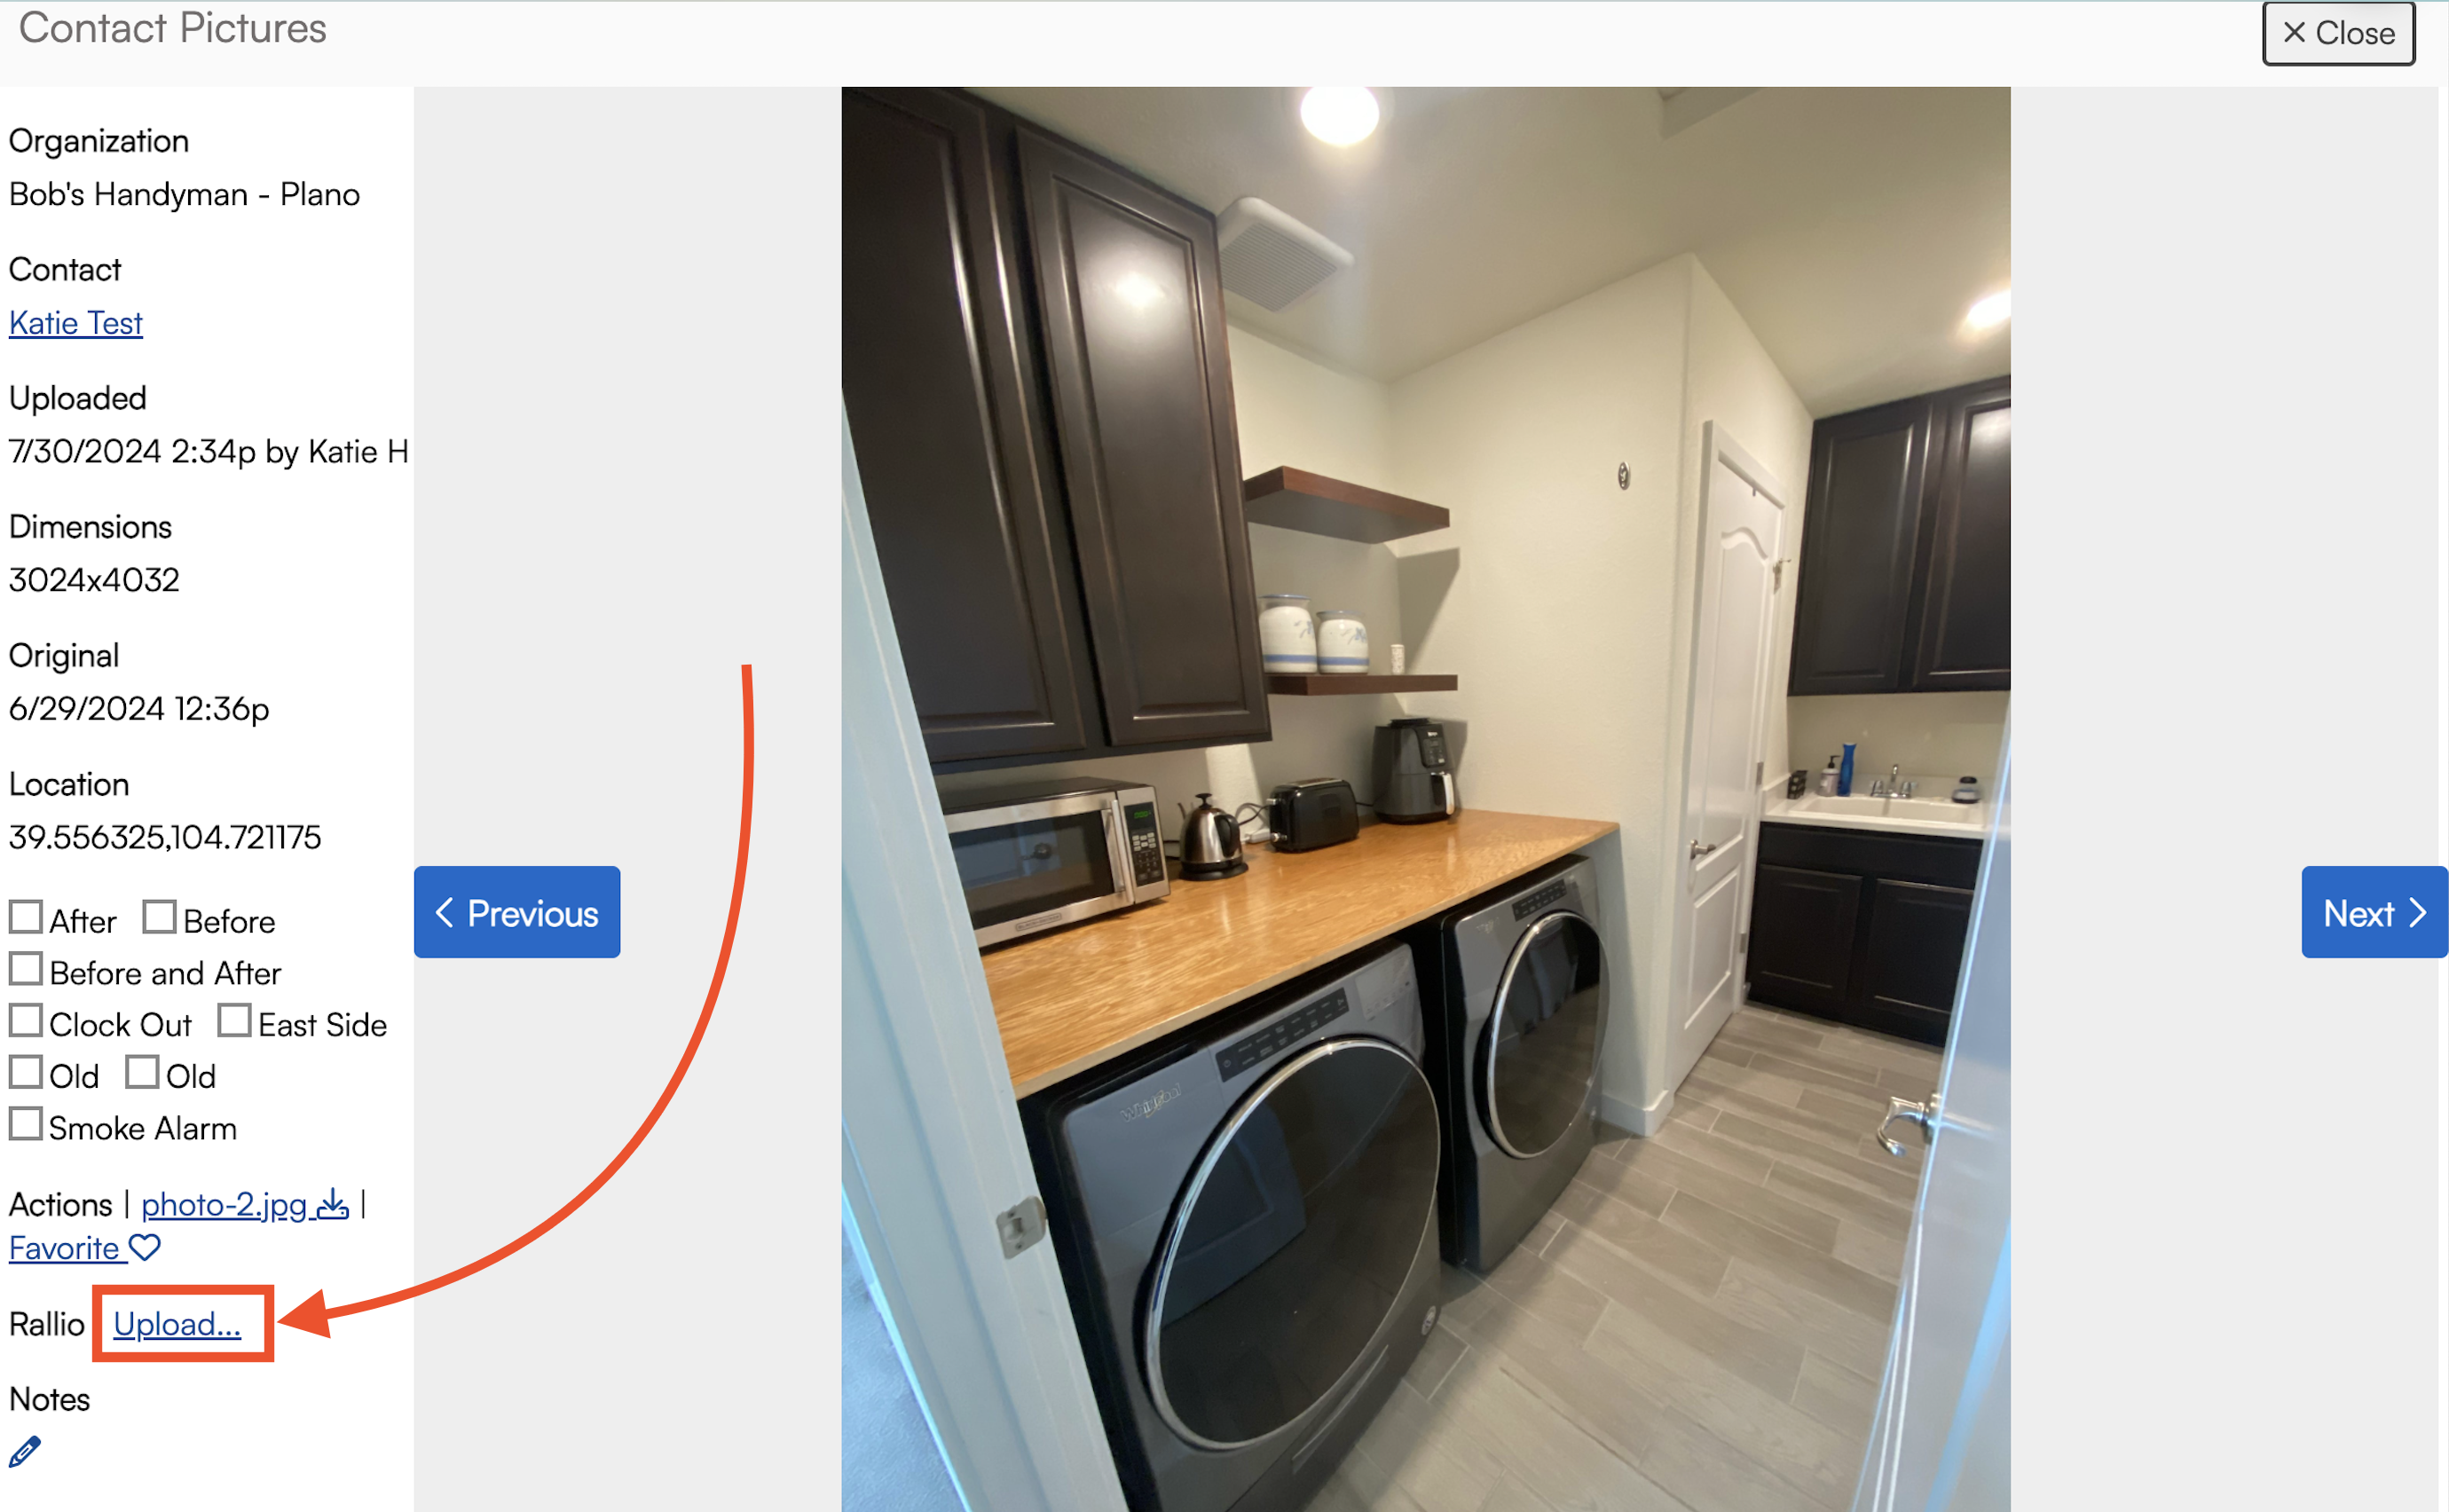
After uploading photos to serviceminder (i.e., to a contact, proposal, appointment, etc), click the magnifying glass to view the details. Here you will find the option to upload them to Rallio.
Revv
If your brand also uses Revv, the survey feature of Rallio, then there is an easy way to integrate that into your serviceminder account and have specific triggers for when the survey sends.
At the brand-level, you need to turn on and connect Rallio. There are additional fields for Revv that need to be filled out.
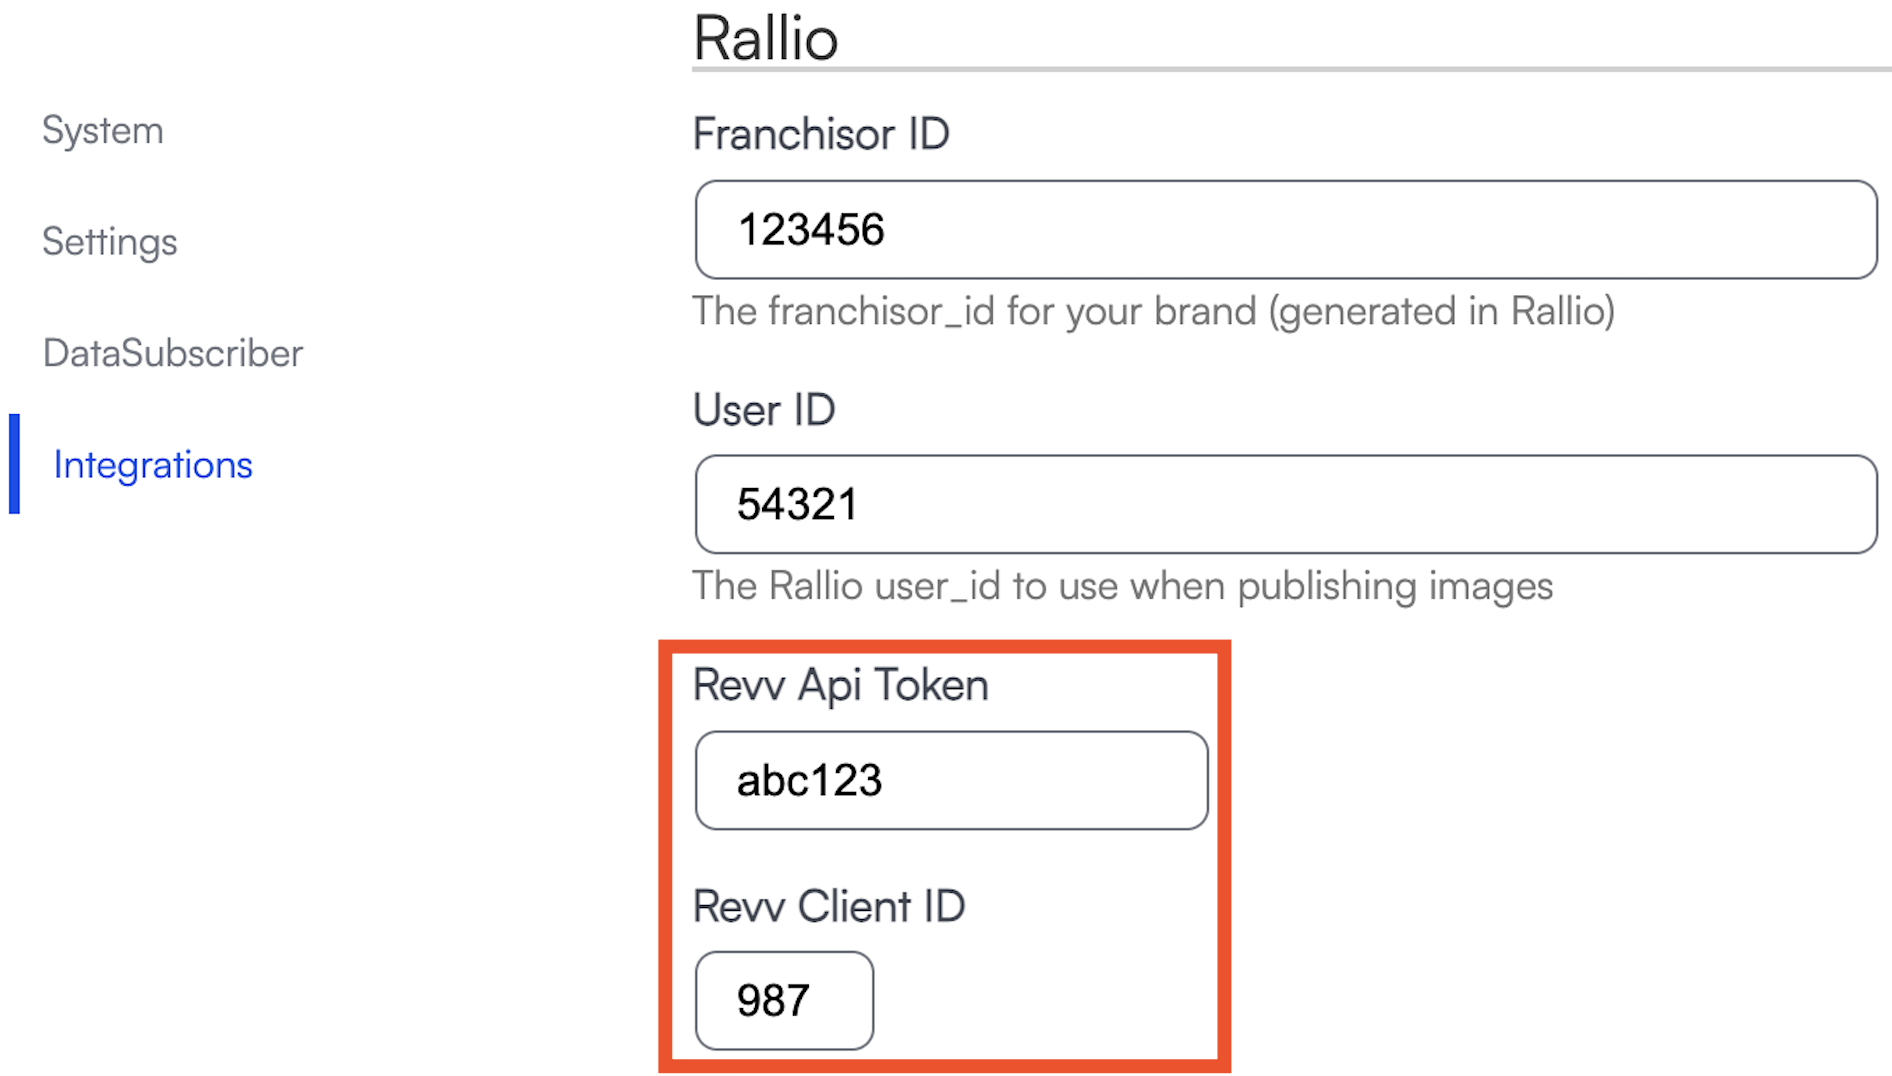
A brand administrator needs to go to Dashboard > Tools > Configuration > Integrations and fill out the Revv API Token and the Revv Client ID (both of which can be found in your Rallio account).
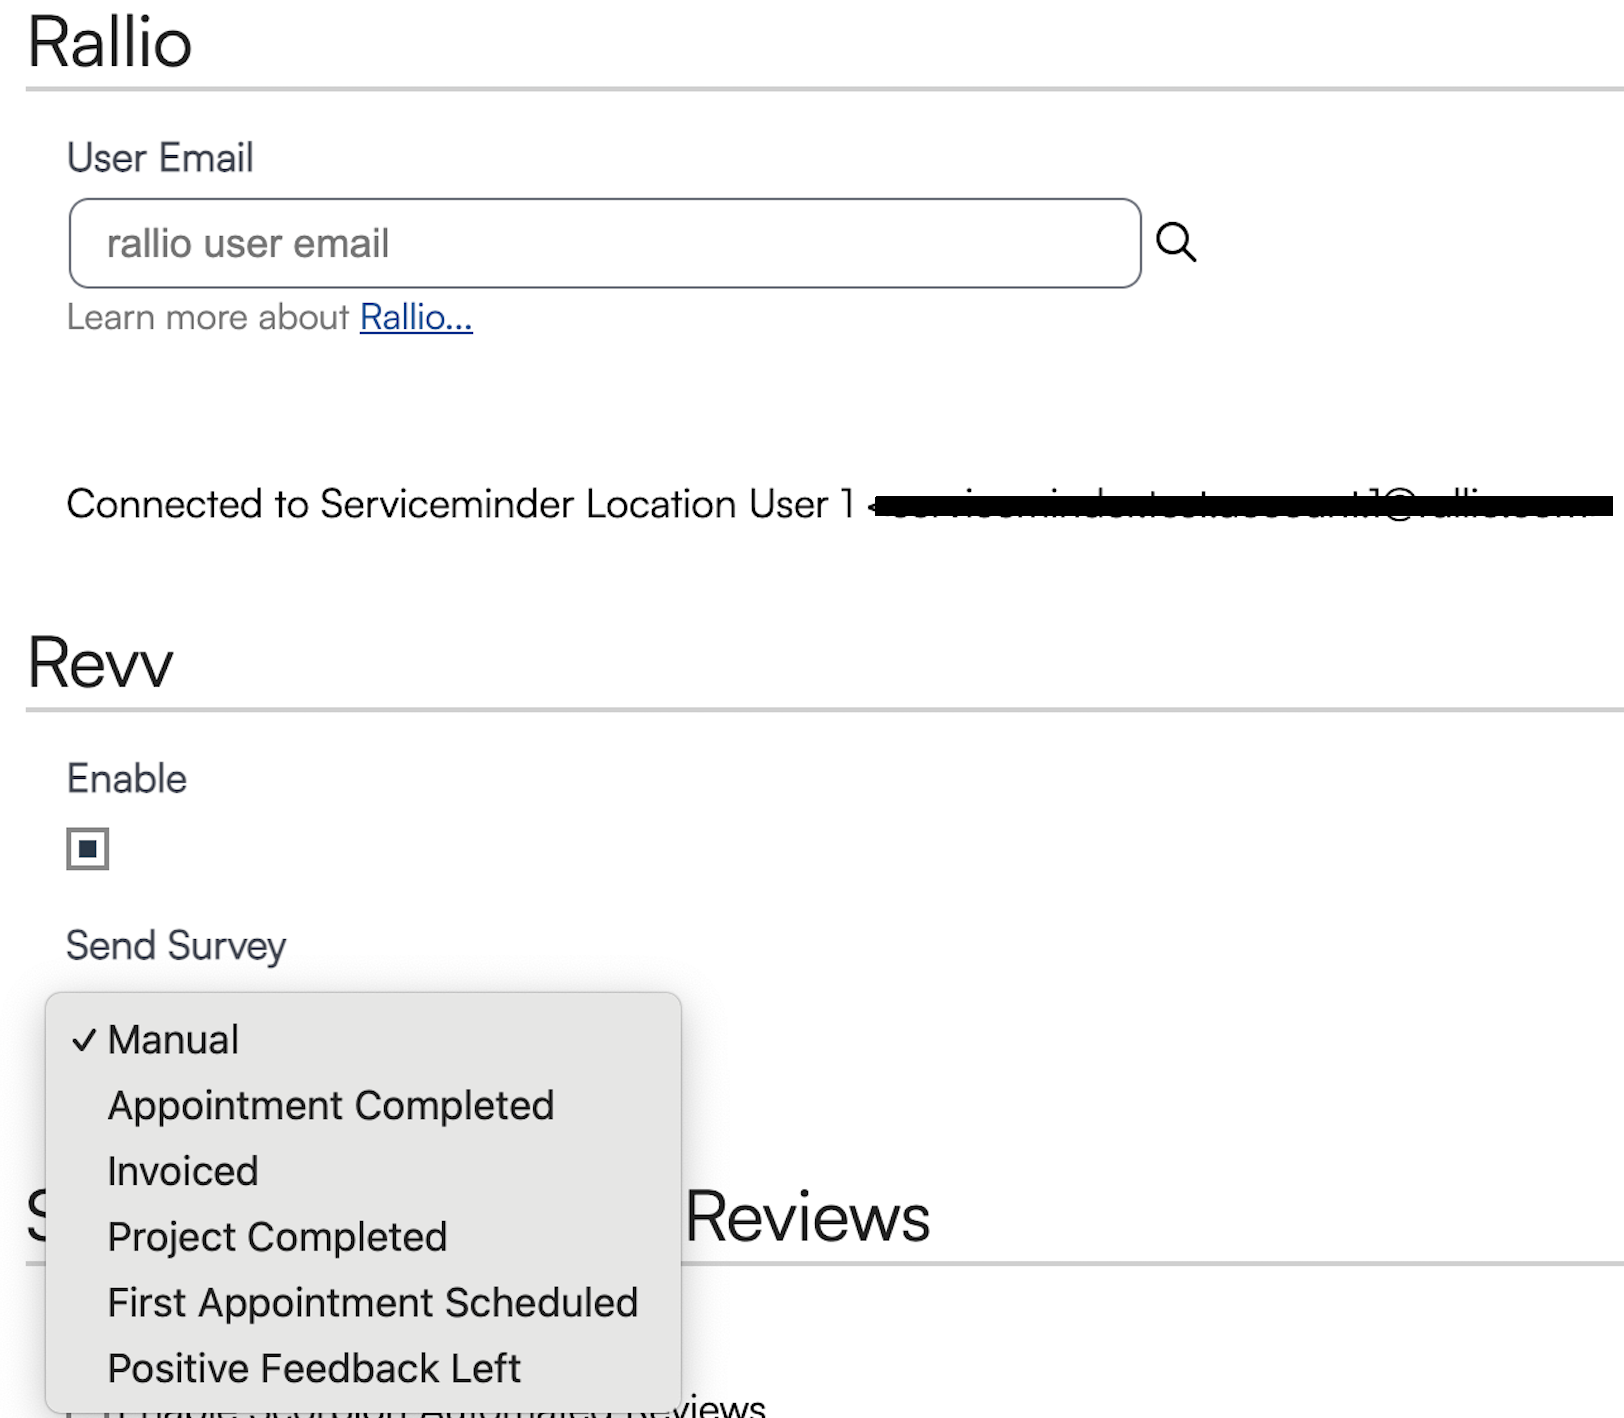
Then a brand administrator or the franchisee should then go to Control Panel > Integrations > Marketing and fill out the Rallio section (if not filled out already) then the Revv section (the Revv fields only appear if the brand has set up the Revv connection.).
- The Enabled checkbox will default to on. If you uncheck that box, this connection will be severed and surveys will no longer be connected to your SM org.
- You will need to choose between the Send Survey triggers provided to determine when the survey will be sent to the customer:
- Manual
- Appointment Completed
- Invoiced
- Project Completed
- First Appointment Scheduled
- Positive Feedback Left (requires the Feedback add-on)
After completing this step, we recommend running a test to be sure things are flowing as you expect.
