Overview
This article will review:
Settings and Navigation
When adding a new Contact, fields with a star (*) beside them indicates that those fields are required.
You may bulk-import Contacts from a .csv file (it must be this file format), or you can create Contacts one at a time.
This is an example of how most of the grids appear. If you're on a page that also supports adding new items, there will be an Add link in the first column. Clicking that link will take you to a page to create the new item.
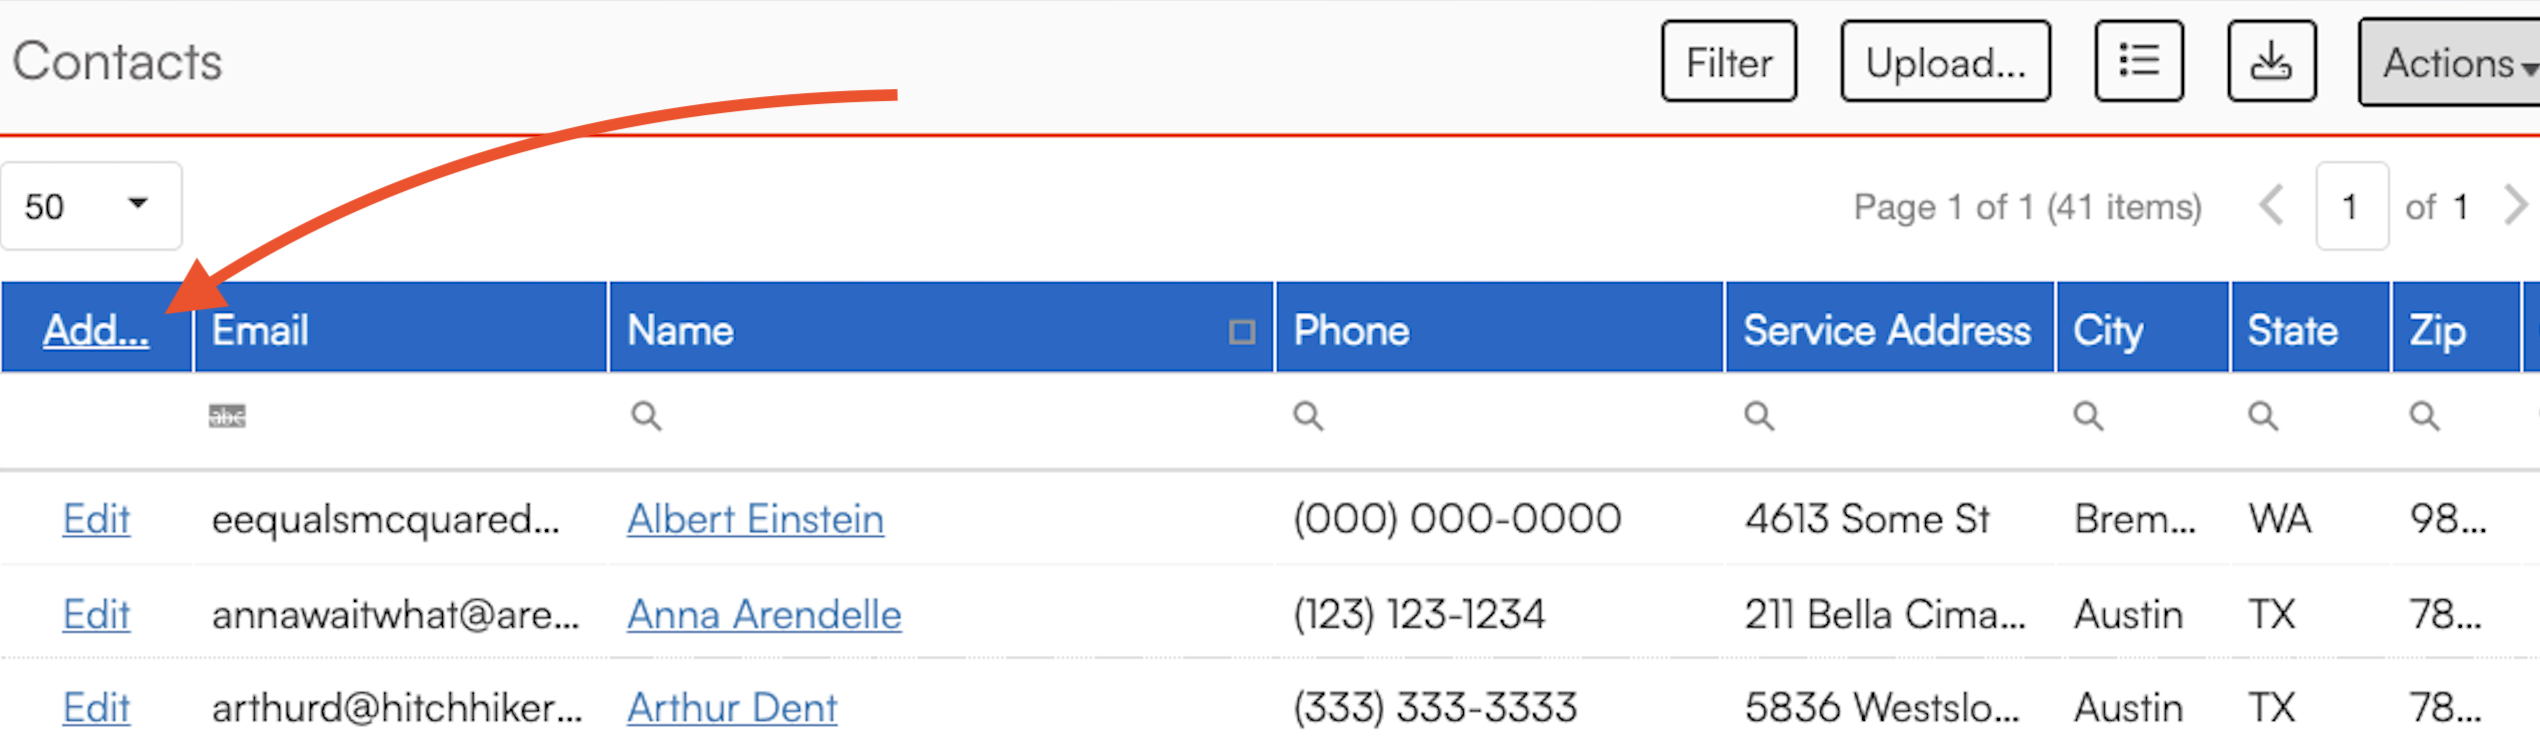
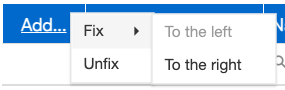
Note: Your Add column may be on the far right side of the screen. You can leave it there, or you can move it by right clicking the column header (where it says "Add") and choosing Fix > To the Left.
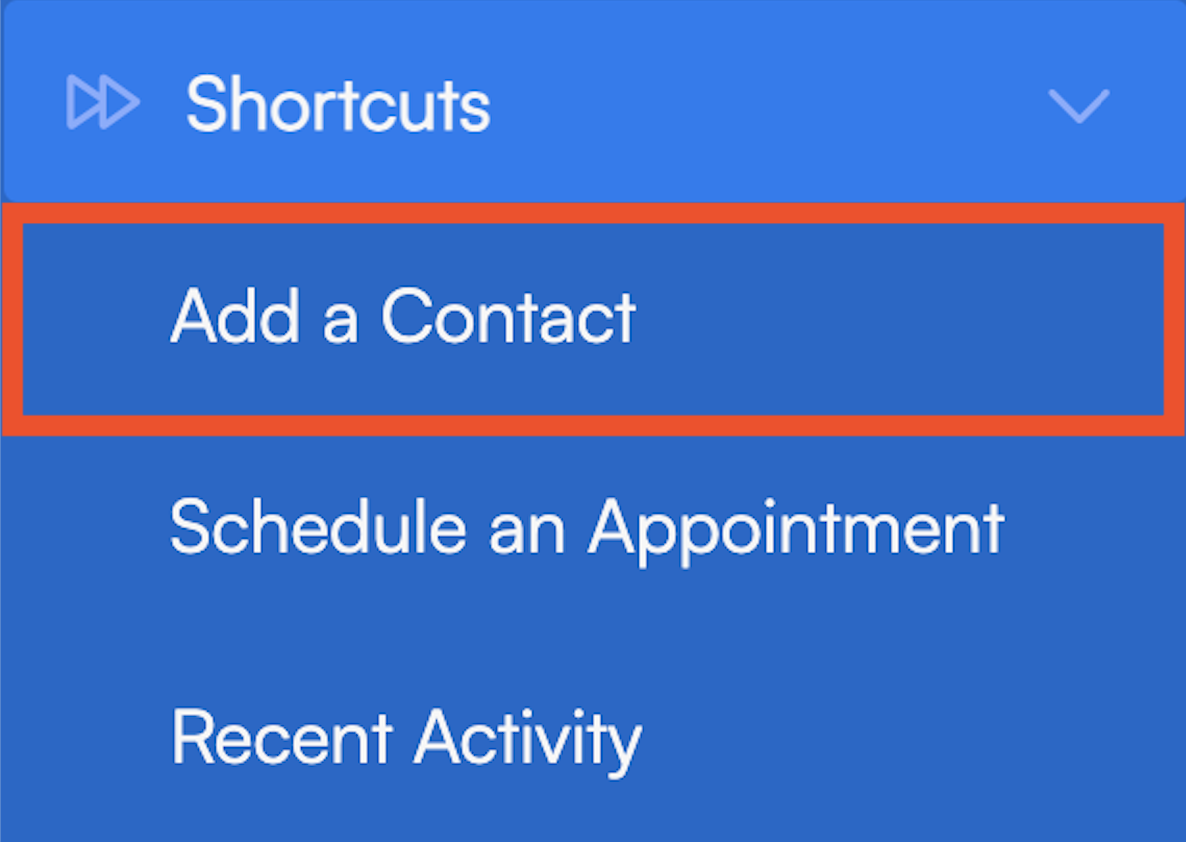
Add A Contact from the Shortcut
The Shortcuts section of the navigation menu has a quick link to add a contact from any page in serviceminder.
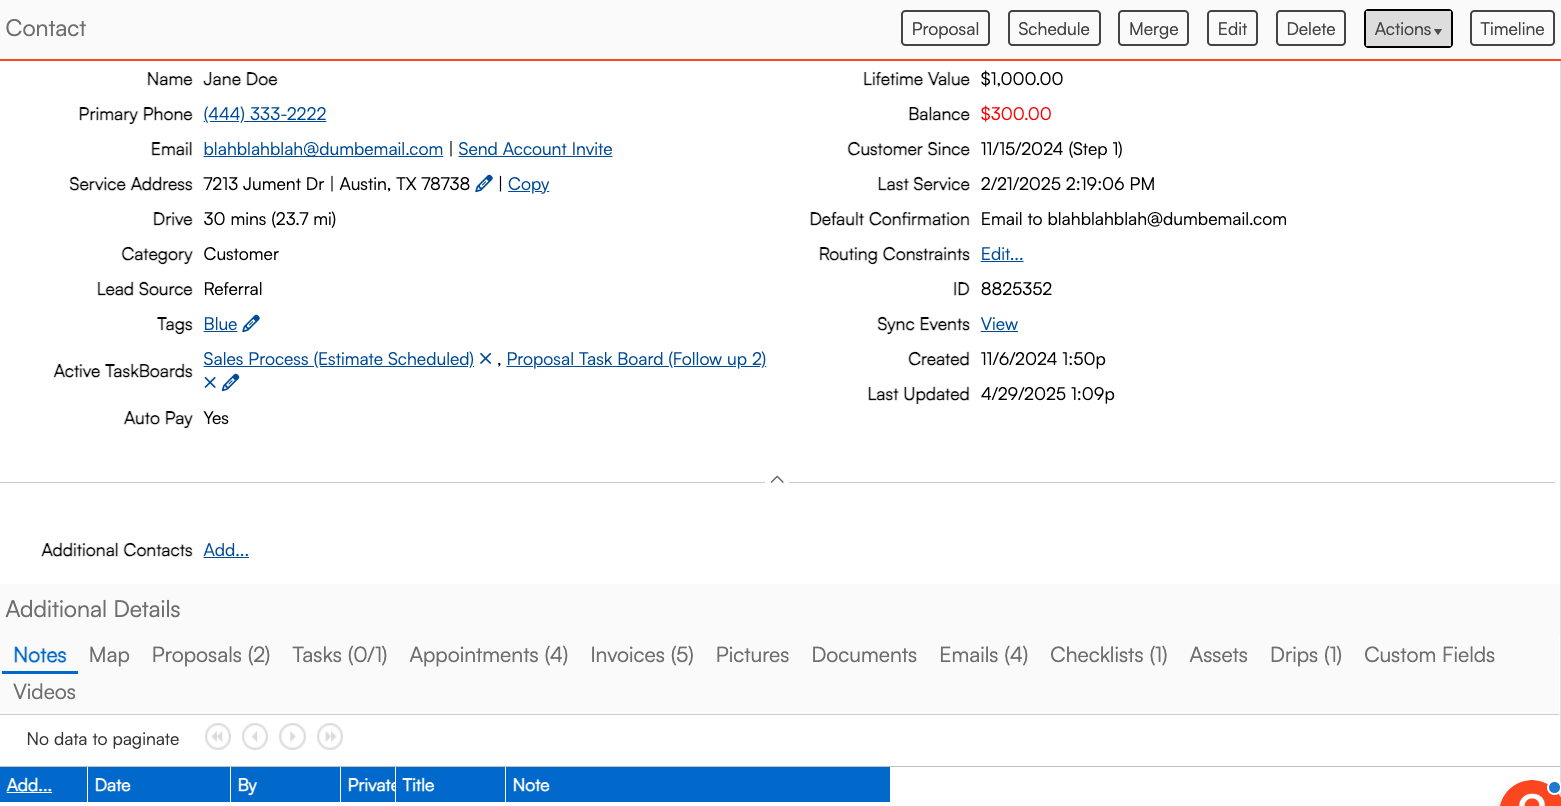
Contact Details
Much like the Contacts grid, the Contact Details page will give you an overview of all the contact's settings and information at a glance. Some settings won't show up because they aren't configured or turned on, so you may not see all of these fields (or there may be more than appear here).
When you first open a contact details page, some information will be minimized. To view the entire contact profile, click the down arrow to expand the page.

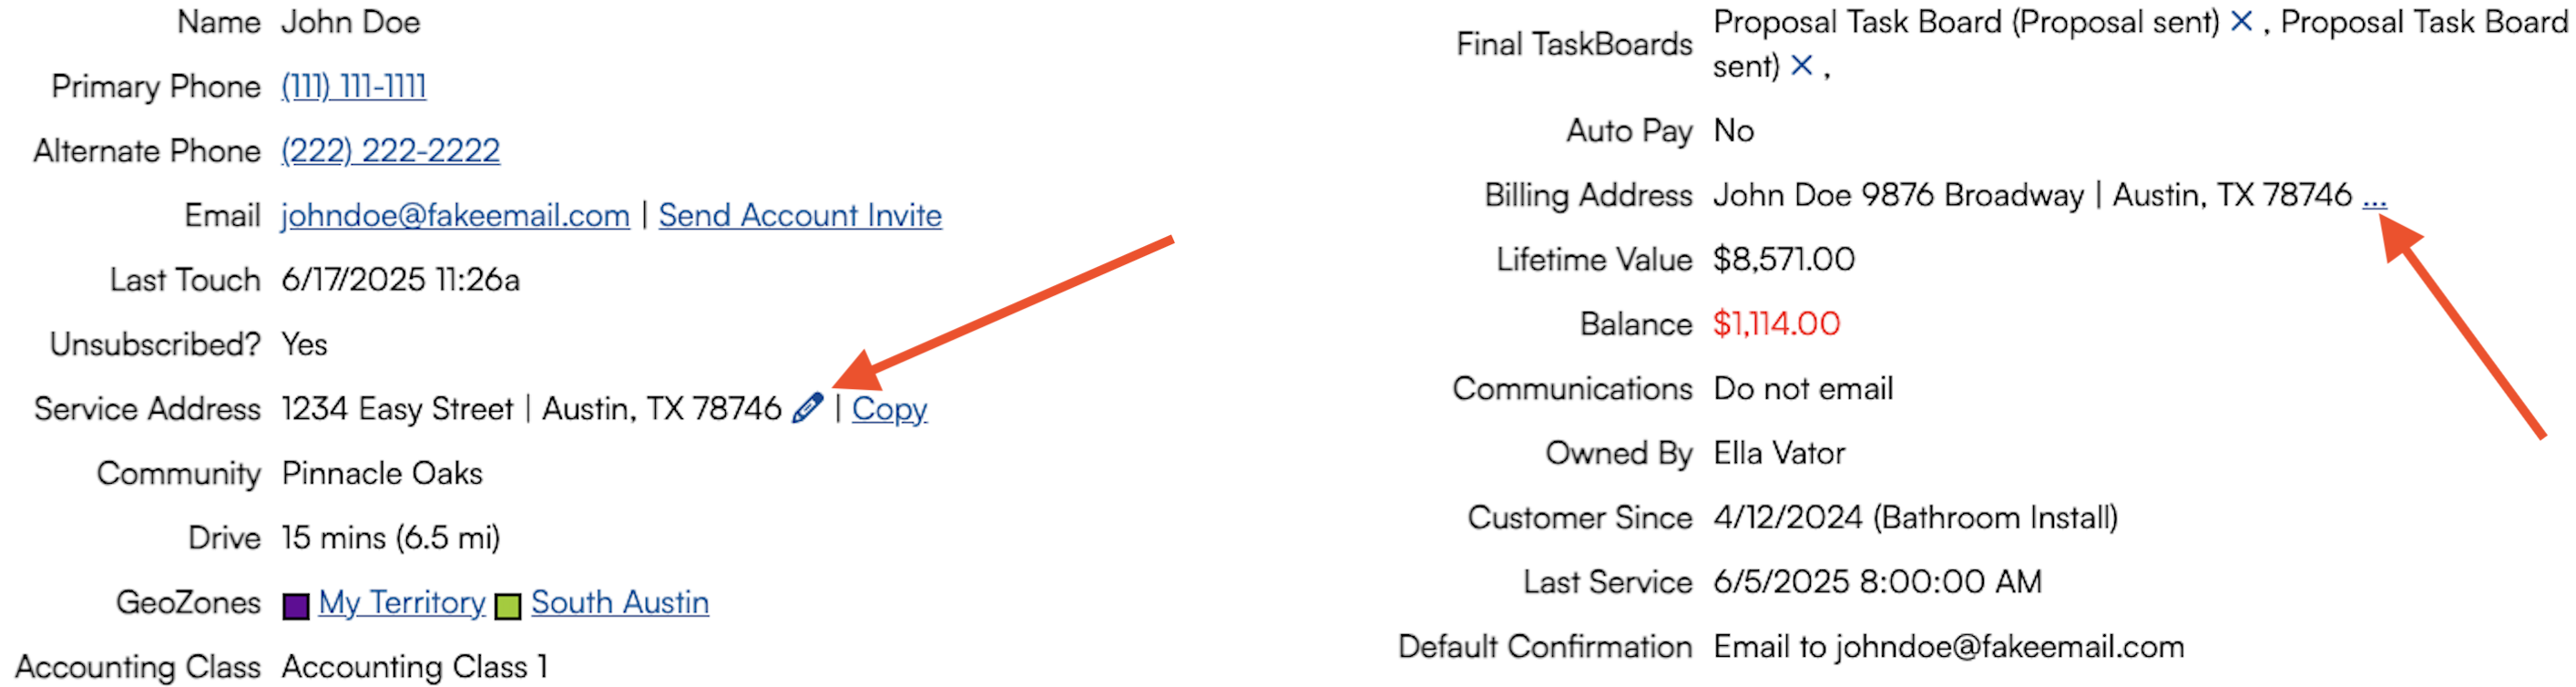
A blue pencil icon indicates you can make a quick edit to that field. A blue "X" indicates you can make a quick removal in that field.
Payment Info
- Balance - do they have any outstanding bills
- Pending payments (like upcoming installment payments) - do they have transactions set for the future
- Credit Hold - It’s an internal check box used to mark an account if the customer is overdue on invoices. It’s just a visual cue.
- Deposit
- Card on file - do they have a card on file; they must have a card on file to start auto pay
- Auto Pay on or off - do they have auto pay set up
- Consolidate Payments on or off
- Lifetime value - what is the total profits from this contact
- Accounting class - is their an accounting class mapped to that contact
Marketing/Sales Info
- Category - contact categories can be Customer, Opportunity/Prospect, Vendor/Partner, etc.
- Tags - you or the brand team can create tags such as canceled, DNC (do not contact), or marketing-based tags like "offer Spring 2024".
- Lead source (channel/campaign) - how did they hear about you; examples: Facebook ad, submitted a inquiry form request
- API Key (name of key if lead capture via an API method)
- Taskboards - if you use taskboards, it will tell you where they fall on your workflow
- Contact owner - do you have a User (employee) assigned as an owner to that lead; this is primarily used if you have more than one sales agents divided by territories
Communication Settings
- En routes
- Confirmations
- Email declined or not - the contact specifically refuse to give you or your call center agent an email
- Unsubscribed yes or no - they unsubscribed from marketing emails
- Do not mail - you do or do not want anyone to email this contact
- Additional contacts - for instance, do they have a spouse who's contact info you want to connect to this main Contact?
- Managed by - if you have a property manager that has many apartment complexes or office buildings, this creates a owning Contact that receives all the invoices but allows for multiple service addresses for your techs to go to the correct location (not the Property Owner billing address)
Contact Edits
- Created when - when was the Contact created/added to the SM system
- Last updated - when was the last time this Contact was updated in SM
- Last touch (the last manual communication made with the contact, can be via text or email (automated emails don't count,) as well as notes or tasks)
Appointments
- Last appointment/service
- Next/upcoming appointment
- Geozone
Extras
- Favorite picture
- Contact custom fields
- Flash message
Address
The serviceminder system pulls in the address from the information contained within the top search box and will automatically fill in the empty fields based on that address. If you are having issues with Dispatch, it is because they are not doing this step correctly.
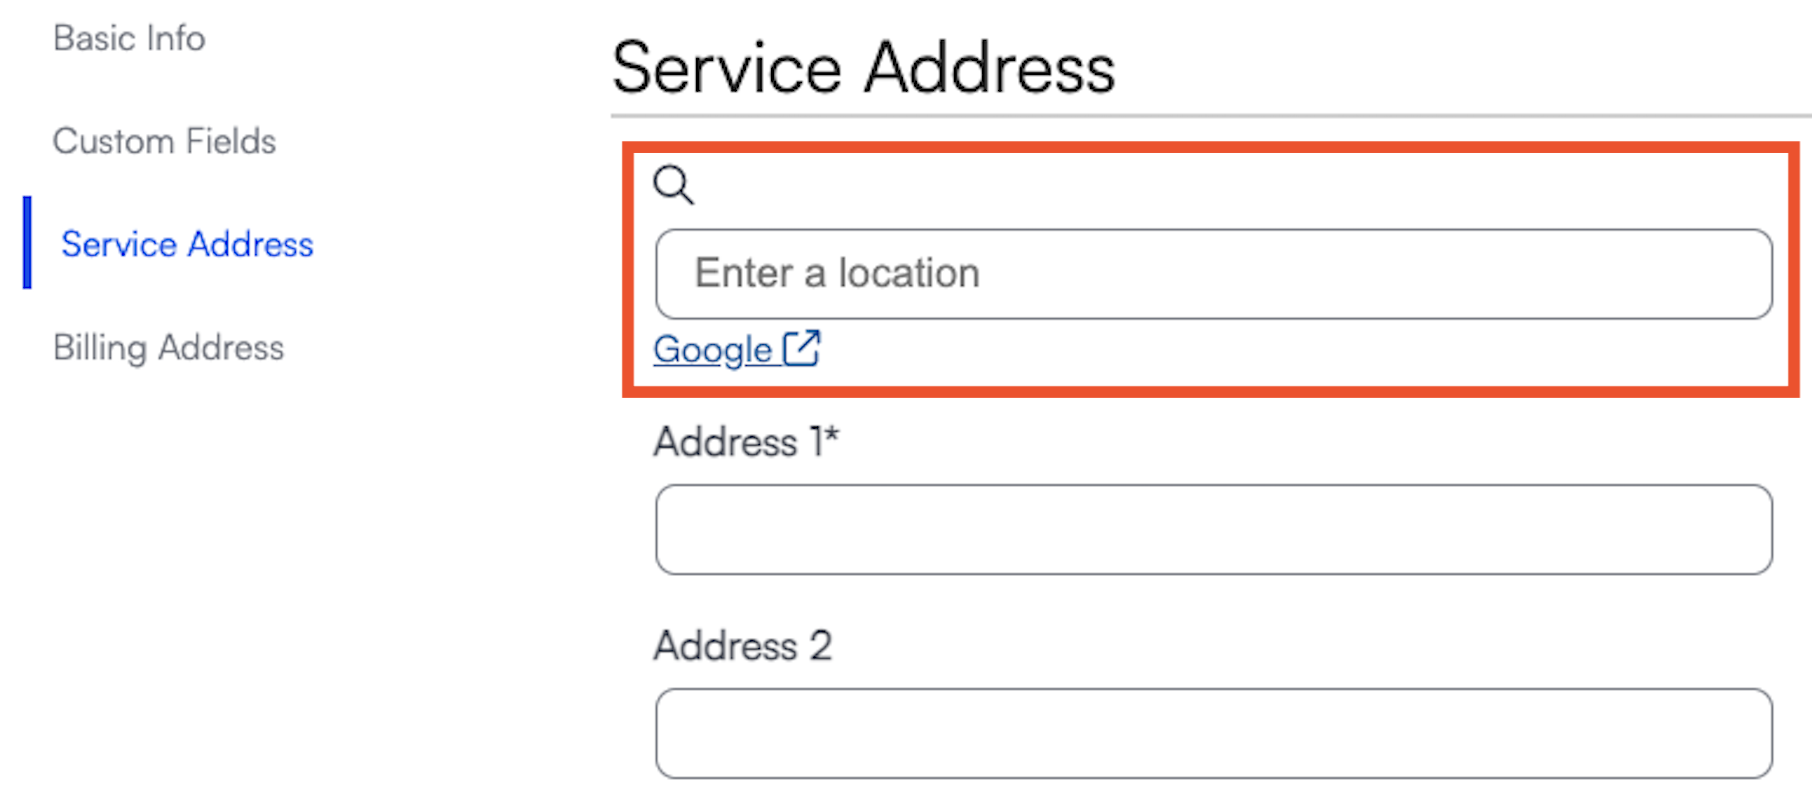
The most important aspect of inputting a Contact is their Service Address. Many settings and features rely on this being complete and accurate. You will want to use the search box to add the address, even if you already know it and can type it into the individual fields.
Diagnosing Address Issues
Problems
You will know you are having issues if an address seems to be:
- failing to populate
- failing to appear on the map
- including extra or missing characters
Solution
If you experience these issues, then use the pencil icon next to the Service Address or the ellipsis next to the Billing Address to open the address edit tool.
Don't Forget to Refresh!
Refreshing will attempt to geocode the address, to locate its correct position on the map. If your address failed to geocode, is missing, or is incorrect, ensure the invalid checkbox is unchecked below and make any necessary corrections. If the address can't be found, the address will remain invalid and will not show up on the Mapping view.
The Debug... button will display the results of the geocoding attempt.
Measuring Contact Location Area
On the contact screen, the Maps tab under additional details can be used to measure anything exterior at the contact's location.
If your business is an outside service (mowing, concrete, landscaping, lighting, pest control, roofing, fencing, etc.,) wouldn't it be great to see, ahead of time, what square footage/acreage/linear feet the project may entail.
By clicking the Measure blue link at the bottom left corner of the map, the user can creat one or multiple shapes on the map, which will give acreage/square footage/linear feet of that shape.
A user can edit these "shapes" on the map - to add or subtract from the total area.
Watch the short training video here!
Contact Notes
This is an area on the Contact Details page that allows you to put information about the appointment or the location, or even about the Contact themselves. You can make the information private, so only the owner of the Contact can see the actual message. Others will only be able to see that a note exists. The Contact never sees this information.
Go to Control Panel > User > Edit their user. Go to Permissions tab at the top of the page and you will see a list of options to "Grant" or "Deny". You will want to grant them access for Contacts:Notes. This allows the User to see general notes.
There is a second layer of notes that you can grant or deny access to. These are private notes, usually franchisees reserve this permission just for themselves or the office admin. If your notes are marked as Private then you need to grant the User permission next on the list, Contacts:Notes:View:Private.
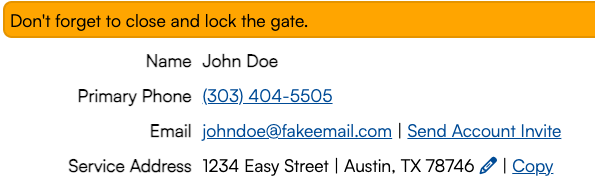
Flash Message
A Flash Message is an orange banner message that can be created at a contact, appointment or invoice level on a customer record. It's purpose is to display a really important message regarding a contact or for a specific appointment. It is an internal display only, to SM users and service agents.
Contact Referrals
When you use the {contact.refer_url} shortcode in serviceminder and send it to a contact, it generates a unique referral link for each contact.

When someone clicks this referral link and submits the information of the person they are referring, the new lead is automatically created in your organization and attributed to the original referring contact.
- The new lead created via the referral link is added to your ServiceMinder account as a new contact (lead).
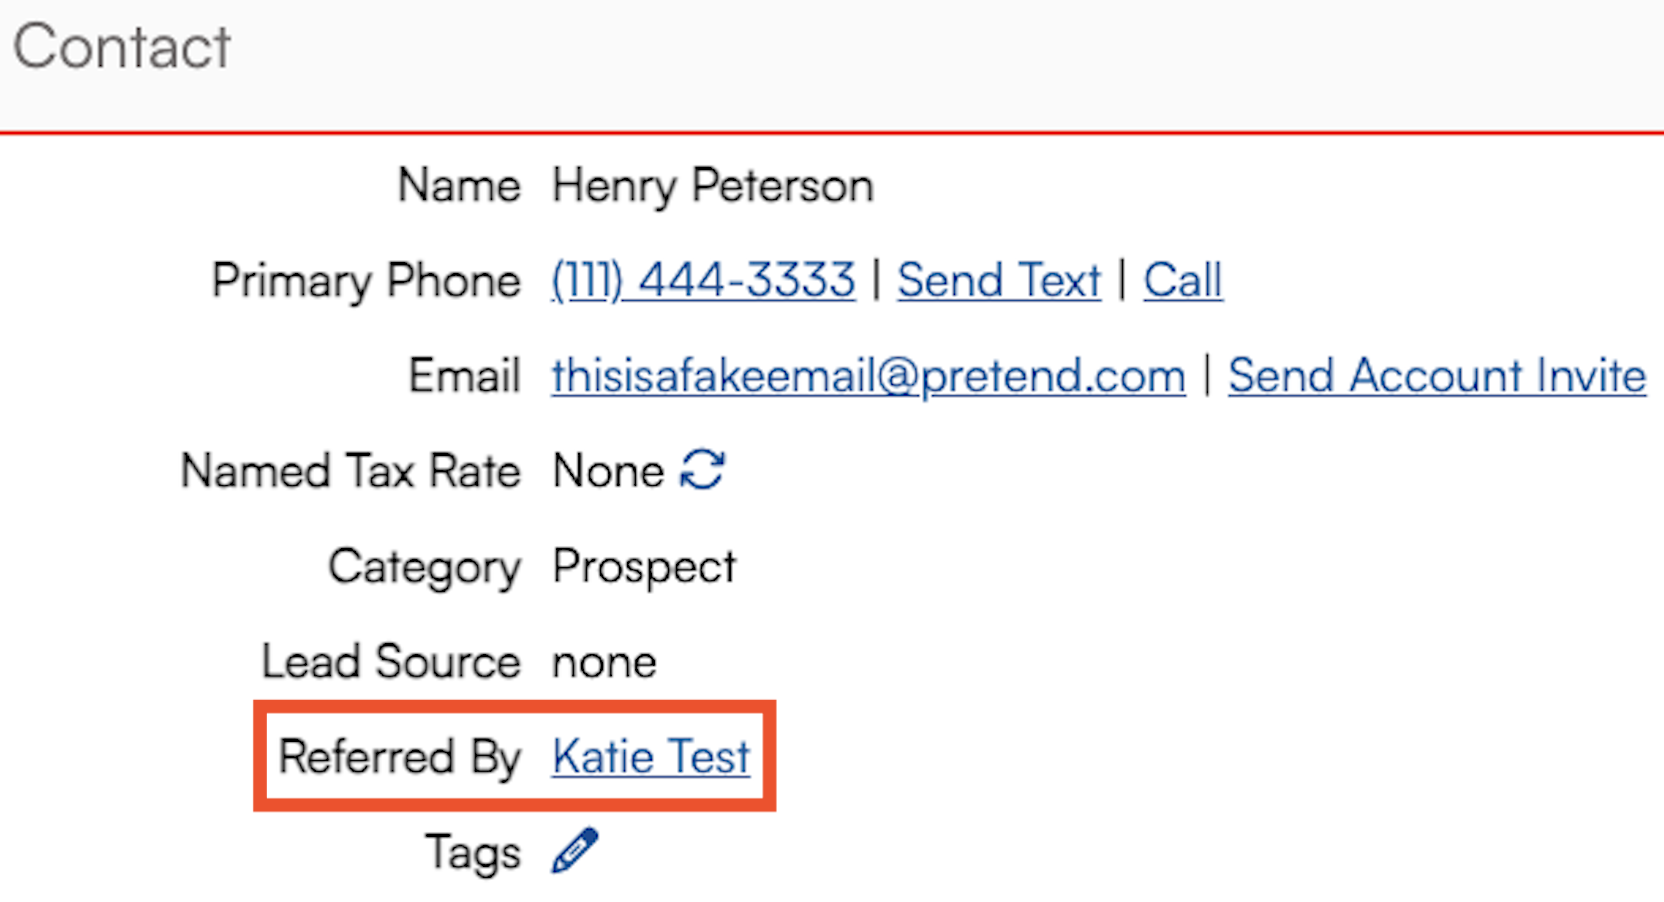
- The system records the referring contact (the original customer/client) as the source of the referral on the new contact's details page.
- This allows you to track which of your existing contacts are generating referrals and new leads.
FAQs
If I want to add a note under client’s profile, will leaving the “Private” unchecked give the client visibility to that note? Or does “private” mean only client owner can see the note?
Any notes in the contact card cannot be seen by the Contact. Private means that only the contact owner can see the note.
I made a note and other employees can see it. Is this a user setting?
Yes, you need to go to Control Panel> Users> Edit User> Permissions. Scroll down to the section that says Contacts:Notes.
There are two categories they need to mark as either Grant or Deny.
Is there a way to have the property address included in the automated texts & emails for our clients?
Yes! We have a list of shortcodes that will automatically pull that information into a text/email template. The shortcode you would most likely want to use is .
You can edit the body of texts/emails in two places in the Control Panel > Automated Emails (or) Ad Hoc Emails.
Is there a way to get it so that pictures taken at the appt level can be saved to the customers profile?
The pictures taken in the app before/after the appointment are saved to the customer's profile in the "pictures" tab.

Troubleshooting
En Route isn't working for this Contact.
Check the address on the Contact Details page. If it is red, the address cannot be located, which means it isn't geocoded correctly in the serviceminder system. It stops the en route from being sent manually since it won't calculate drive time.
If an address doesn't automatically geocode, you can manually fix it by using the pencil next to the address on the Contact Details page. That will let you manually drag and drop the pin on the map or you can copy/paste lattitude and longitude from Google to get a valid address.
Thought, that doesn't guarantee accurate drive time calculation if ithe system thinks it can't find how to drive to the pin. So the agent can get to the location and pin the location accurately so that this problem is fixed for next time.
