Overview
In addition to tracking a user's regular appointment schedule, one can also create a record of company holidays, vacation time, personal appointments, staff meetings, or any impromptu departure from their regular schedules.
You have two options available to block off time so that new appointments can't be scheduled during that time.
- Holidays are at the organization level and affect all service agents within the organization
- Time Blocks are for setting aside time for specific service agents only
This article will review:
Video Tutorial
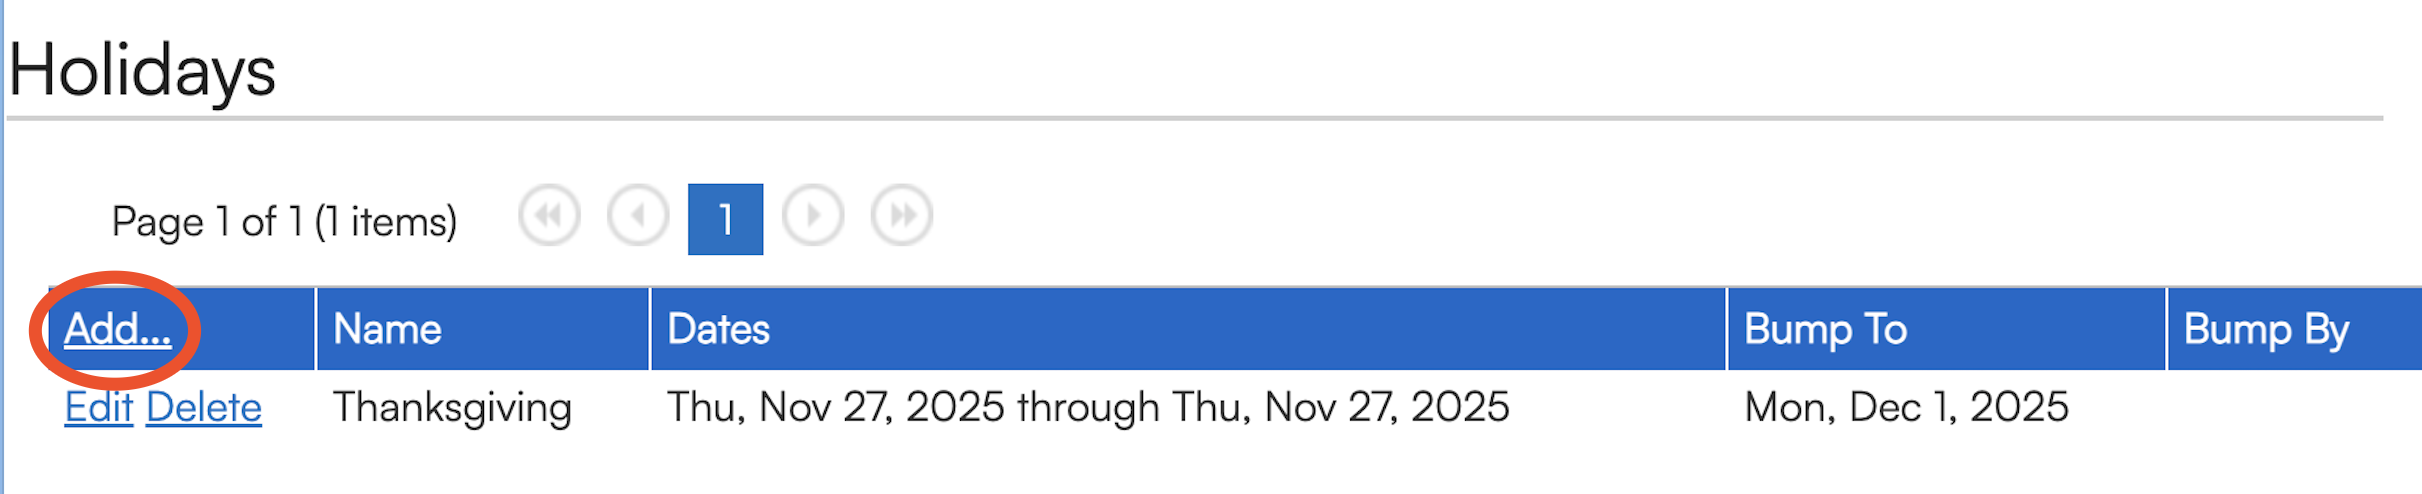
Adding Organization Holidays
To add new company holidays, use the following steps:
- Go to Control Panel.
- Click on Scheduling.
- Scroll down to the section labeled Holidays.
- Click on Add and fill out the dialog. You can block out a specific day or a range of days. The Name value does not have to be unique and will display on the Month and Week calendar views.
Hit Save to confirm.
Adding a Service Agent Time Block
Time Block entries are only available for service agents. Time blocks specify times and dates that the agent will be unavailable for scheduling.
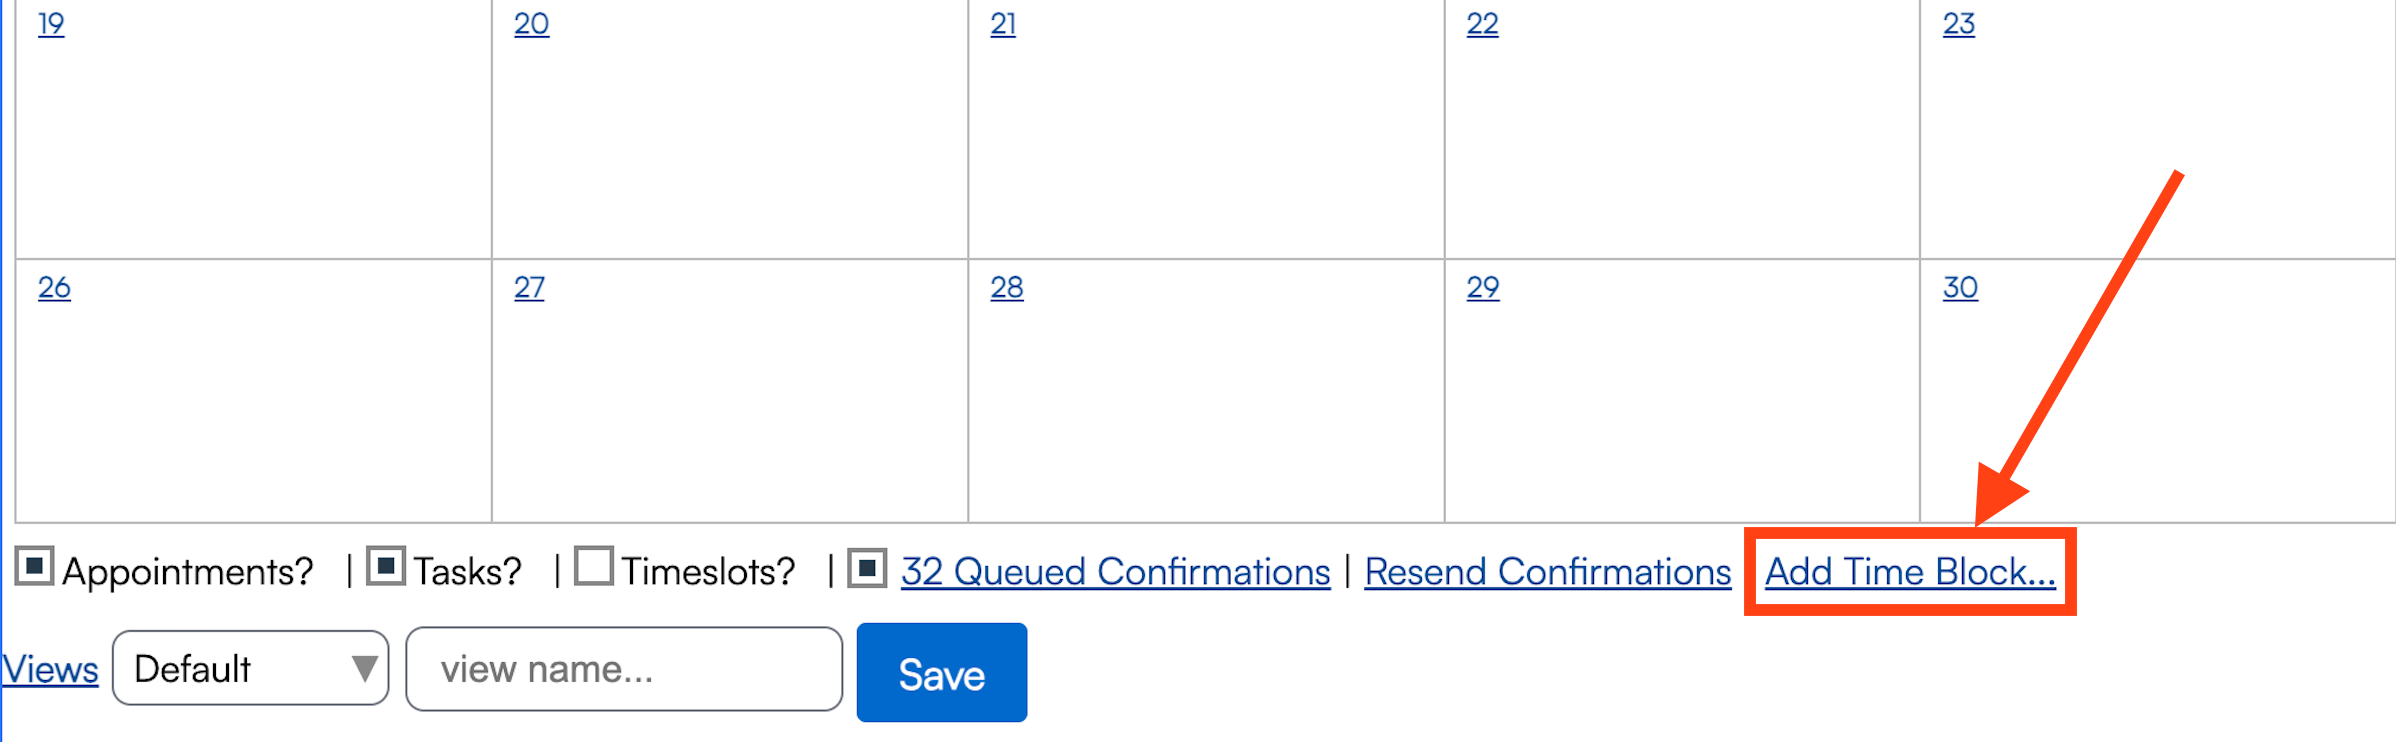
You can input a reason to describe the nature of the absence. You also can add an address to a time block, so the system will calculate drive time for that agent should you want to book a contact/service-related appointment before or after that block. These Time Blocks appear on the calendar. You can add time off entries via the blue hyperlink on the bottom of the calendar view or via the Service Agents details screen.
Add From any Calendar View
- Click the Add Time Block link at the bottom of any calendar.
- This will slide in a dialog that lets you choose the service agent, enter a reason and then the date and time range.
- Hit Save to add the time off entry for that agent.
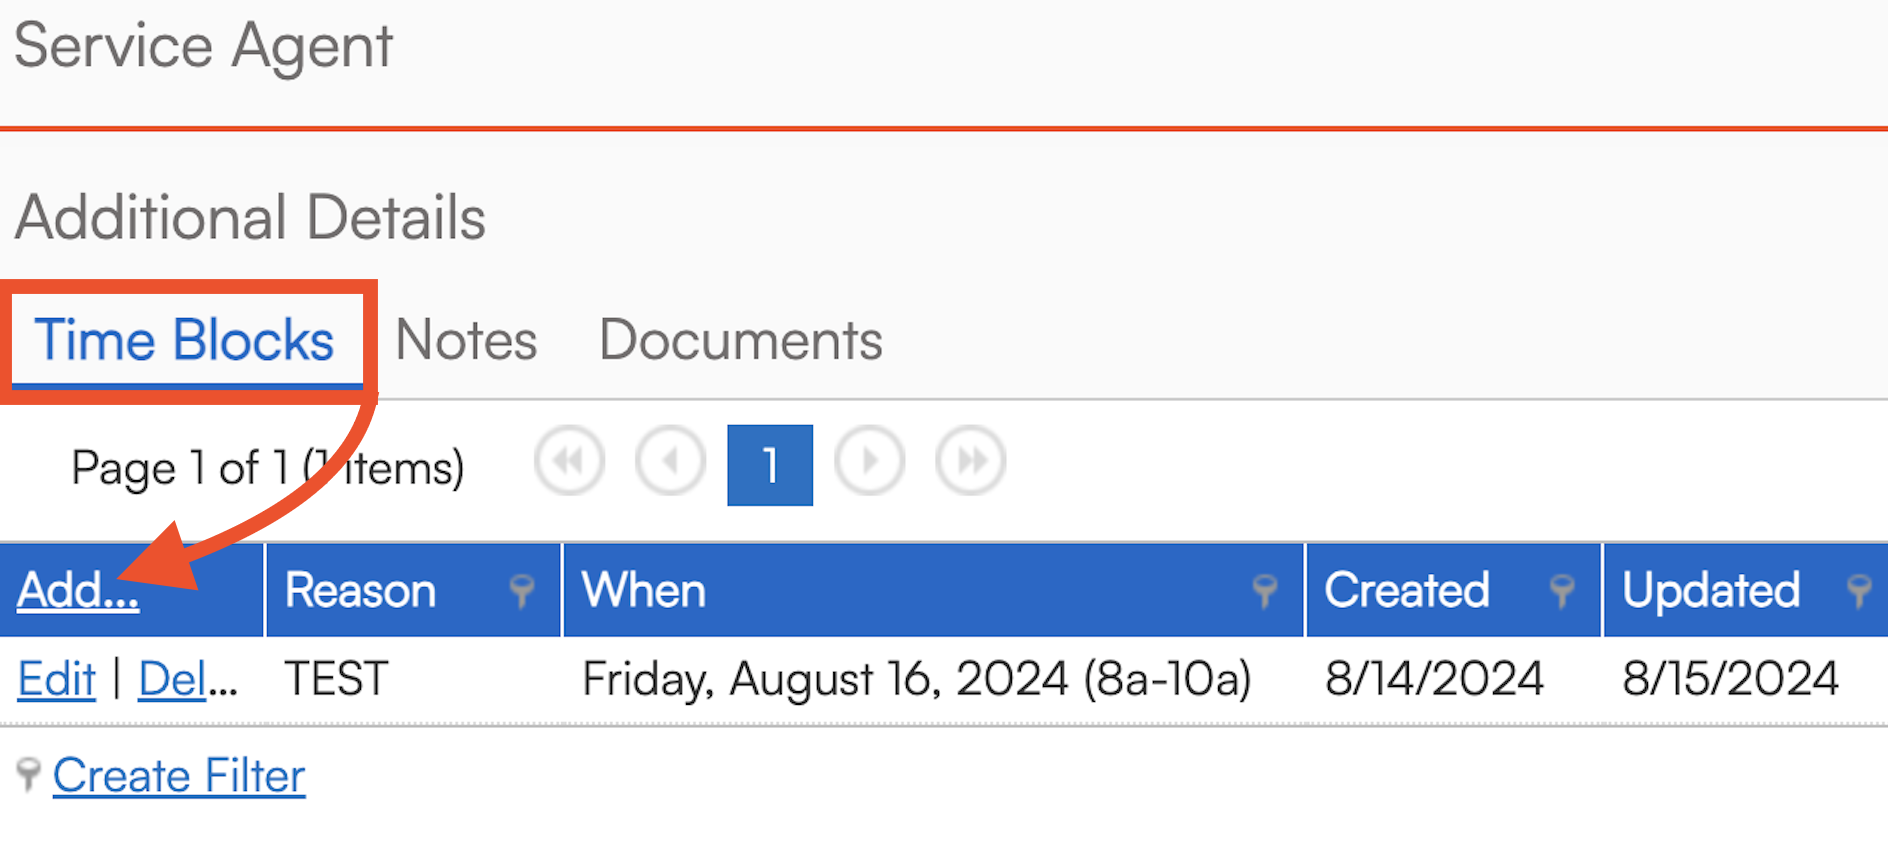
Add From any Service Agent
- Go to Control Panel > Service Agents
- Click on the name of the agent you want to add a time block for
- On the right hand side you'll see the Time Blocks tab
- Click Add and fill out the dialog. You can block off an entire day or a range. To enter a range, select the Time/Date Range button and either put in a time range (e.g. 1p-4p) or an end date for a range of days. You can also make the time block recurring (daily, monthly, weekly, etc.)
- Hit Save to confirm.
FAQs
Q: Can I edit the time block once it has been created?
A: Yes, you can edit or remove time blocks either from the Calendar or the Service Agent Detail page.
