Overview
Email remains one of the most effective, low-cost ways to stay in touch with your customers, boost brand visibility, and generate revenue. While serviceminder already includes powerful communication tools like appointment confirmations, en-route notifications, and automated follow-ups for open proposals and invoices, sending a one-off message to a specific group used to require exporting data and using a third-party tool.
The Email Campaigns add-on feature solves that. It allows you to send targeted, bulk emails—right from within serviceminder—without the hassle of switching platforms.
If you do not currently have this feature as part of your plan, visit the Marketplace, review your Account in Control Panel > Account > Change your billing plan or add/remove Features, or talk with your Brand Administrator to discuss making changes to your billing plan.
This article will review:
Video Tutorial
Settings and Navigation
Once Email Campaigns are enabled for your account, you’ll see a Launch Campaign option in the Actions menu of several grids. 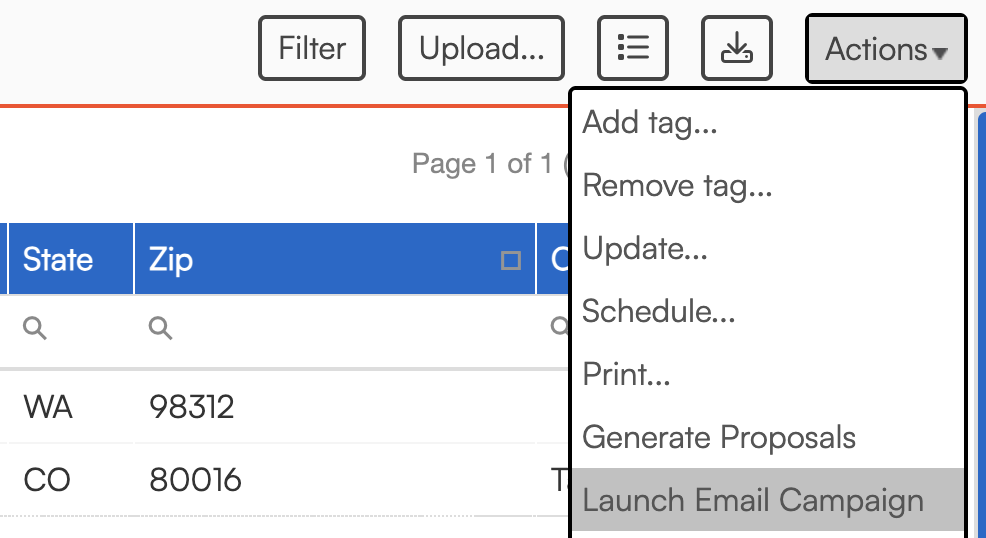
Contacts Grid
Use the Filter or Custom Filter buttons to select the group of contacts you want to email. You can filter by:
- Category (e.g., Customer, Prospect)
- Last Service or Next Service date
- Tags
- City or ZIP code
Once your list is ready, select Launch Campaign from the Actions menu to start building your email.
Appointments Grid
Use filters to target customers based on recent or upcoming appointments. Note: the default view is Upcoming, so you may want to click All to include past appointments.
Appointment-based campaigns give you access to appointment-specific shortcodes to personalize your message.
Proposals Grid
This is ideal for targeting leads with Open or Expired Proposals. Use filters to narrow your list, then click Launch Campaign.
Proposal campaigns include dynamic links to view the proposal, making it easy for prospects to re-engage and take action.
Invoices Grid
While less commonly used, invoice campaigns are great for notifying customers with Open Invoices or following up after certain services.
As always, filter your list, then choose Launch Campaign from the Actions menu.
When creating the ad hoc email template to use in an email campaign, think about which grid you will be launching it from.
Make sure to match the template type to the type of the grid.
Launching a Campaign
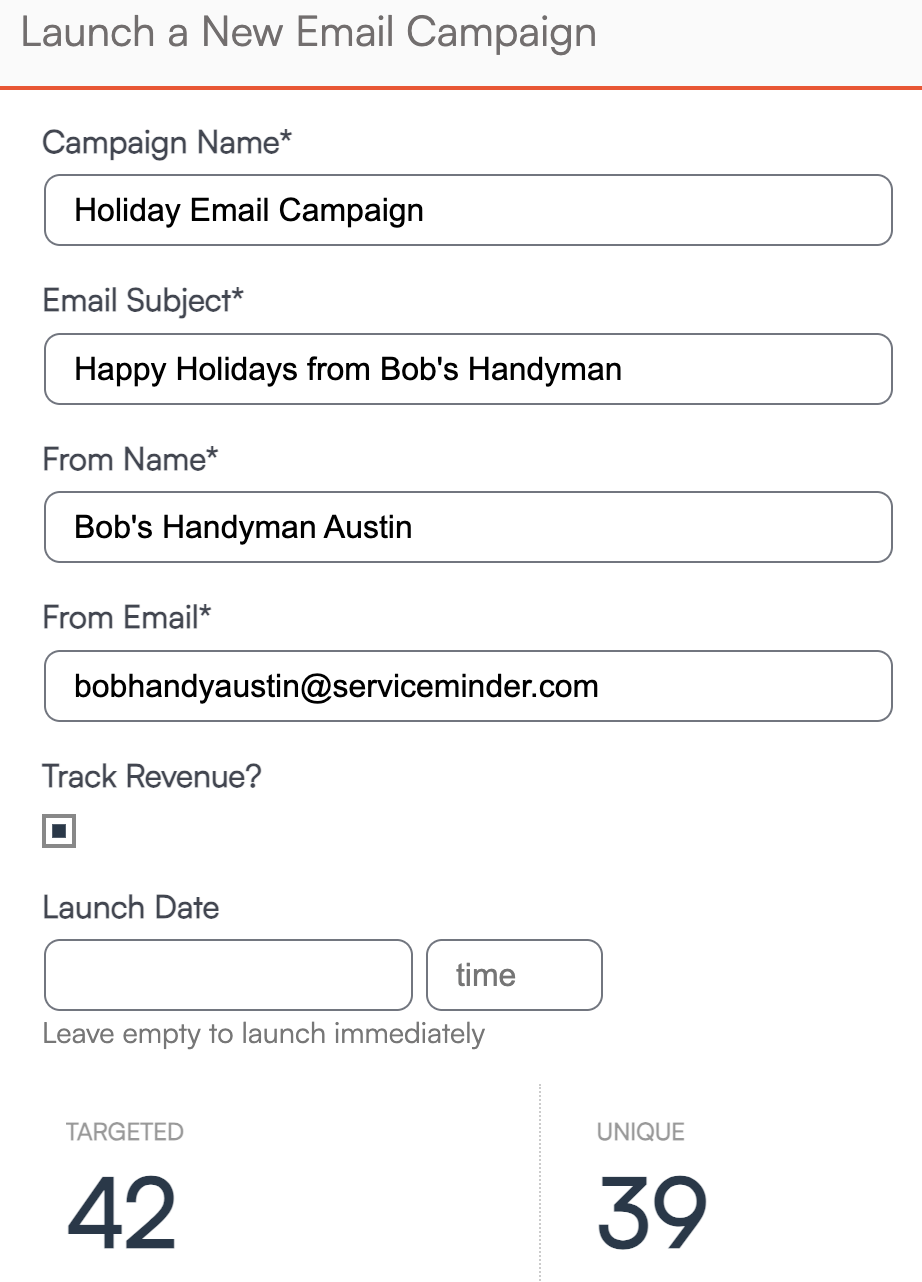
After clicking Launch Campaign, you’ll be taken to the campaign setup screen. This may take a moment as serviceminder builds the recipient list.
 Step-by-Step Setup:

- Name your campaign: Use a unique and descriptive name like
Spring-2025-Promo. This name appears in your campaign reports, so choose something meaningful. - Set your sender info: By default, the From Name and From Email match your Organization’s settings. You can edit them—but it's best to keep them recognizable to avoid spam filtering.
- Choose a template: Select from your existing Ad Hoc Email Templates, which are organized by type (Contact, Appointment, Proposal, etc.). The grid you launched the campaign from will determine which type of templates you can choose from.
- Write your subject line: Keep it clear and compelling. Avoid spammy language like “FREE!!!” or overuse of exclamation marks.
- Customize the content: Use the built-in editor to personalize your message. Shortcodes make it easy to pull in details like names, dates, or links.
- Schedule your campaign: Leave the Launch Date blank to send it immediately, or set a future date/time for scheduled delivery.
- Preview and test: Click Continue to review your campaign, send yourself a test email, and confirm the settings.
- When you're ready, click Launch.
Campaign Reporting
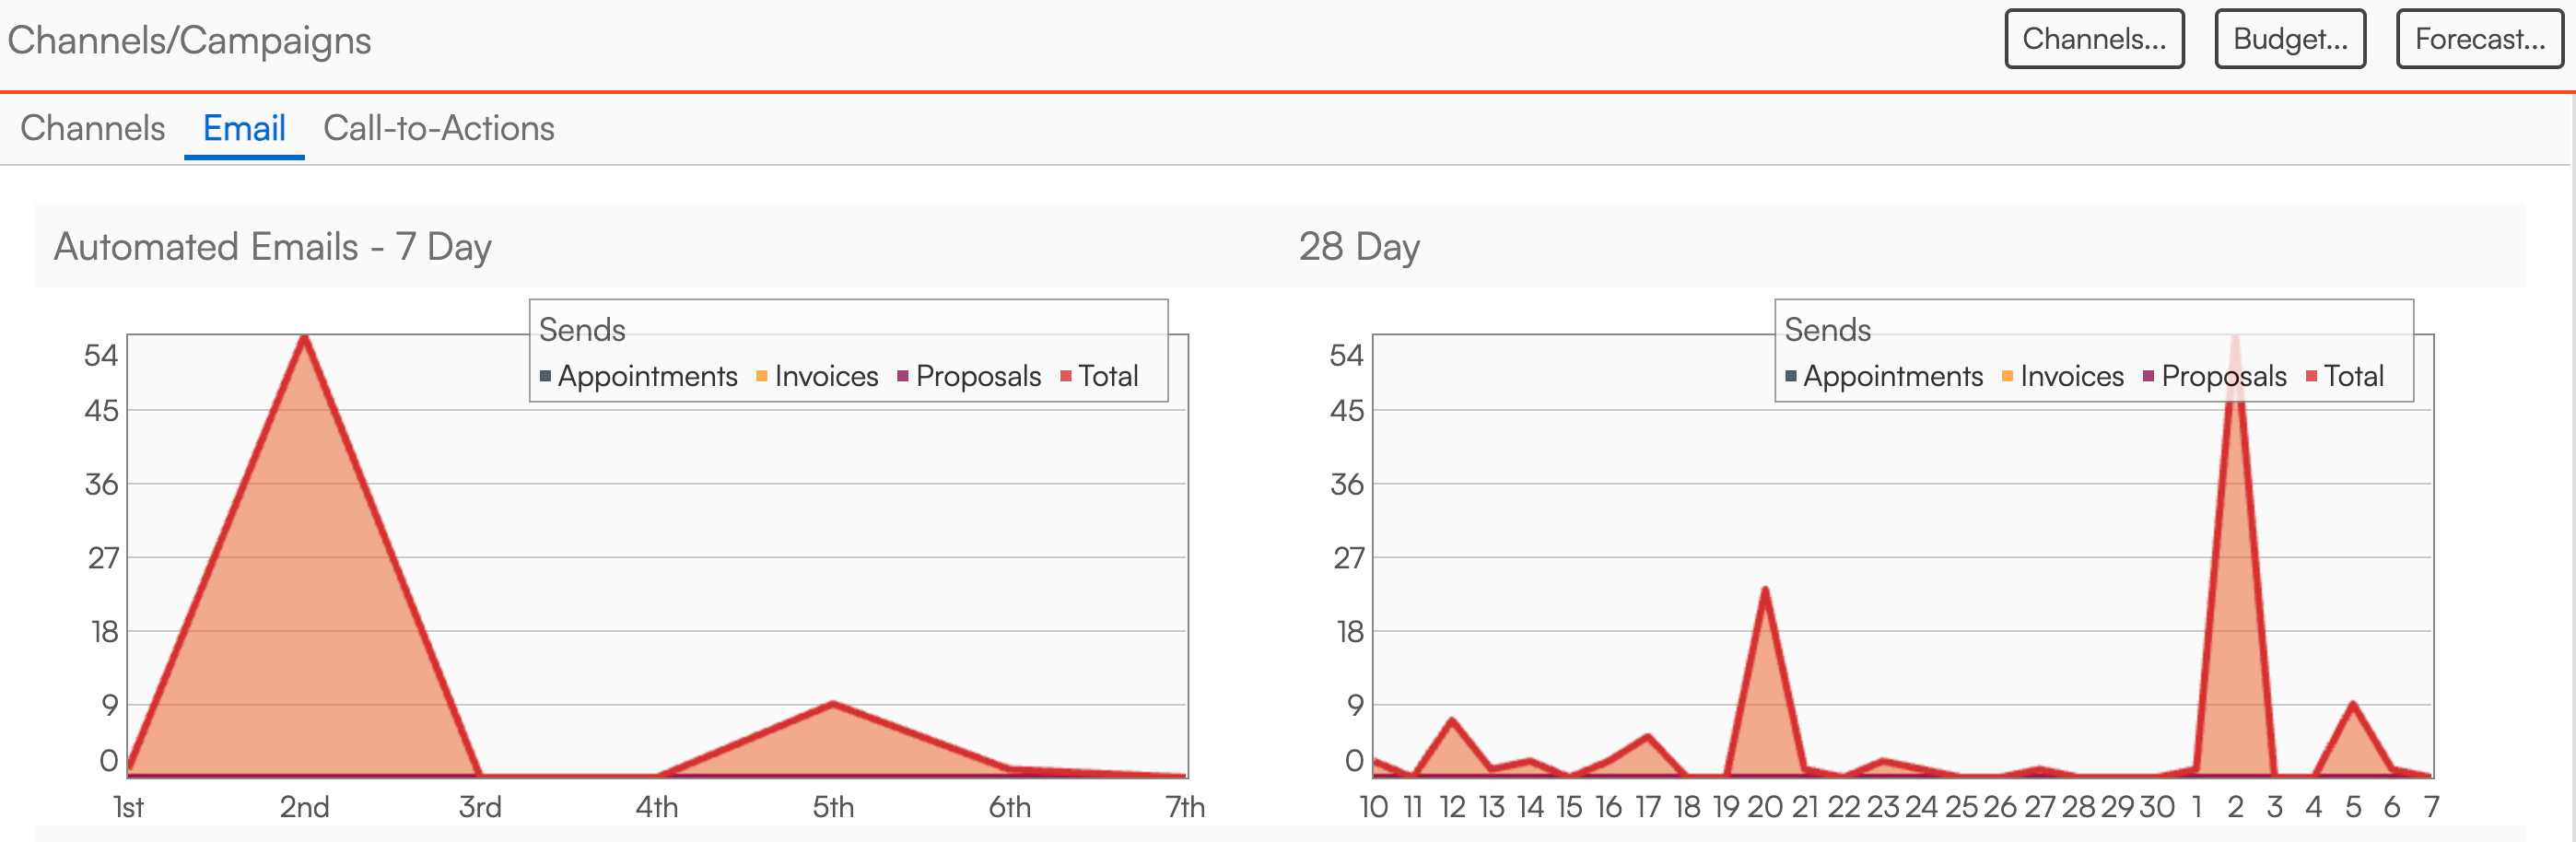
Once your campaign has been launched, you can view its performance in the Campaigns module by navigating to Campaigns > Email tab. Campaigns are listed in reverse chronological order, with the most recently launched campaigns shown first.
Each campaign dashboard includes a detailed summary of engagement metrics, giving you insight into how well your message performed.
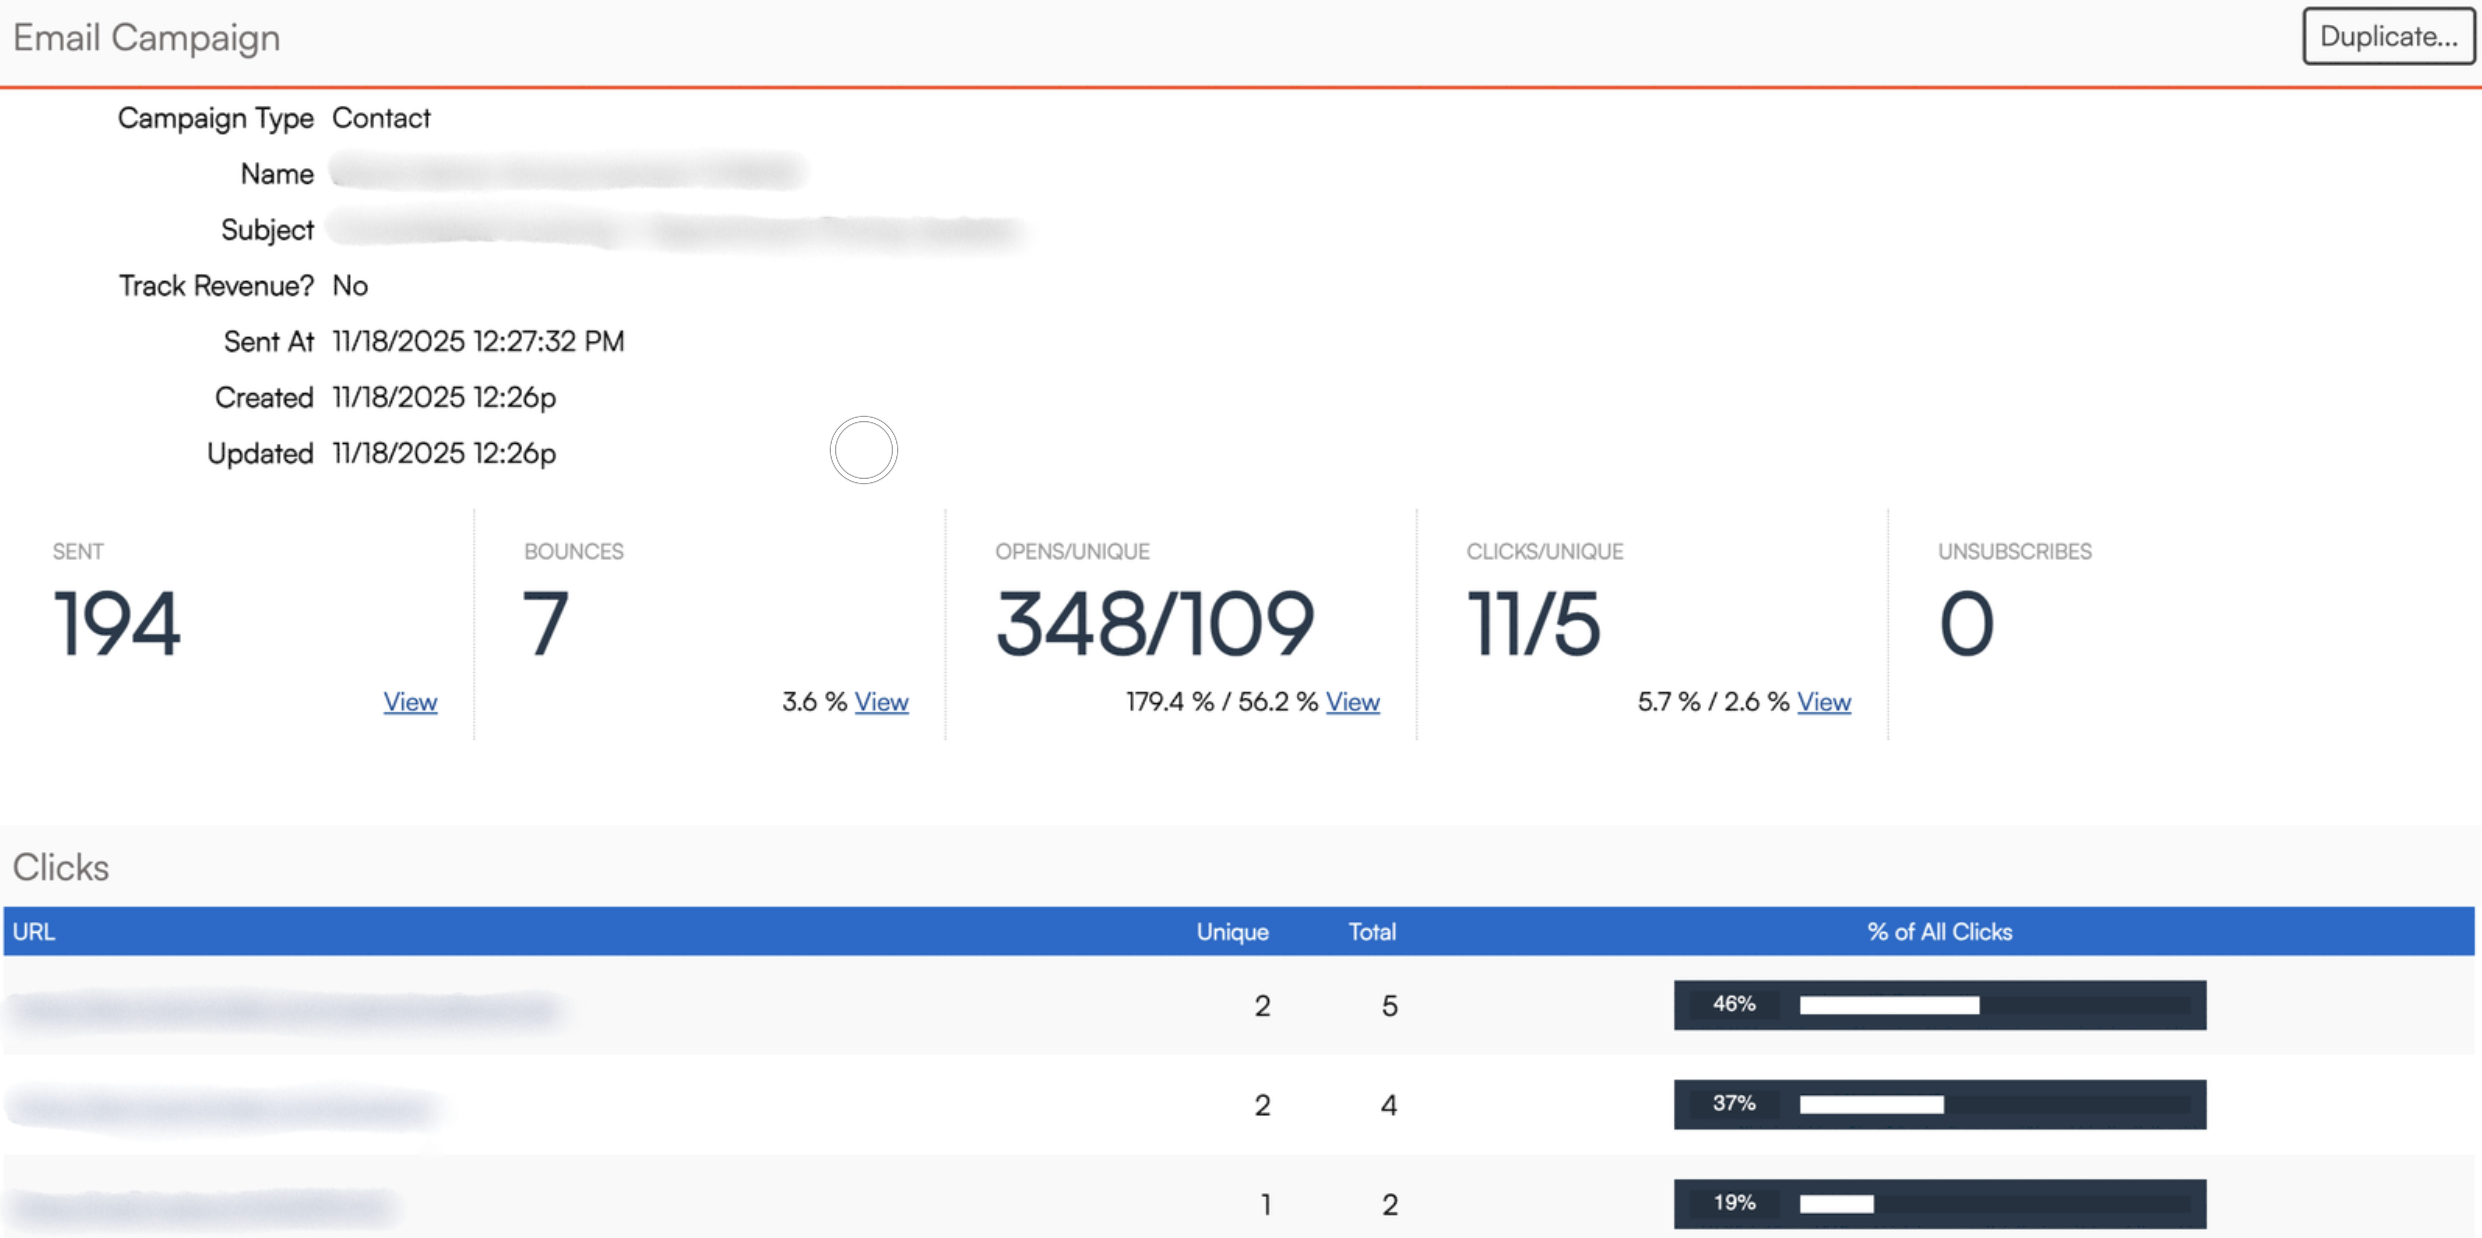
Standard Engagement Metrics
The following metrics are tracked by default:
- Sent – Total number of emails successfully sent.
- Bounces – Emails that could not be delivered.
- Opens / Unique Opens – Total number of times your email was opened, and how many of those were unique recipients.
- Clicks / Unique Clicks – Total number of times links were clicked, and how many were from unique recipients.
- Unsubscribes – Number of recipients who opted out via the unsubscribe link.
Beneath the engagement stats, you’ll also see a list of links that were clicked, including how many clicks each received. This list will populate only after one or more clicks have occurred.
Tip: You can click the View link next to any metric to see a list of contacts that contributed to that stat—such as who clicked or unsubscribed.
Revenue and Conversion Tracking (Optional)
If you enable Track Revenue when launching your campaign, you’ll gain access to additional performance insights:
- Accepted – Number of targeted proposals that were accepted after the campaign was launched (proposal campaigns only).
- Proposals – Total number of new proposals generated for recipients after the campaign was sent.
- Revenue – Total invoice amount from any proposals that were either targeted by or created for those contacts after launch.
This allows you to tie actual sales activity and ROI directly back to your campaign performance.
Revenue tracking is only available if you check the “Track Revenue” box when launching your campaign.
If left unchecked, these stats will not be collected—even if proposals or invoices are generated afterward.
Managing Campaigns
From the Campaigns grid, you can also:
- Archive a campaign to remove it from your summary report.
- Duplicate a campaign to quickly relaunch it using the same settings and template, with the option to make edits.
FAQs
How do I view who opened or clicked on my email?
From the Campaigns page, click on the name of a campaign to view its dashboard. You’ll see stats for opens, clicks, and unsubscribes—plus links to see the exact contacts who took those actions.
Can I send follow-ups to non-openers or non-clickers?
Not directly, but you can download the list of non-openers from the report and use it to create a new campaign.
What kinds of contacts can I email?
You can email any contacts on your grid who meet the filter criteria you set—whether they’re prospects, customers, or leads tied to proposals or invoices.
Are there similar tools for automated emails?
Yes—Drip Campaigns offer automation for recurring or trigger-based messages. Email Campaigns are ideal for one-time sends.
Why don’t I see the Launch Campaign option?
Make sure the Email Campaigns feature is enabled for your account. You’ll also need appropriate user permissions to use it. Check with your Brand Admin if unsure.
Can I track ROI from my campaign?
Absolutely! Just check the Track Revenue box when creating the campaign. This enables metrics like Accepted Proposals and Revenue.
