Overview
It happens. Something doesn’t go as expected with a job, and your agents need to go back and make a correction. These follow-up visits are called rework appointments.
Rework appointments are scheduled when:
- Something was not completed or was done incorrectly
- A customer was dissatisfied
- A product or service needs correction or repair
As a business owner, reworks can be costly. Tracking them allows you to better understand expenses, spot recurring issues, and refine business strategies.
This article will review:
Settings and Navigation
A rework appointment is always tied to the original proposal and the associated appointment, ensuring accountability and a clear record of what needed correction.
To enable the ability to track reworks:
- Go to Control Panel > Services.
- Edit the applicable service.
- Scroll down to the Scheduling section.
- Check the Track Rework box.
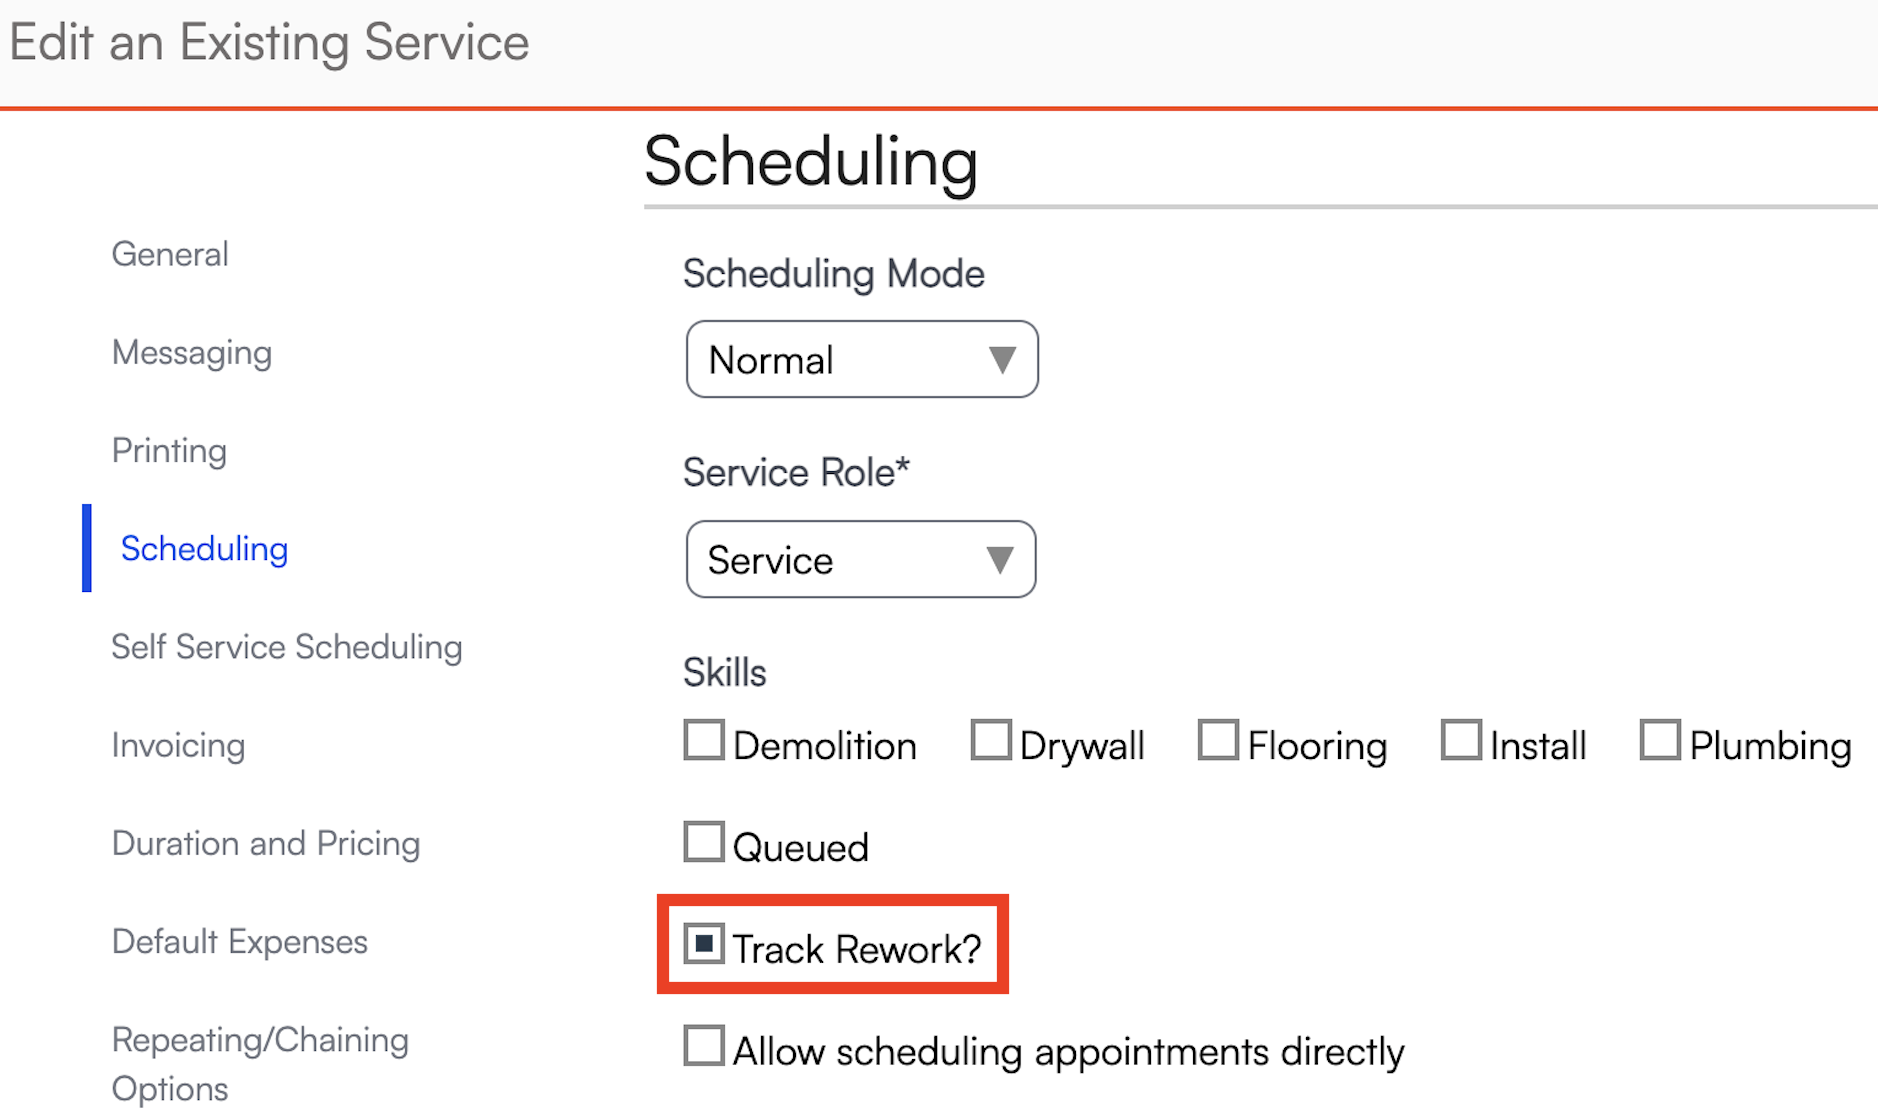
Once enabled, this Service will allow you to create and track rework appointments.
Create a Rework Appointment
After the original appointment is completed, if the service has rework tracking enabled, you’ll be able to schedule a Rework appointment.
On the completed appointment screen, click Actions > Rework.
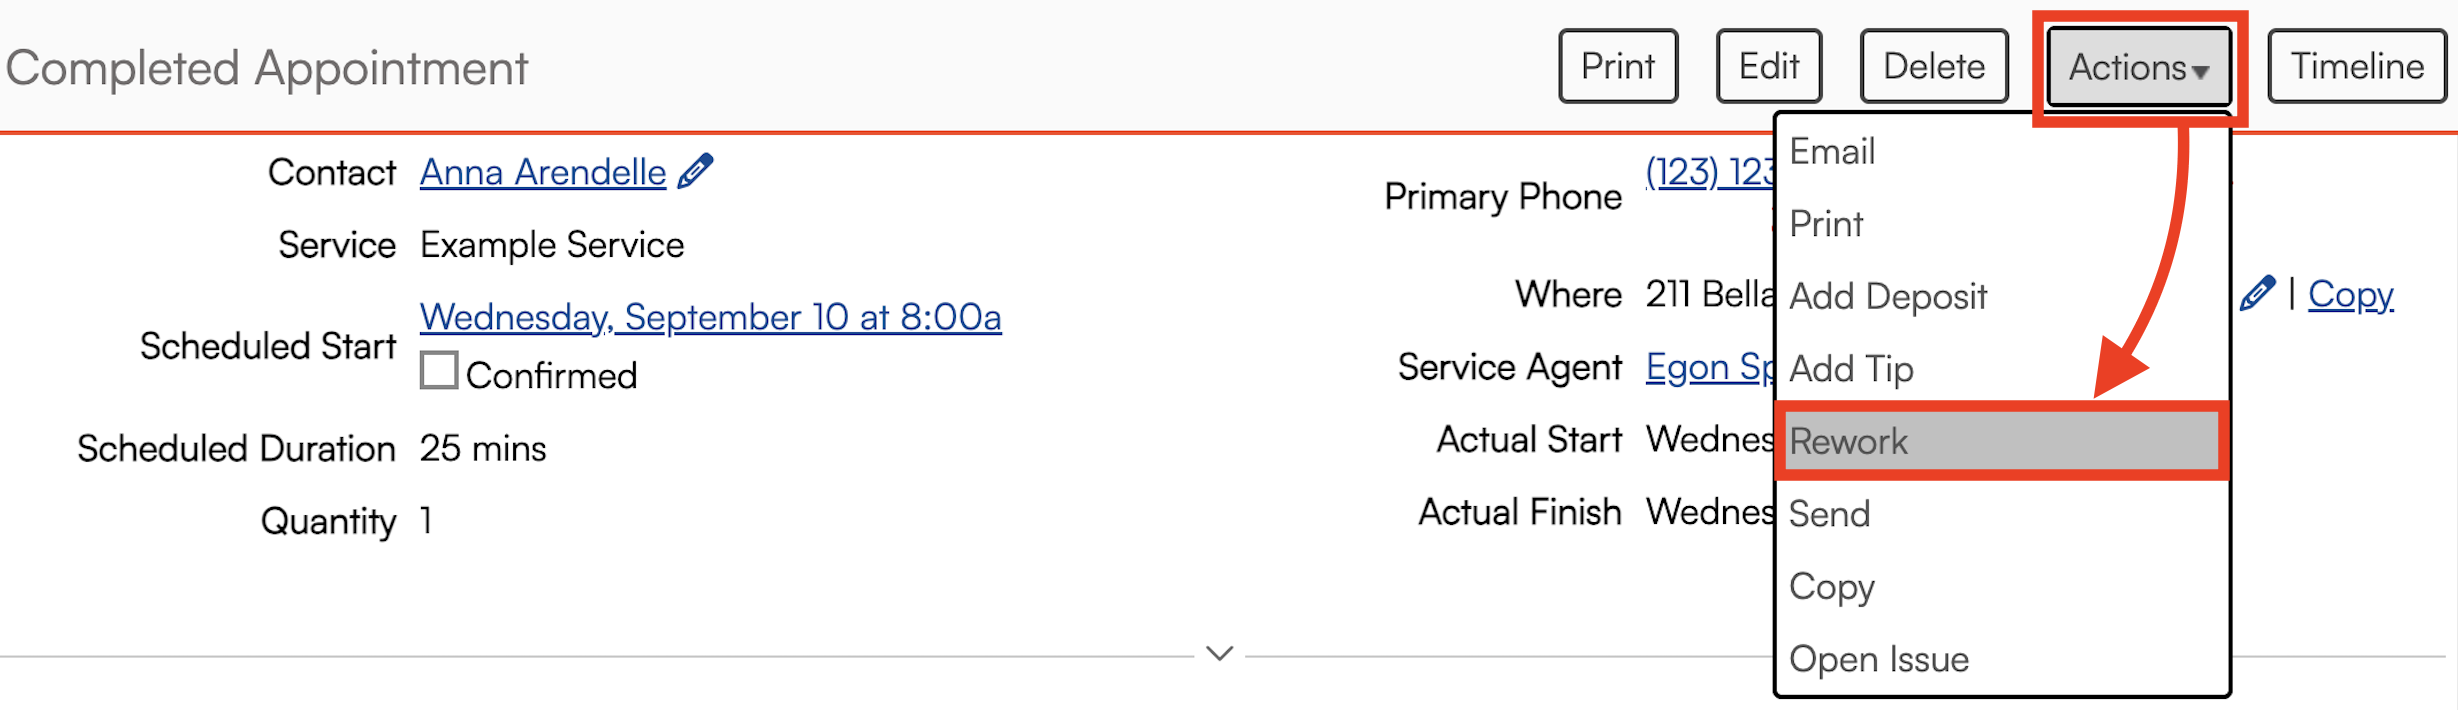
For example, let’s say an installation went awry. Your installer accidentally damaged something that needs repair. Create a rework appointment from the Actions menu and complete the following steps:
Add notes and other important information about the issue.
Choose the service and parts required for the rework.
Schedule the appointment.
The new rework appointment will be directly linked to the original proposal and appointment, ensuring a clear record of both the initial job and the follow-up work.

Operationally, rework appointments are managed just like regular appointments, but they are specifically categorized and tracked for corrective work.
Reporting
Once the appointment is finished, the data will feed to the Rework Report, found in the Reports section of the navigation menu.

The report allows you to:
- Filter results by date range
- Download the data to a spreadsheet for further analysis
- Track trends in reworks
- Monitor the frequency and causes of reworks
- Identify recurring issues with specific services or agents
This visibility helps you address operational inefficiencies, reduce repeat issues, and make data-driven decisions about training and process improvements.

