Overview
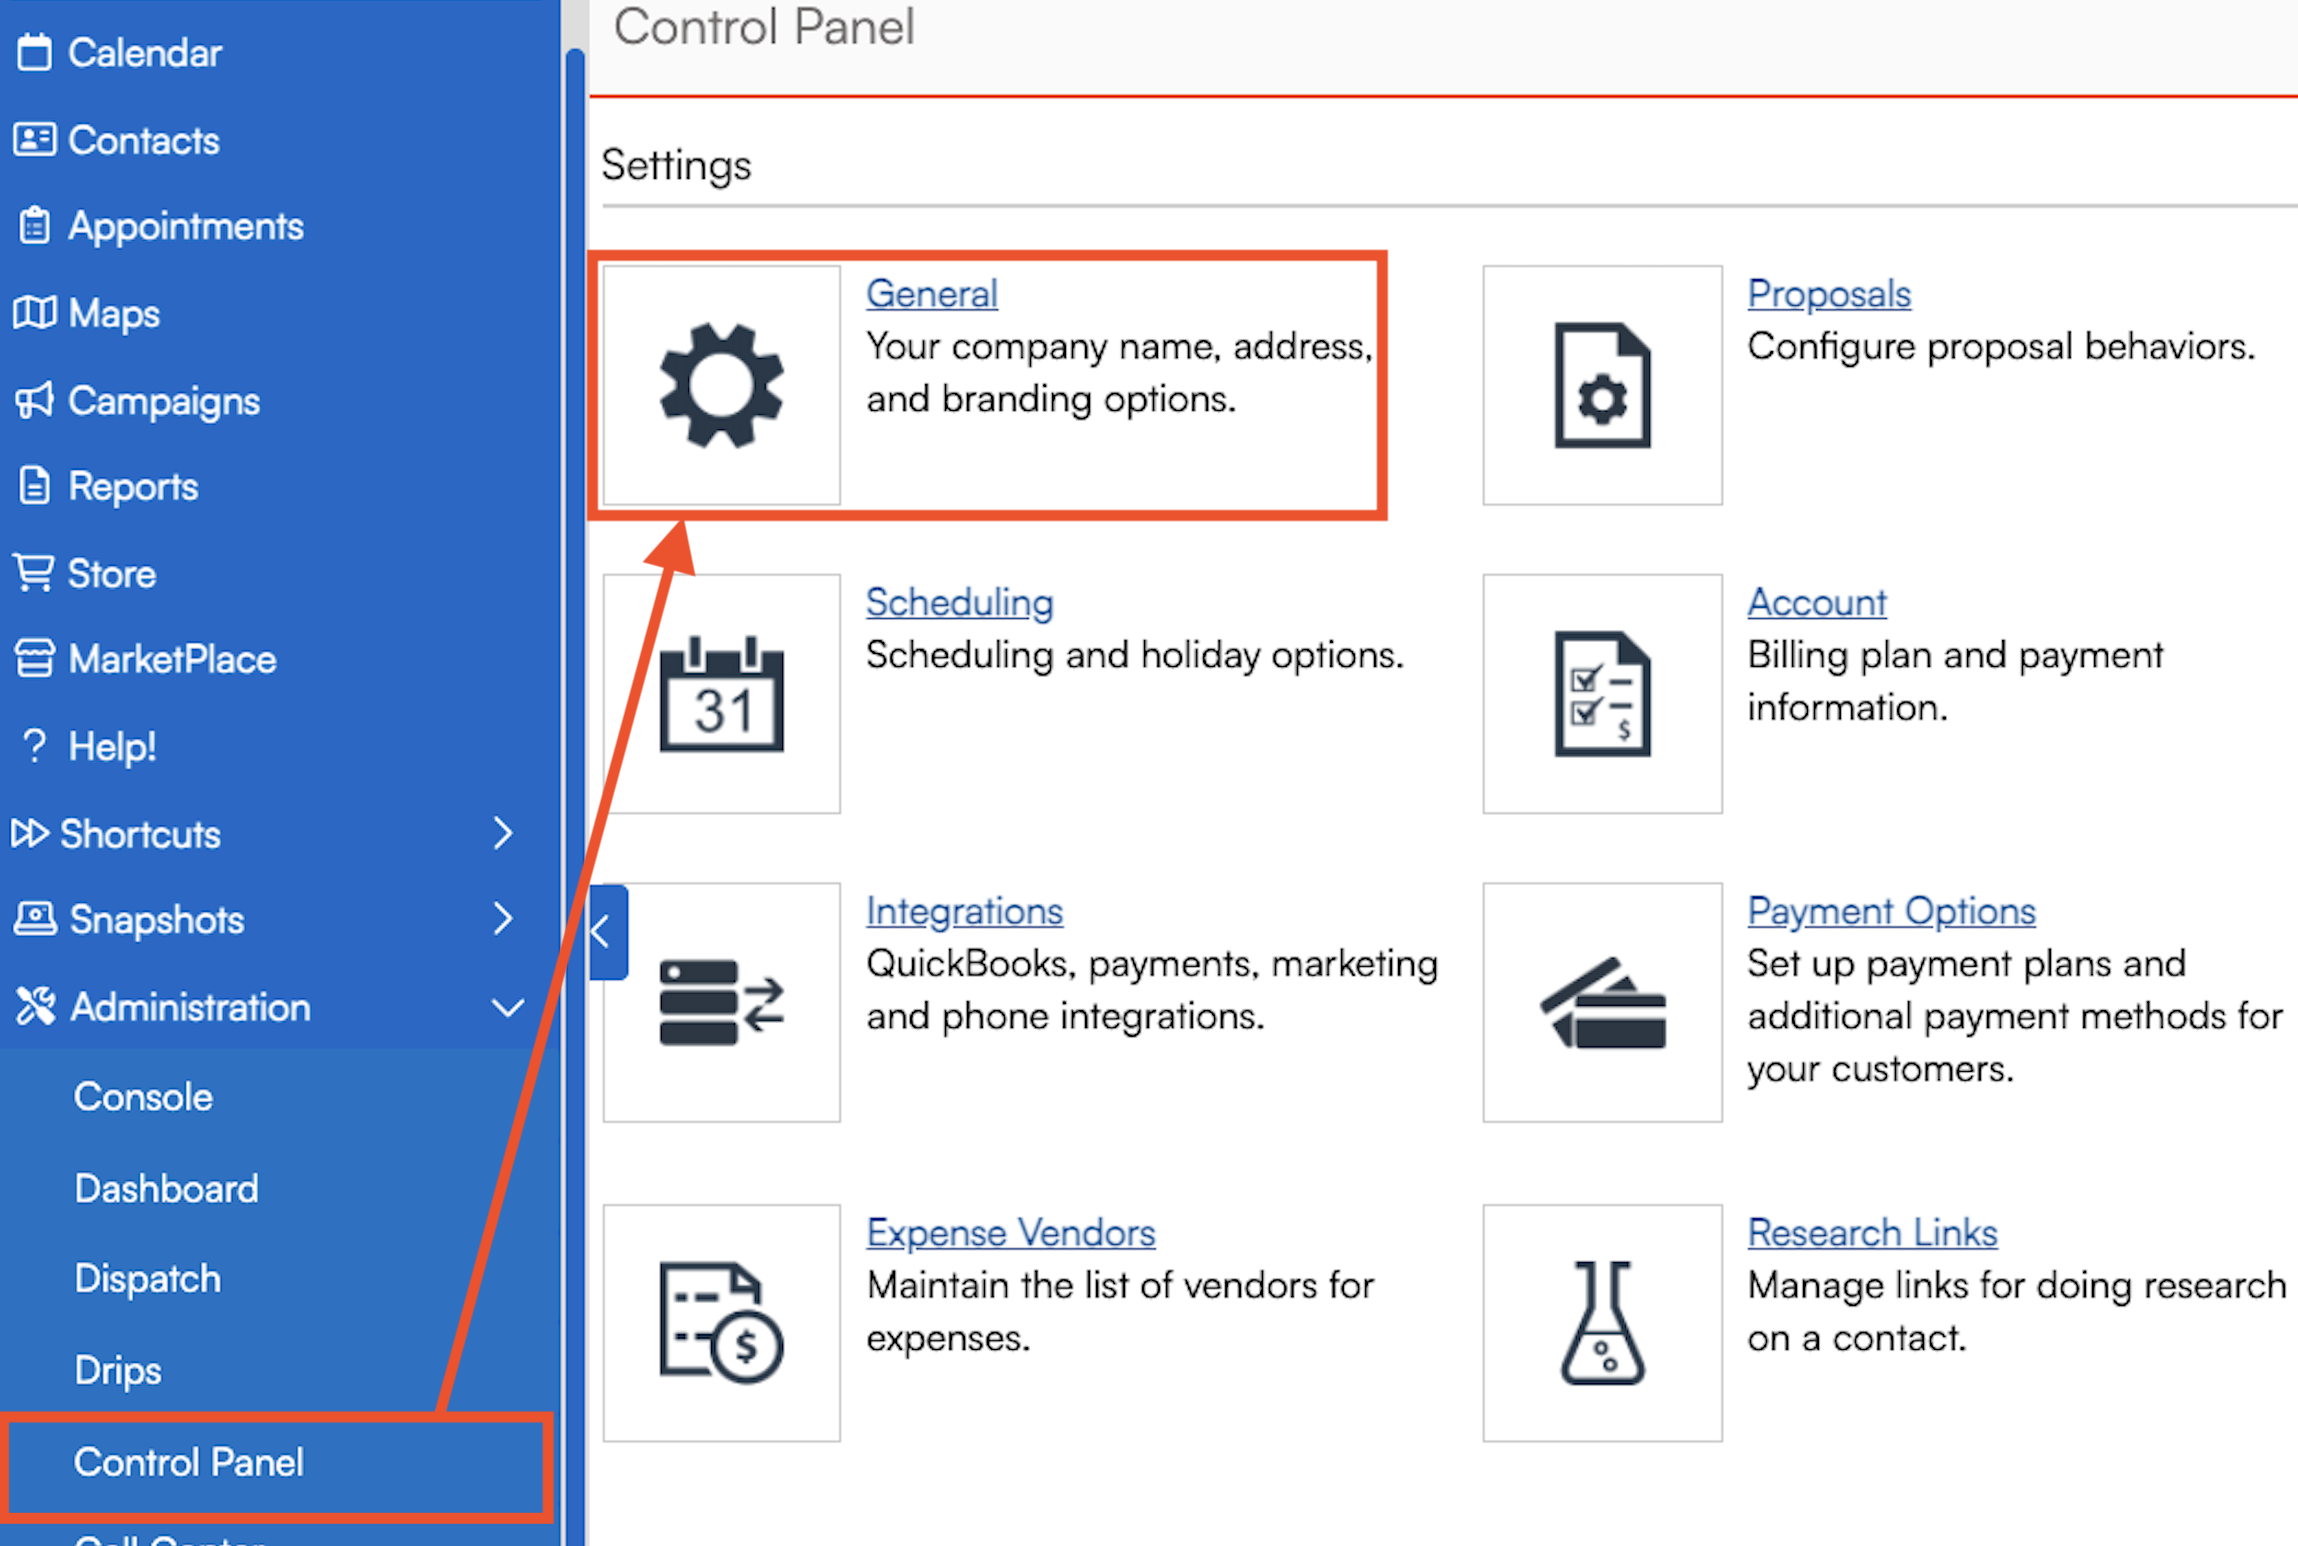
To fill in your general business information, go to Control Panel > General Settings. This article will review each section of this page.
Please note that only certain User Permissions can access this area of serviceminder.
This article will review:
Basic Info
Here you will fill in basic contact information for your organization. These fields will be displayed in various communications with the use of shortcodes, so use information that you want customers to be able to see.
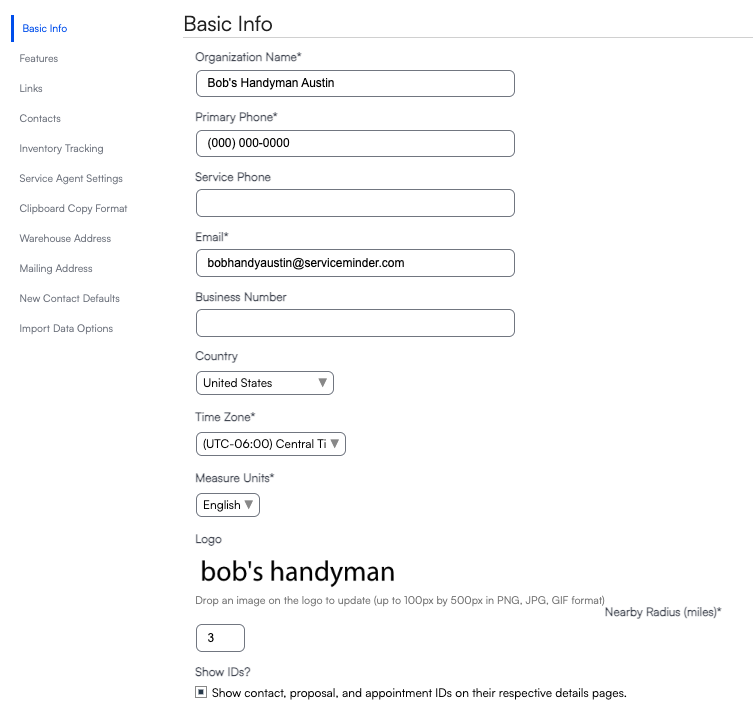
Anything with an asterisk (*) means that it is required. If you do not fill in one of the required fields before attempting to save the page, you will get an error message.
Required Fields:
- Organization Name - This is client-facing, so write it how your clients will know your business (follow brand guidelines if you are unsure).
- Primary Phone - This will be your location's main phone number; whatever number you want customers to call, this is what to put in this field.
- Email - This will be the main email address to receive and send customer communications.
- Time Zone - The system uses this for your calendar and scheduling; it will also be used for time stamps on receiving/sending emails or marketing messages.
- Measure Units - English or Metric; you will most likely choose English if you are U.S. or Canada-based
Optional Fields
- Service Phone - A secondary phone number with its own shortcode to provide to contacts.
- Business Number - Enter your BIN or EIN here (How do I get my EIN?)
- Country - This field will default to United States. Changing this to another country will impact the postal codes you are able to enter into the system.
- Logo - Upload your company logo here and it will display on proposals and invoices sent to your customers. If you are part of a franchise, the brand will handle this for you.
- Nearby Radius - Used to help serviceminder determine where your service agents are allowed to go at certain times based on this radius. The center is located at your organization's Default Start Address, which can be edited a little lower on the page.
- Show IDs? - Choose whether or not you want to display IDs on contact, appointment, and proposal details pages.
Features
This section includes some master on/off switches for various features within serviceminder.
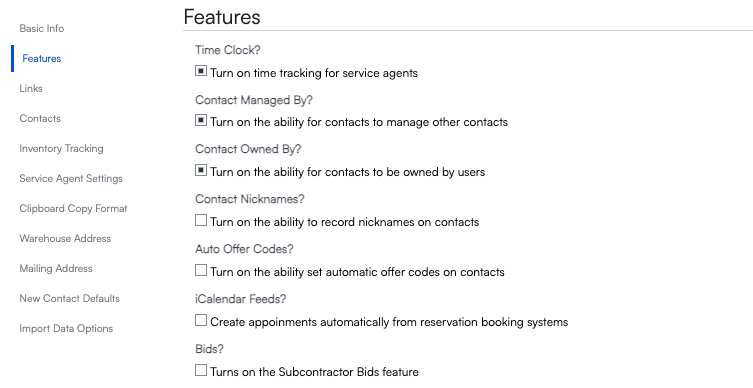
- Time Clock - Enable the ability for employees to Clock In & Out.
- Contact Managed By and Contact Owned By - Learn more about those features in the Managing and Merging Contacts article.
- Contact Nicknames - Enable an additional field that collects nicknames or alternative names for contacts.
- Auto Offer Codes - Set automatic Offer Codes on contacts.
- iCalendar Feeds - Create appointments automatically from reservation booking systems.
- Bids - Enable this feature if you will be using Subcontractors who will provide bids for jobs.
- App Picture Quality - Set the default quality of pictures uploaded via the app (setting this lower can help with load times in the field)
Beyond Time Clock, Contact Managed By, and Contact Owned By, many of these features are specified by industry and most organizations do not need them. You can always return to this page when you have more experience in serviceminder and a clearer picture of what features would be beneficial for your business.
Links
The next section, Links, has dedicated fields for adding various social media URLs. This will be your location's website and social media accounts (not the brand website). These will be customer-facing on proposals, invoices, and emails.

These links can be used in shortcodes
Inventory Tracking
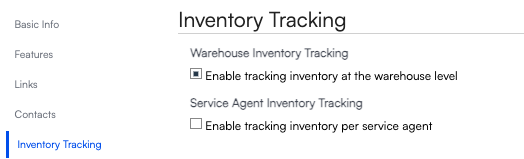
Enable Inventory Tracking at the Warehouse and/or Service Agent level.
- Warehouse Inventory Tracking: Track inventory for the entire organization as a whole.
- Service Agent Inventory Tracking: Track inventory for each individual service agent.
Service Agent Settings
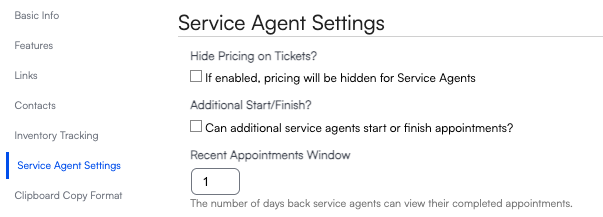
- Hide Pricing on tickets? - If enabled, pricing will be hidden for service agents.
- Additional Start/Finish? - Allow additional service agents to start or finish appointments.
- Recent Appointments Window - The number of days back service agents can view their completed appointments.
Warehouse & Mailing Address
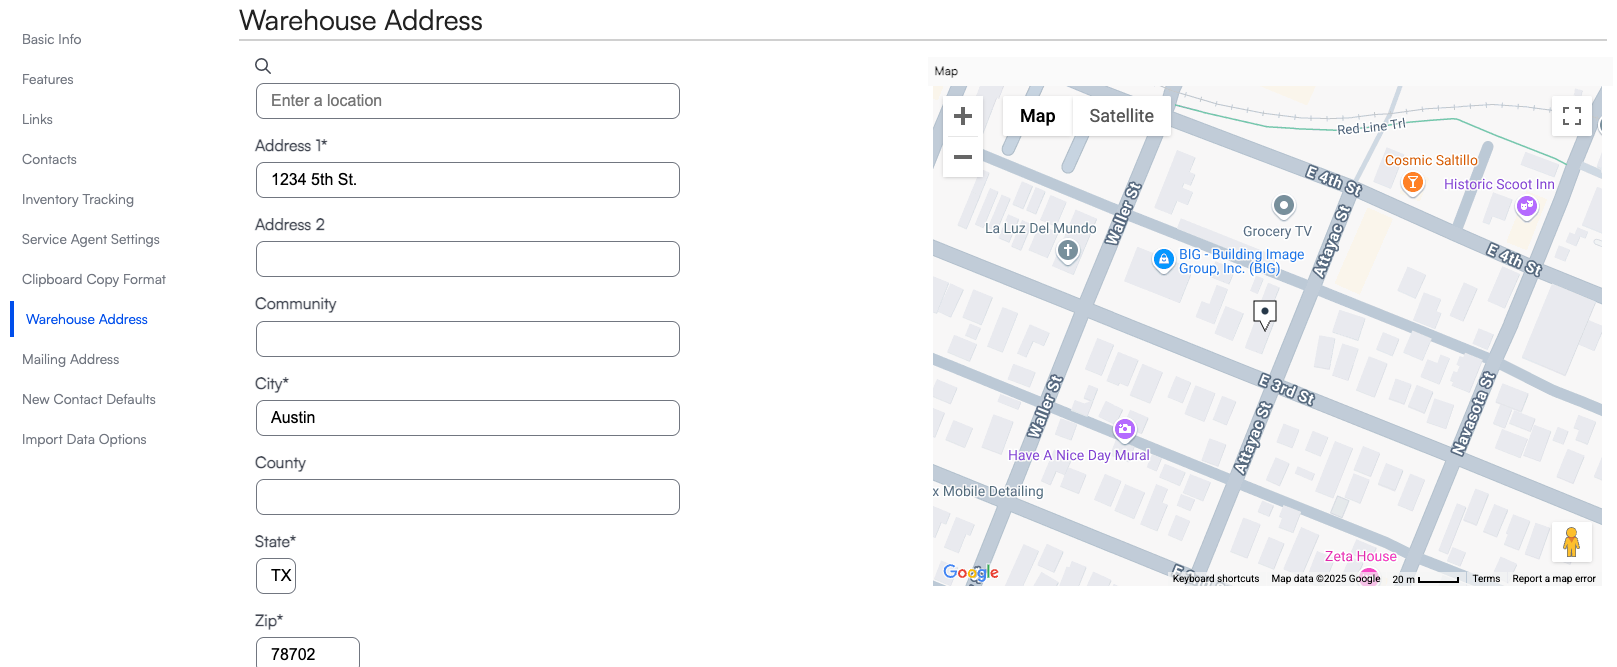
The final important step of General Settings is adding your Warehouse Address. Your Warehouse is the term we use for your office or whatever location is your HQ.
When adding an address, ALWAYS use the search box. The search box is the first field. It connects to Google Maps to pull in a verified address.
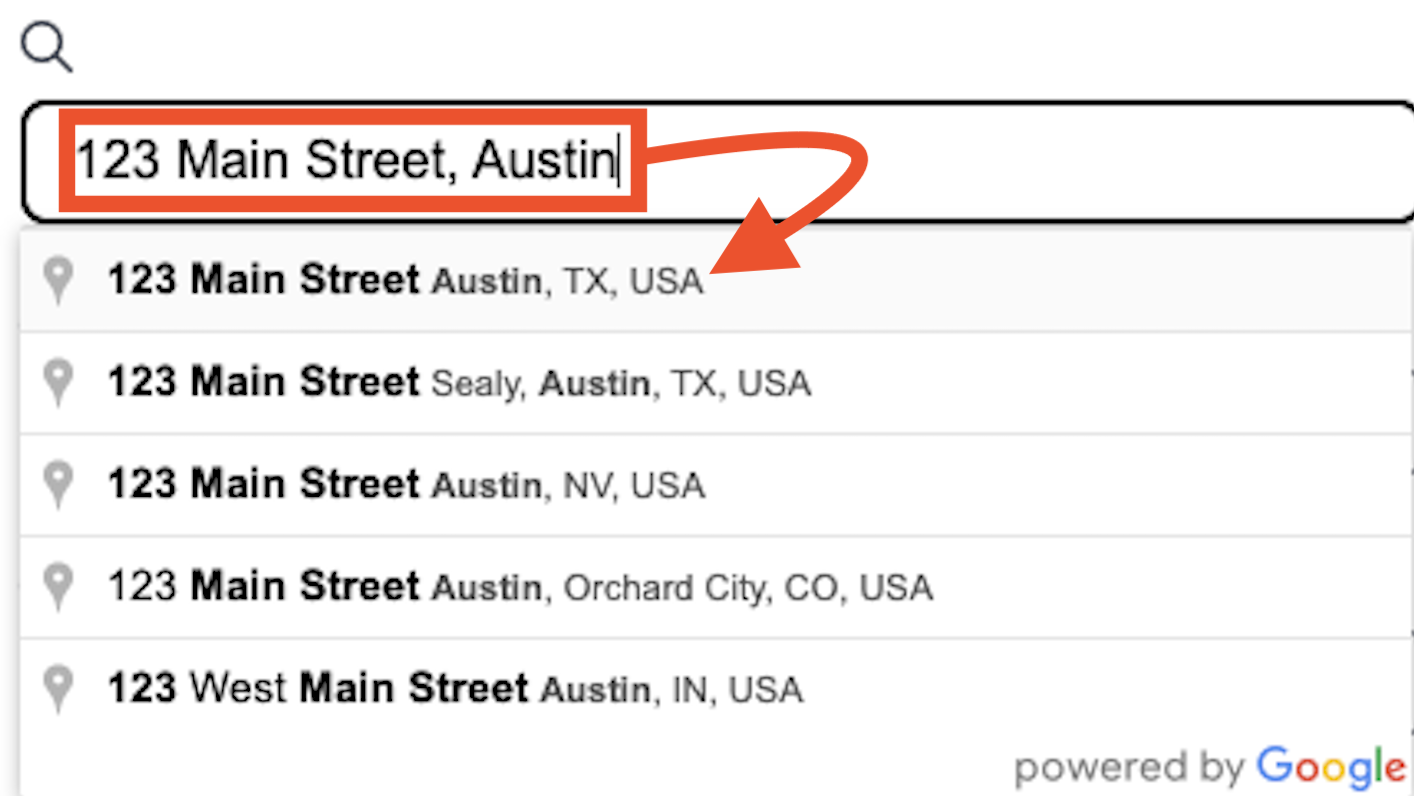
This address is used for routing, tax mapping, and more. It is incredibly important that you do not manually add the address, city, and postal code - even if you know it by heart. ALWAYS use the search box.
If you do not want to display your warehouse address on communications with your contacts, you can also enter a Mailing Address. This will be the address that displays on proposals and invoices. If left blank, it will default to the warehouse address.
