Overview
These are settings and descriptions based around communication for appointments with Contacts. These include En Route messages as well as sending confirmations and reminders for booked appointments in text and email formats.
This article will review:
Settings and Navigation
Go to Control Panel > Notifications > Turn Notifications On/Off and select the box En Route for Contacts.
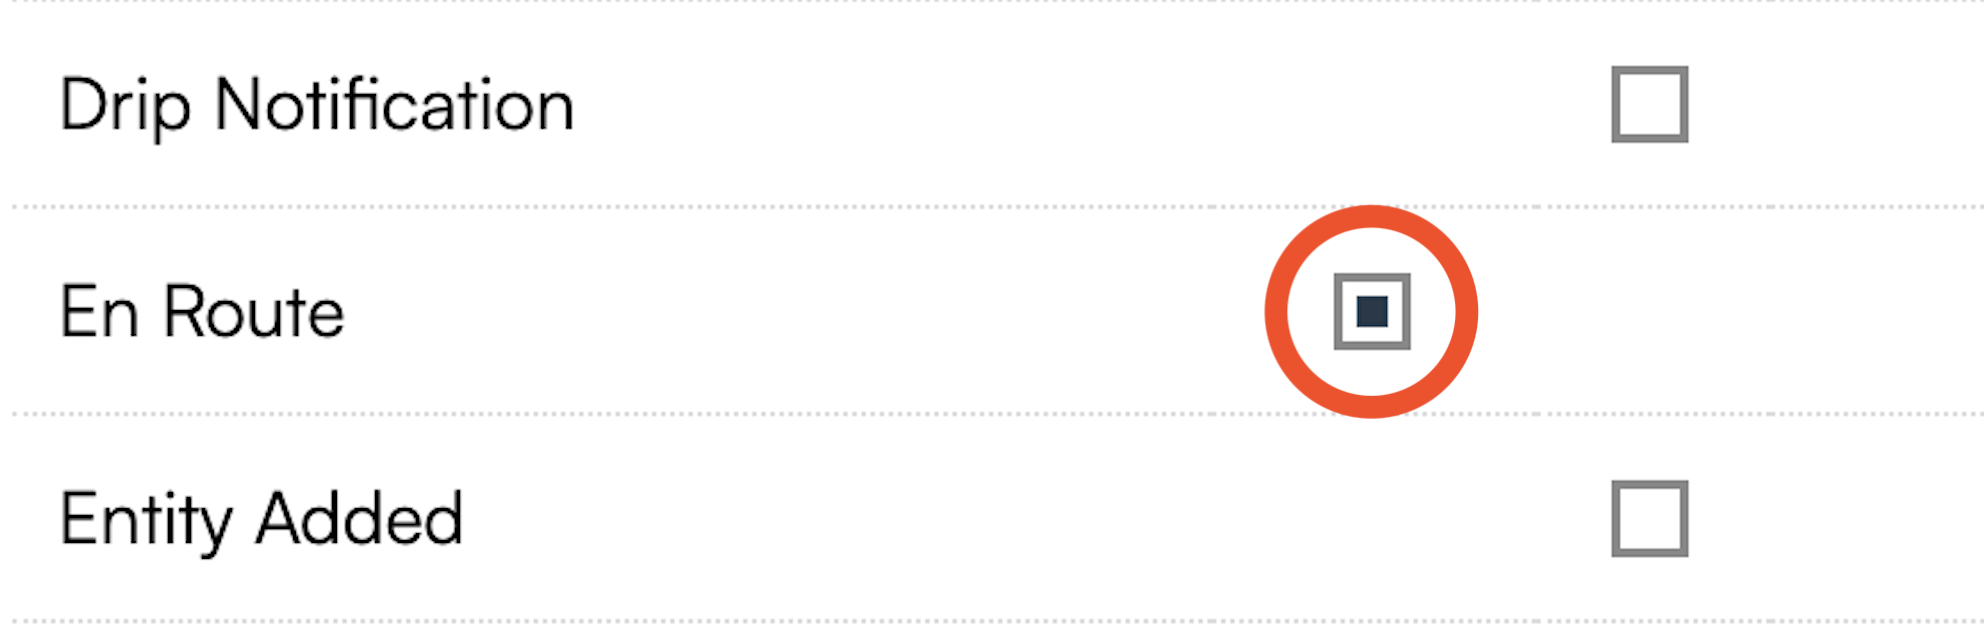
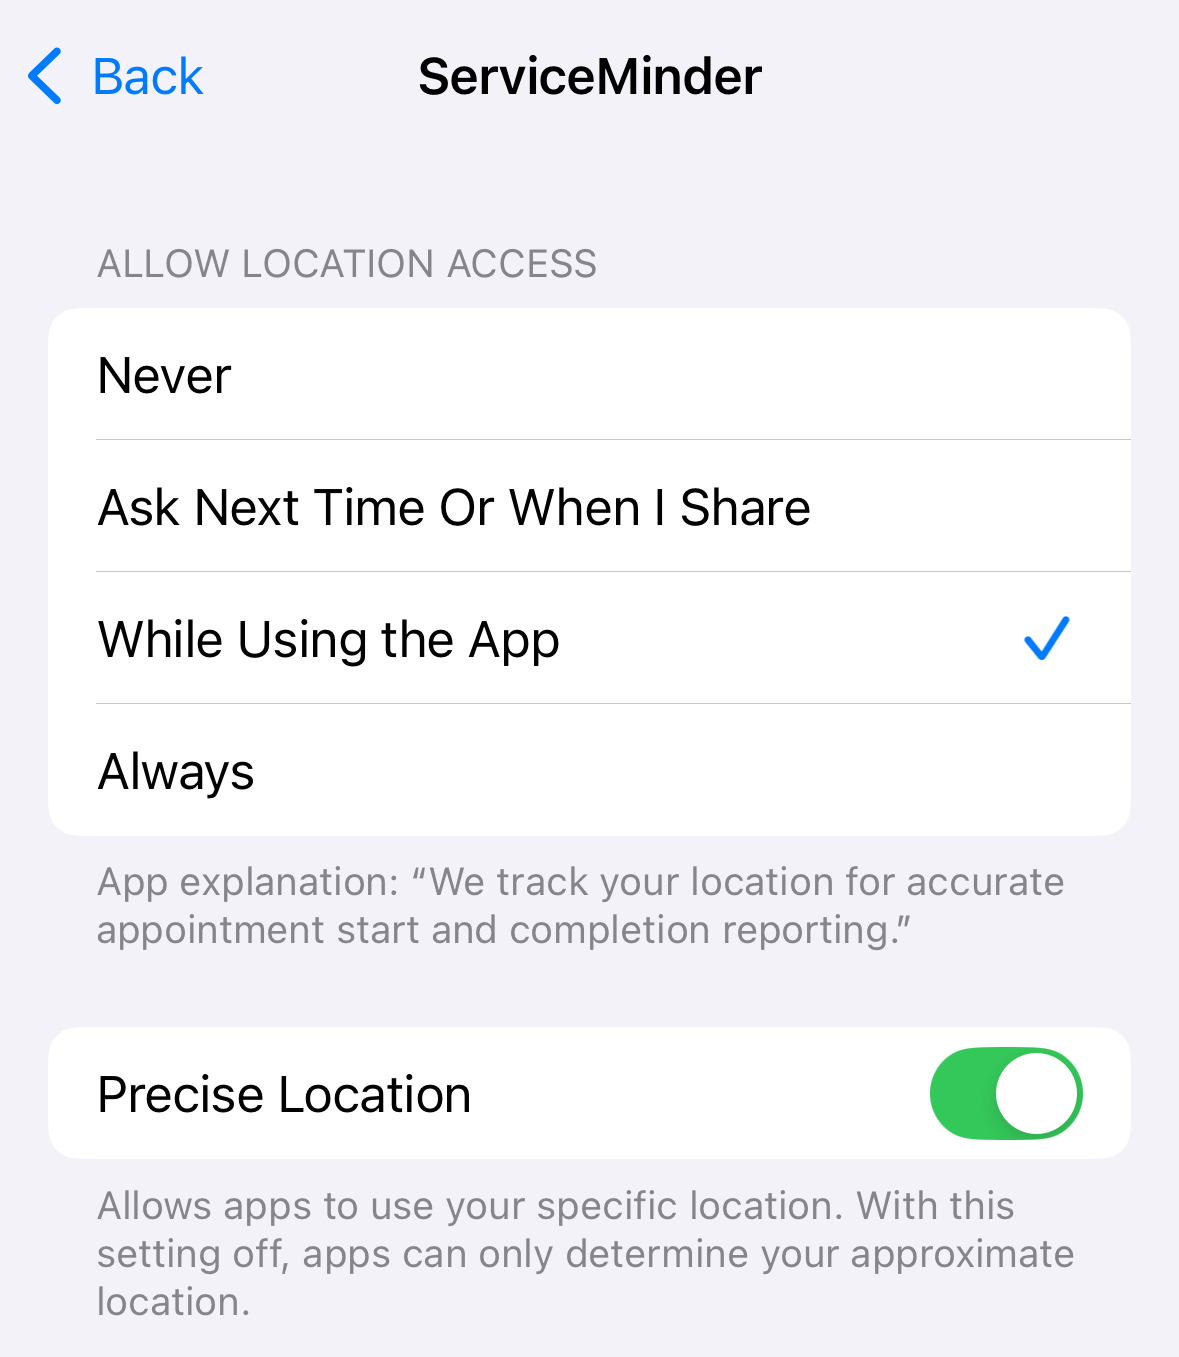
It is vital that you allow the serviceminder app to access your location in order to send En Route notifications. If this is not enabled, the option to send the en route will not be available.
Appointment Confirmations
When scheduling an appointment, there are options at the bottom Schedule and Send or Schedule.

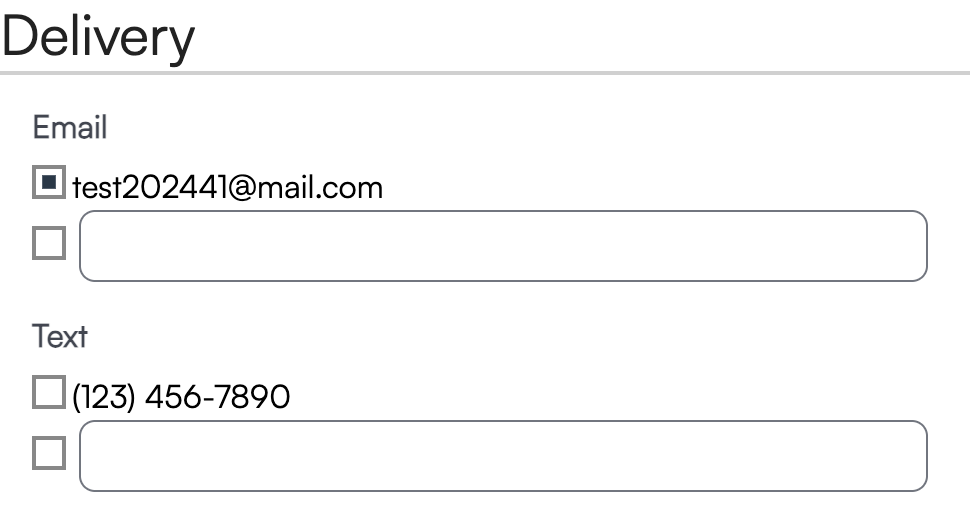
Schedule and Send sends an email or a text message to the customer confirming their appointment, depending on their communication preferences and what you have selected for the Delivery Method when creating the appointment.
To enable these notifications to send, navigate to Control Panel > Notifications > Turn Notifications On/Off and make sure the Appointment Confirmation notification box has to be checked in the Contacts column.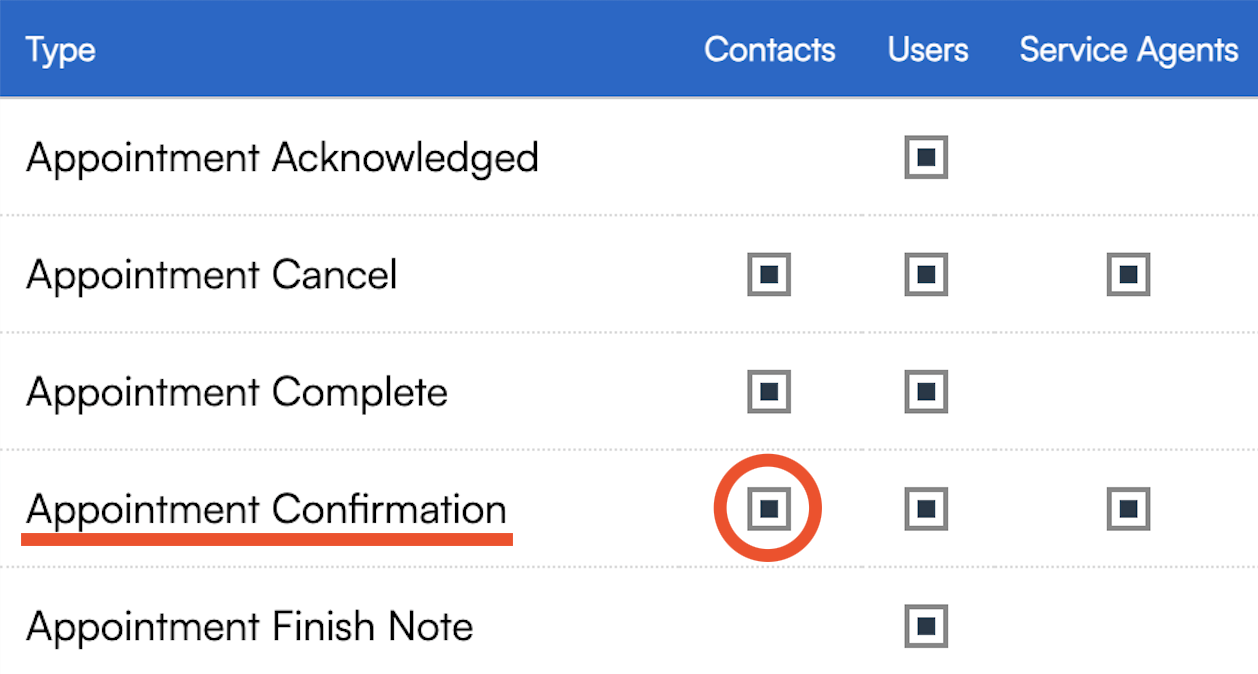
En Routes
En route notifications may be sent when you are on the way to an appointment. If you have en route notifications enabled, you'll be prompted to select how to deliver the en route to the contact. The default value is always set to none to prompt you to get permission from the contact to send them the en route via text message.
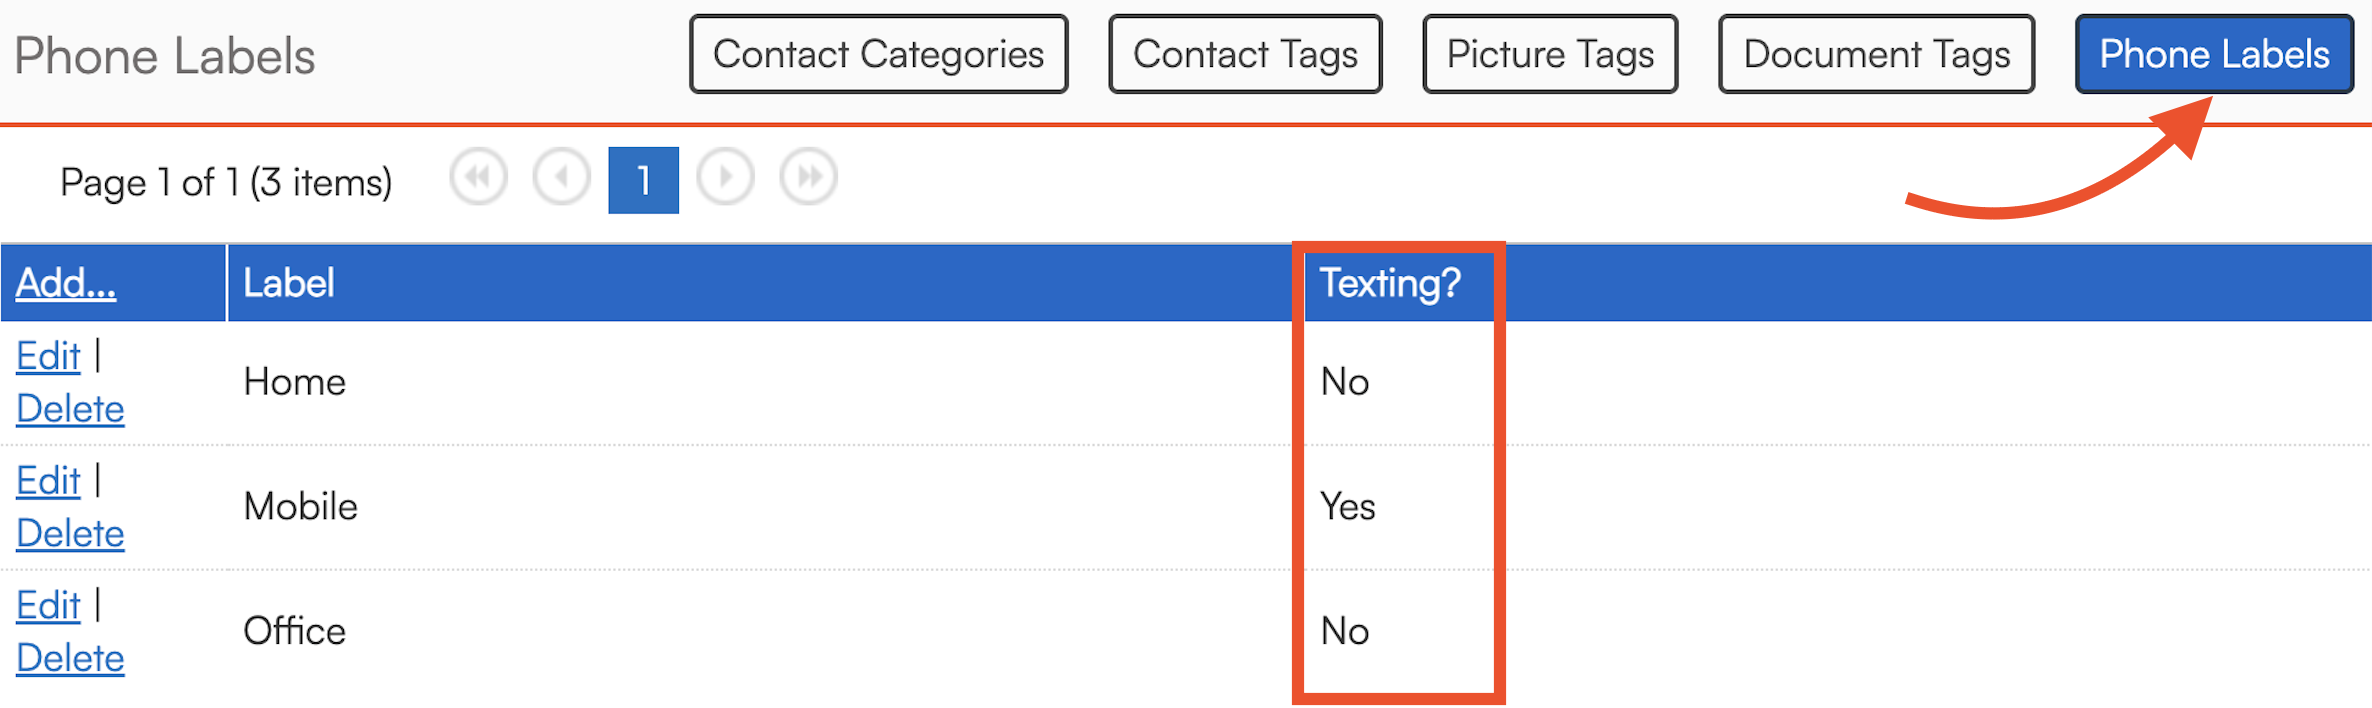
The texting option will be available for any phone numbers either with no Phone Label, or a Phone Label that has the Textable box checked. Phone Labels can be set up in Control Panel > Categories, Tags, and Labels > Phone Labels.
Please note that if your account does NOT have the Two-Way Texting add-on feature enabled, you will be limited to 100 text notifications per billing cycle. To enable Two-Way Texting, visit Control Panel > Account or visit the Marketplace to update your plan.
Triggering En Routes
You can manually trigger en routes from the web by clicking the En Route button on the appointment details page. You can choose where you're departing from (the warehouse) or from a list of common times or enter a specific number of minutes. Once you hit Send, the en route will be sent.
You can also manually trigger en routes in the app by tapping the En Route button (right next to start). The distance/time will be calculated automatically based on the phone's location. The En Route button will only show up if:
- You must have permission to start the appointment (including that the appointment is not yet started).
- You must have location tracking enabled for the app and the app must have a recent location for the phone. You can confirm that the app is tracking your location if you see a "distance from the pin" on the appointment details page. You should also see a Location entry displayed on the About page. Note that when the "distance to the pin" is 0, it will not display (indicating that you are already there).
Default En Routes
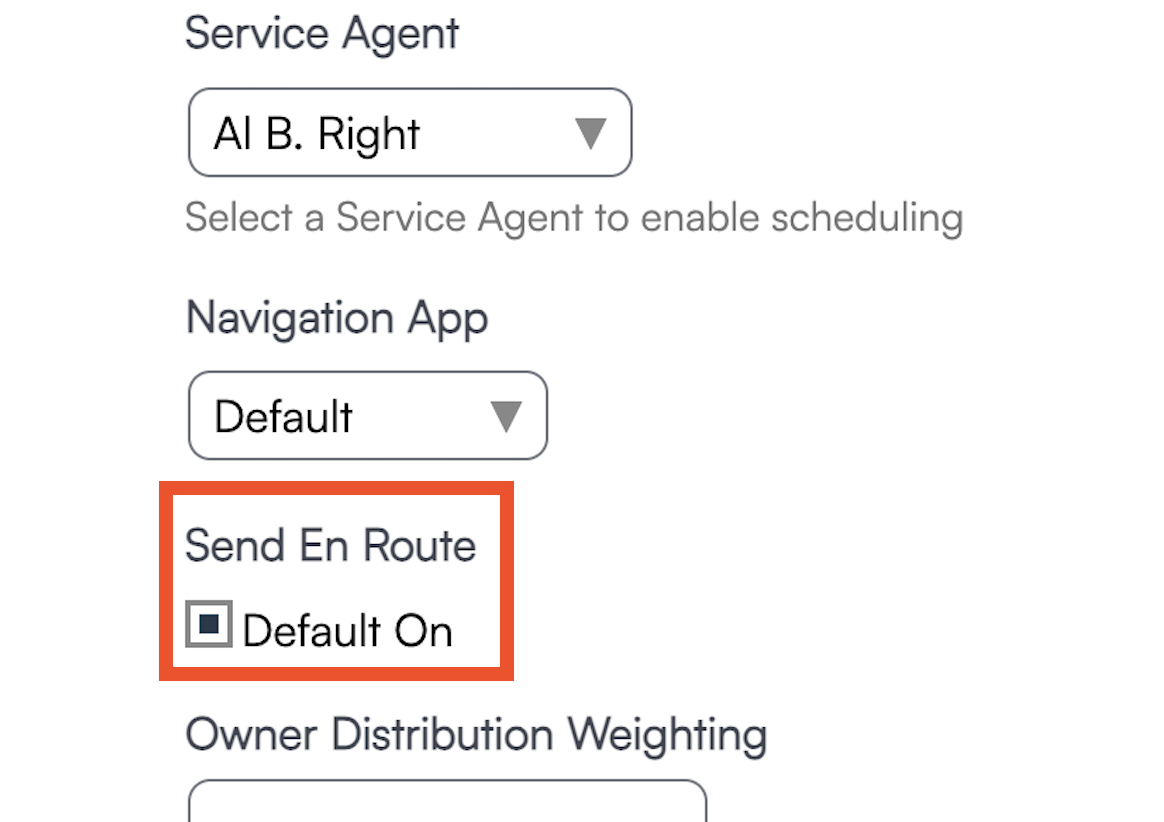
If a User has the Default On box checked for Send En Route, then the en route will send automatically to the next customer on the schedule when the agent finishes the previous appointment.
You can find the default setting under Control Panel > User > Edit User > Settings.
The first appointment of the day will always have to be triggered manually. We don't want the system to assume an agent is on the way to an appointment and send an en route before they are ready!
Confirmation Settings
When creating appointments, there are confirmation settings you can select. The user may have pre-selected this on the proposal, if those options are turned on, but you may also be selecting these for the first time for them.
Confirmations can be sent as email or text, or both, or not sent at all. This is a master setting, but can also be deselected on the appointment if you/the customer do not want those going out for this particular appointment.
On the main contact details page, you can see the Default Confirmation that's set up on the contact at that point, if there is one.
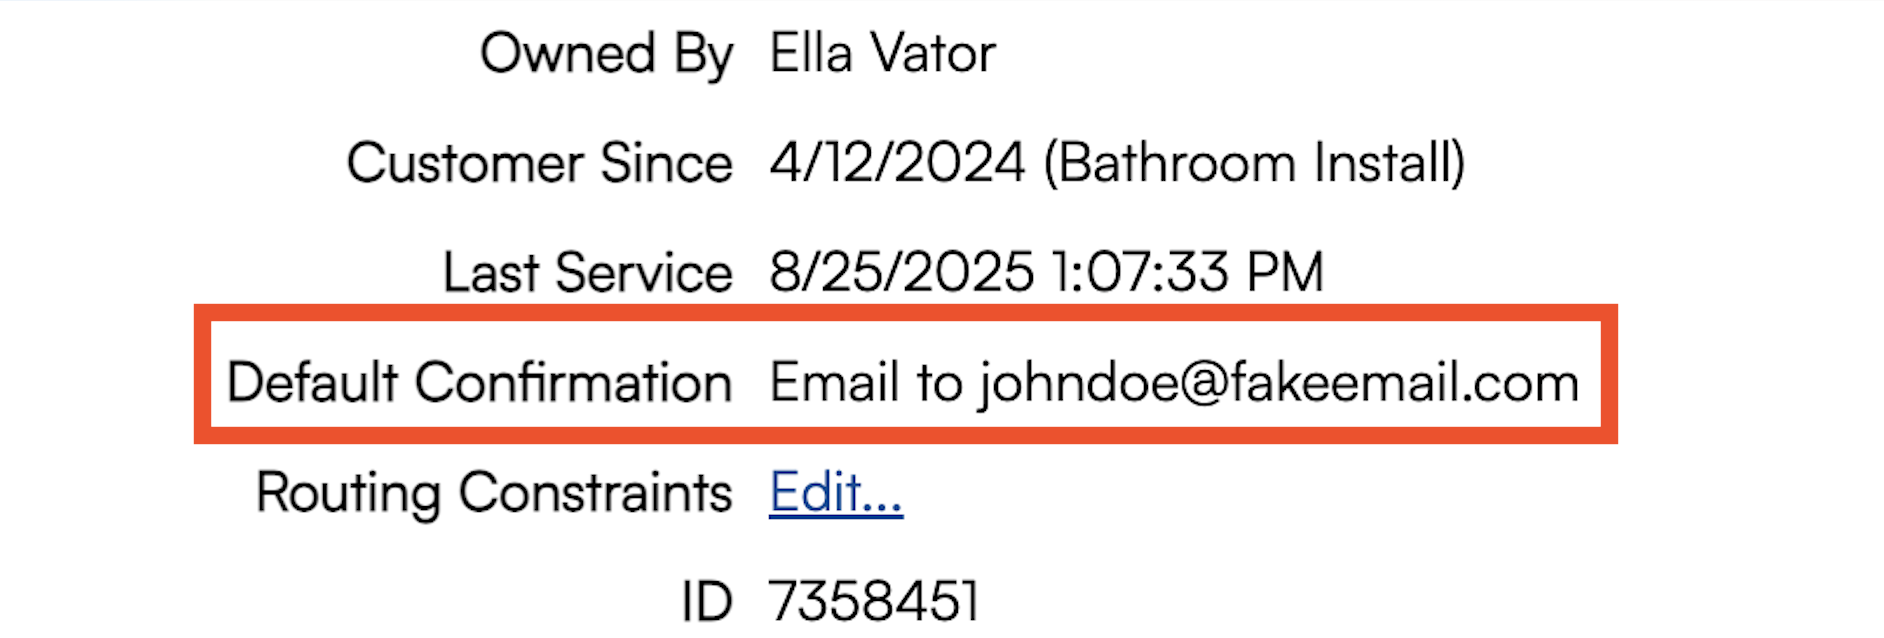
When creating new appointments or proposals, the confirmation settings will be set to that default automatically. If the confirmation is unselected (like no email is checked to send to,) then the default will be to not send a confirmation out going forward.
FAQs
Q: Can I send both email and text notifications to clients? Are they simultaneously sent?
A: Yes, if you have Two Way Texting for your account, you can send both email and text notifications about appointments to customers. It should be simultaneous but this is conditional on the customer agreeing/accepting text notifications from your business.
Q: If text message notifications are only available with the two-way texting feature, how do I get that?
A: For two-way texting, you'll go to the Texting tab in your left sidebar and apply for a phone number. You'll go through the steps and once you're approved, those automated texts will be able to go out, as well as the ability to text back and forth with the customer.
Q: Is it possible to have default settings for scheduling appointments set to en route via text (confirmation via text)?
A: Text Confirmation has to be changed per contact when booking their appointment. We do that to ensure you get permission to send text messages. The fines for unsolicited texts are pretty steep so by not defaulting to that, it helps unsure you got permission. Once you schedule an appointment with text as the en route, future appointments will default to that for that contact.
Does turning off the Default Send not allow that user to manually send an en-route notification from the app?
No, just turning the default send option off for en routes just means that they won't auto send to the next appointment in the schedule. It will not prevent an agent from sending them manually. They still will have the "permission" to send en routes turned on.
How do I check that my en route was sent?
Go to the Contact's timeline to view all interactions including texts and emails.
Why can't I manually send an en route? The button isn't there on the mobile app.
The address cannot be located, which means it isn't geocoded correctly in the serviceminder system. It stops the en route from being sent manually since it won't calculate drive time.
If an address doesn't automatically geocode, you can manually fix it by re-entering the address using the search bar or by using the pencil next to the address on the Contact Details page. That will let you manually drag and drop the pin on the map or you can copy/paste latitude and longitude from Google to get a valid address.
What is the En Route Window?
That setting in Control Panel < Notifications < Settings tab, allows you to designate a frame of time that all en routes will send. If you have 30 minutes in that field and you finish an appointment the system will look for all future appointments within that window. For any that have not had their en route already sent, the notifications will send. It is only going to look at appointments scheduled between the current appointment and the next "window" minutes ahead.
Why isn't my text isn't going through to the contact?
1. The contact may have selected on their personal permissions not to receive texts.
2. You may not have the correct notifications turned on for either the General Notifications or the Appointment Settings.
3. The number attached to their Contact is labeled with a certain phone label that doesn't have texting enabled. For example, a number marked "Mobile" will allow texting but "Home" will not.
Is there a way to keep certain customers from getting automated confirmations for appointments?
No, it is all or nothing.
Will Resend Confirmations will only work for appointments that had automated reminders?
Resend Confirmations will allow you to input a date range and other filters and send confirmation from there. Doesn't matter if they received them before or not, it can be the first time.
If a contact isn't receiving appointment confirmations, there are a few places to check.
1. Is that notification turned on? Check by going to Control Panel > Notifications > Notifications On/Off.
2. Check the contact's Emails tab. Did the email bounce? If so, check the email on the account to verify it is correct.
3. Look at the appointment itself. Was the confirmation selected to send out?
If the email is updated, you will also need to update it on an appointment in order to update the Default Confirmation. Updating the main contact email address will NOT fix the default confirmation, so this step is vital!
