Overview
The Contact Portal serves two functions: allowing customers to view their account information and to self-schedule their appointments. You also have the choice to enable the online account feature while disabling online scheduling features, which would still allow your contacts to view their appointments, proposals, and invoices.
This article will review:
Settings and Navigation
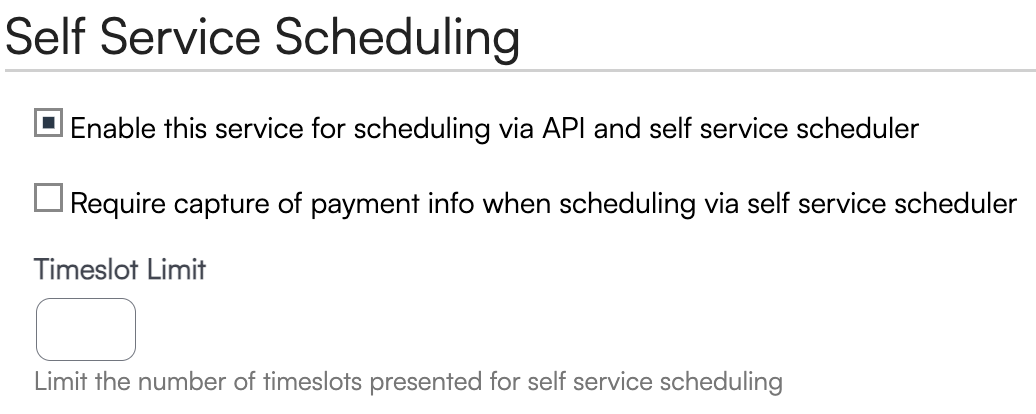
To get started, you need to decide which services, if any, you want to offer for self-scheduling. Common services for self-scheduling include estimates, annual maintenance checks, or system inspections. To enable self-scheduling for a service:
Navigate to Control Panel > Services.
Edit the services you want to offer and check the Enabled checkbox in the Self-Service Scheduling section for each service..
Next, you’ll need to enable the Contact Portal:
Go to Control Panel > Scheduling.
Scroll down to the Online Scheduling section.
Check the Account Creation box to allow contacts to create accounts.
If you want customers to be able to schedule appointments, also check the Online Scheduling box.
You can enable the Account Creation option by itself if you would like your customers to have the ability view invoices, make payments, and check appointments but not schedule appointments.
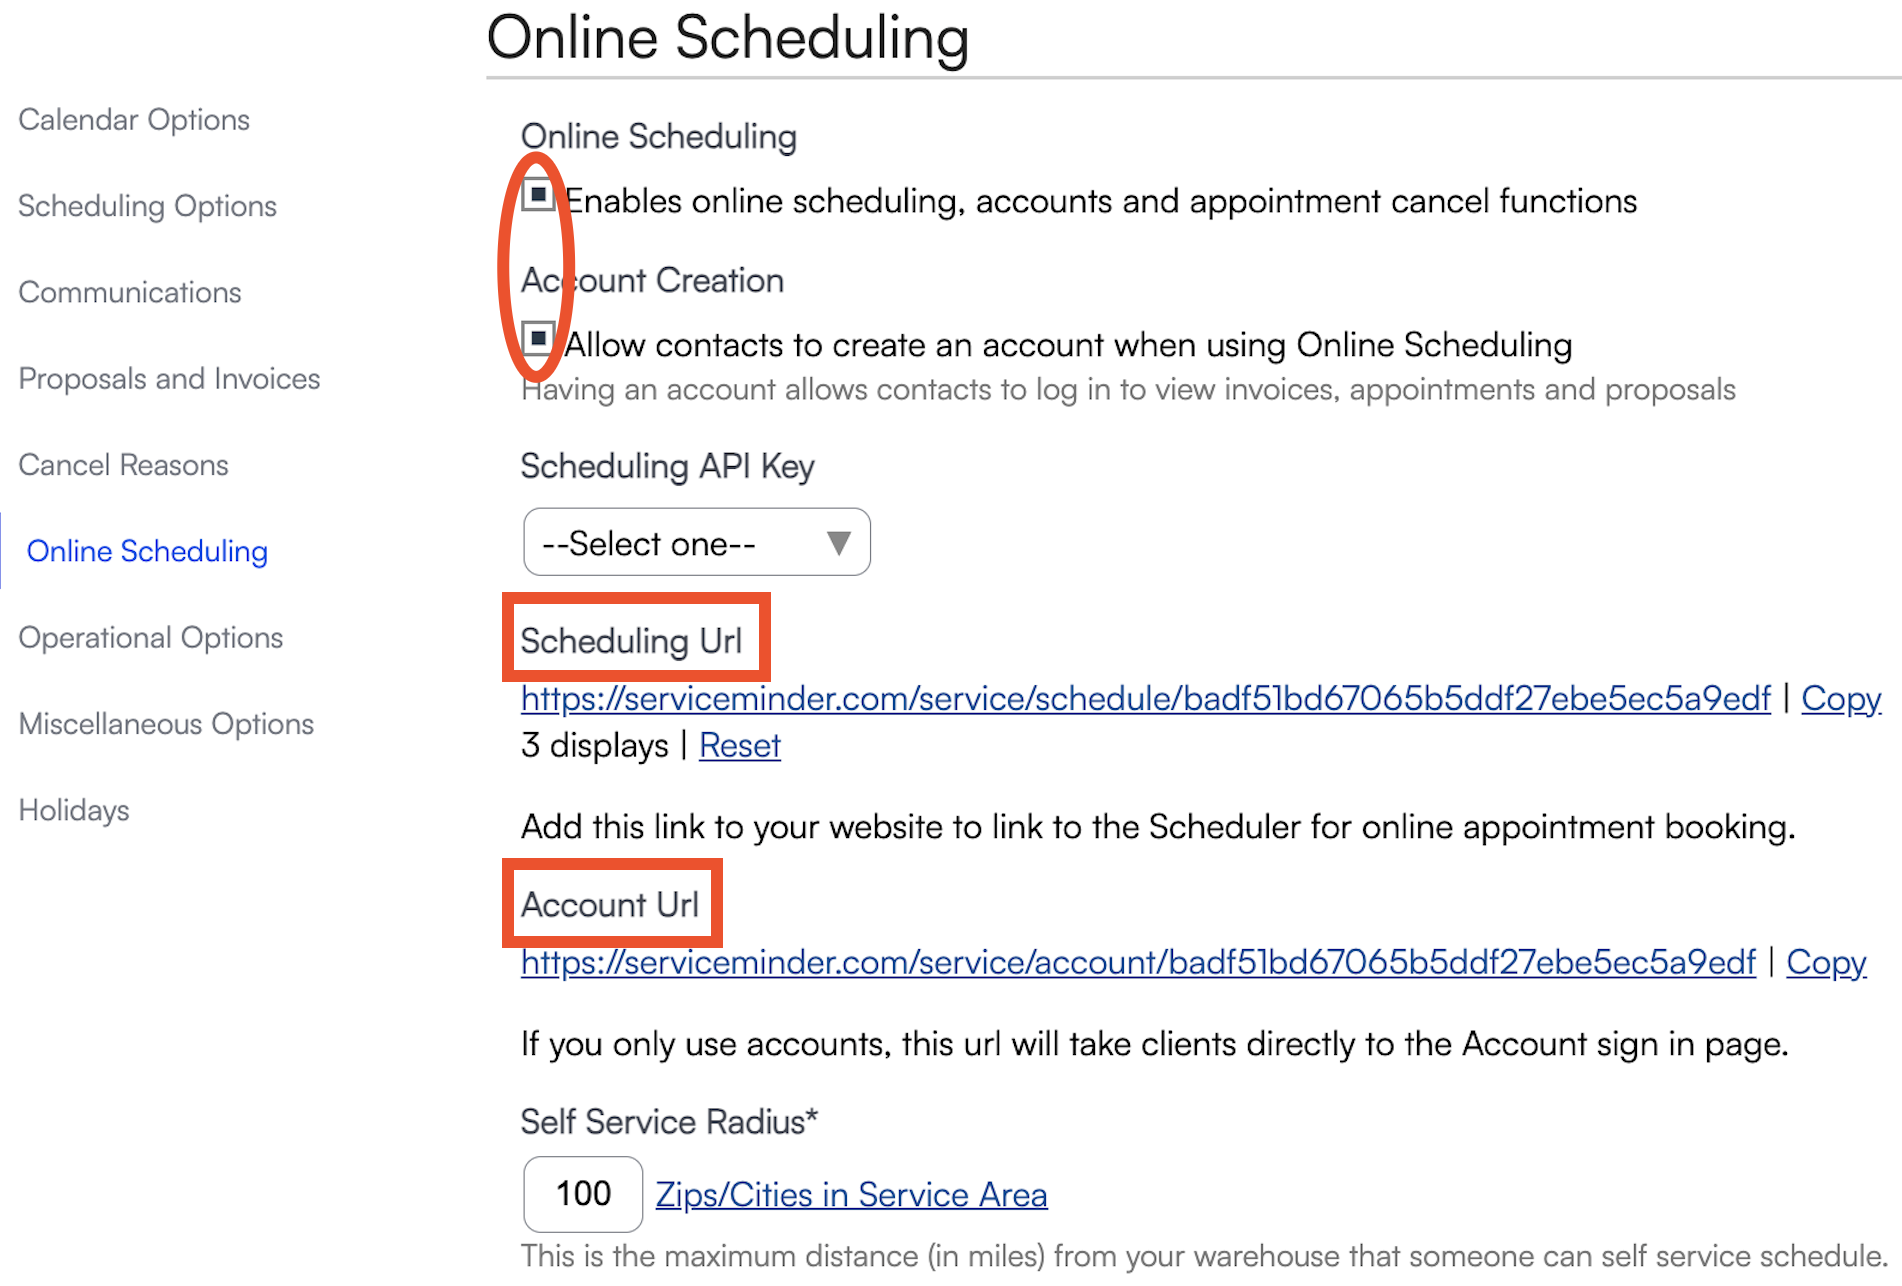
To add the online scheduler link to your website, click Copy Link and embed it on your site. Customers clicking the link will be directed to the scheduler to make appointments.
Once enabled, you can preview how the portal will look to customers by clicking the link. The top portion of the online scheduler allows users to select from available services.

Customers will be asked to enter their contact information in order to proceed and view your available services. This will generate a contact in the serviceminder system, allowing you to follow up with prospects who do not complete the booking process.
Further settings below the URLs allow you to configure details like scheduling radius and cancellation policies.
- Self Service Radius: The maximum distance (in miles) from your warehouse that someone can schedule a service using the online scheduler.
- Show Team Slots Only: Only show Team time slots and not individual agent time slots when scheduling online.
- Exclude Internally: Hides Self Service services from the dropdown menu when creating appointments or proposals internally.
- Self Service Phone: Set an alternative phone number to display on the self service scheduler page.
- Hide Queued Appointments: If a contact creates an account, they can view the dates of their appointments. Check this to prevent them from seeing queued appointments.
- Confirmation Redirect URL: Redirects to this URL upon completion. Supports any appointment shortcodes.
- Contact Me Redirect URL: Redirects to this URL when contact requests to be contacted for scheduling options.
- Custom Fields: Allows you to add Custom Fields to the online scheduler to gather additional customer information or apply custom pricing bands. Learn more about custom fields.
- Proposal Templates: Provide pre-built packages that customers can choose from when self-scheduling an appointment. Learn more about proposal templates.

Slot Searching
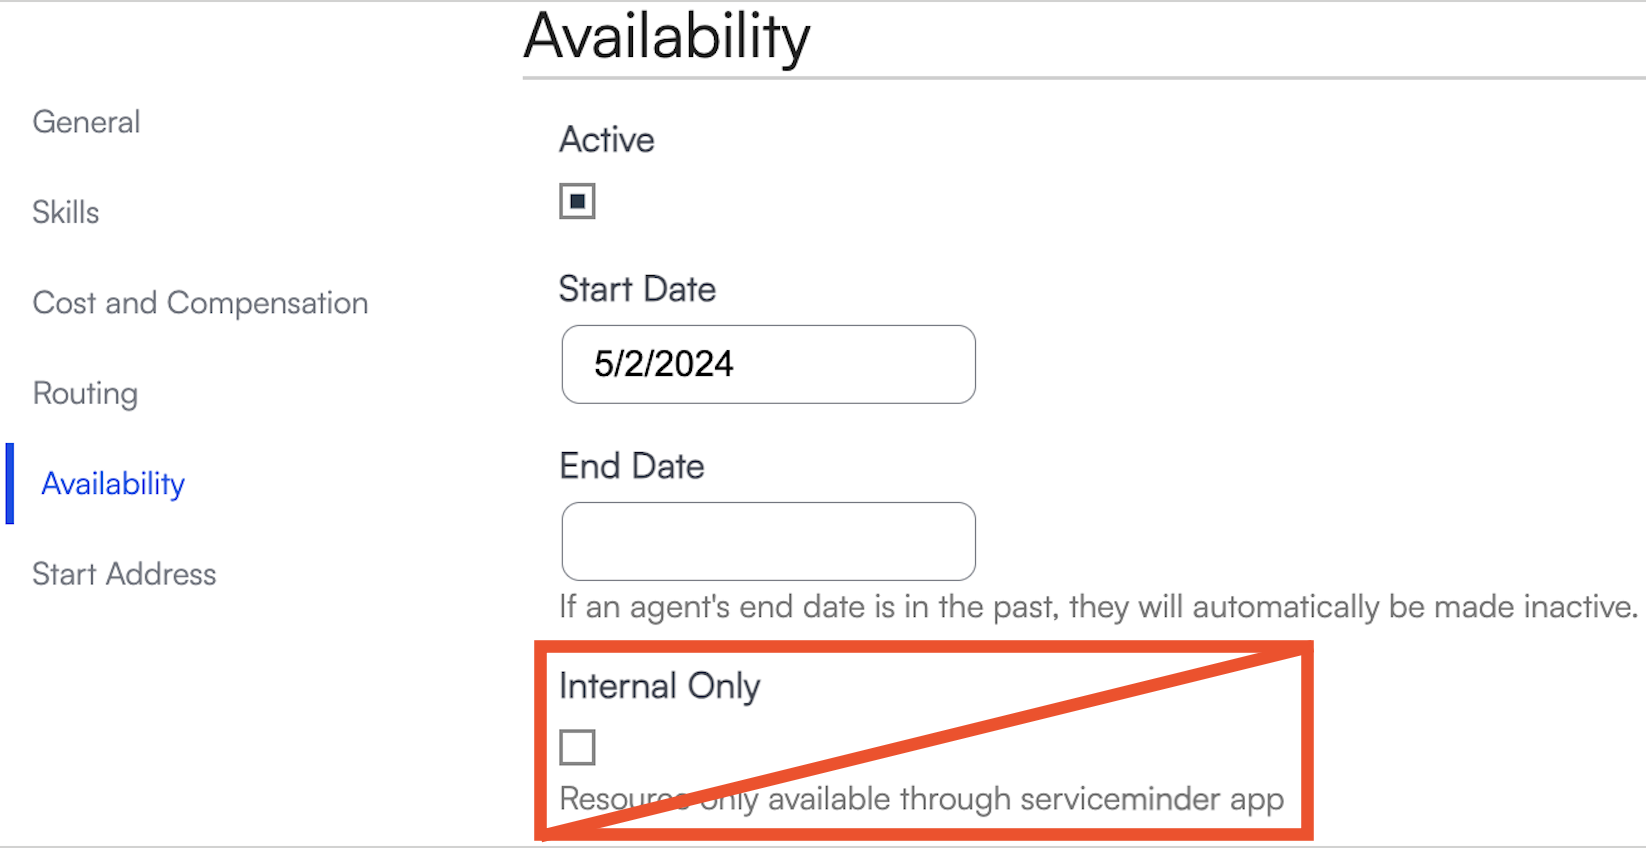
For the self-scheduling feature to work, service agents must have scheduled availability and must not be marked as Internal Only. If all agents are marked as "Internal Only," no available slots will appear in the self-service scheduler.
Tracking Leads
Tracking which campaigns generate the most revenue is essential for refining your marketing strategy. The online scheduler supports Channel and Campaign tracking, enabling detailed performance analysis.
Your scheduler URL can include two parameters: channel and campaign. For example:
https://serviceminder.io/service/*unique-id*?channel=*channel-id*&campaign=*campaign-id*
When included in the URL, these parameters help attribute lead sources to specific campaigns, even for contacts who do not schedule an appointment. You can then use the Lead Source Revenue Report to measure the success of various campaigns.
Learn more about Channels, Campaigns, and Revenue Forecasting.
How to Track Leads
There are three primary ways to track leads from the Contact Portal:
Default Online Scheduling Link: This will use the settings defined in Control Panel > General. Learn more at General Settings.
API Key Link: This uses the settings from the chosen API key (if present), or defaults to what's set in General.
Custom URL: You can manually append Channel and Campaign parameters to the URL. This is not recommended unless you have a web team handling redirects and tracking.
Using an API key is the most effective method to track and customize leads from your scheduler. More on this below.
Using an API Key
The online scheduler allows you to add API keys, which offer several benefits:
- Contacts and appointments created via the scheduler are tagged with the API key for easier tracking.
- You can differentiate performance across different sources by using unique API keys (e.g., one for your website, another for a digital ad campaign).
- API keys automatically apply the specified Channel and Campaign to new contacts and appointments.
To set up:
1. Create an API key in Control Panel > API Keys (Learn more about that process HERE).
2. Go to Control Panel > Scheduling, and in the Scheduling API Key dropdown, select your API key.
3. Copy the new Scheduling URL that populates.
Important: Do NOT click Save immediately. Instead, copy the new URL, which will include the unique API key at the end. This URL can now be used for scheduling links on emails, websites, etc.
The API key allows you to track leads from specific campaigns, helping you measure the effectiveness of different marketing channels.
FAQs
How do I get the online appointment scheduler to show something other than the first available slot?
In Control Panel > Scheduling, look for Open Time Granularity. If left blank, it defaults to showing the first available slot. Setting it to an hourly or custom interval will allow customers to choose specific timeslots, and this setting will apply across all appointments.
Can a contact reschedule an appointment via the self-scheduler?
No, contacts cannot reschedule once an appointment is made. They would need to call the office (or a specific scheduling number) to reschedule.
How will I know if an appointment was scheduled via the online portal?
Appointments scheduled through the portal will appear immediately on the calendar, and both the customer and the office will receive automated notifications.
What if I have a large territory and want to limit how far agents travel?
In Control Panel > Scheduling, you can set a territory radius to limit scheduling. For example, if you set a 30-mile radius, customers outside of that area will be prompted to contact the office directly.
What are the steps for setting up the portal in my organization?
1. Control Panel > Scheduling: Check the Online Scheduling box and get the scheduler URL. You can email this to contacts or add it to your website.
2. Control Panel > Services: Edit services to enable Self Scheduling.
3. Control Panel > Service Agents: Ensure agents are available for scheduling by unchecking Internal Only for agents you want to appear in the portal.
Do we need to enable both Online Scheduling and Account Creation?
They are separate features but often enabled together. Account Creation allows customers to view their past appointments and invoices. Online Scheduling lets customers book appointments, either with or without an account. Both features can be used independently, but using both streamlines the scheduling experience.
What can a contact (customer) do without requiring a portal login?
Contacts can perform several actions without a contact portal account. All of the following items are accessed via a link that is sent to them via email or text.
- Schedule services (if you have self-scheduling enabled)
- View and accept Proposals
- View and pay Invoices
- Update a card on file after a failed payment
- Confirm an appointment
- View "real time status" of an appointment (i.e., current ETA, how many stops ahead of them)
- Leave tips
- Update communication preferences
- Review appointment reports sent to them
