Overview
Parts are the building blocks of an appointment. They represent the items, materials, or processes involved in a given service. On invoices, each part appears as a separate line item. Since every company defines and uses parts differently, serviceminder offers flexibility to match your workflow.
This article will review:
Video Tutorial
Settings and Navigation
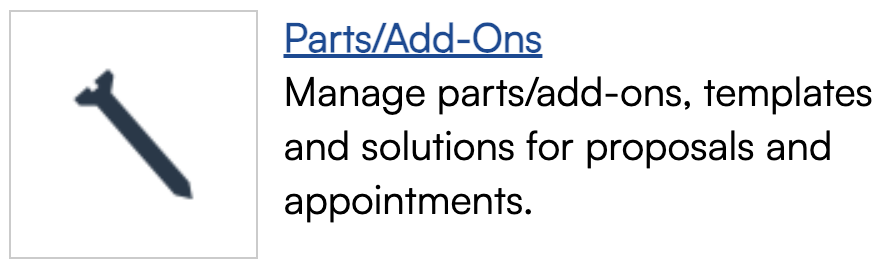
To create and edit Parts, navigate to Control Panel > Parts/Add-Ons.
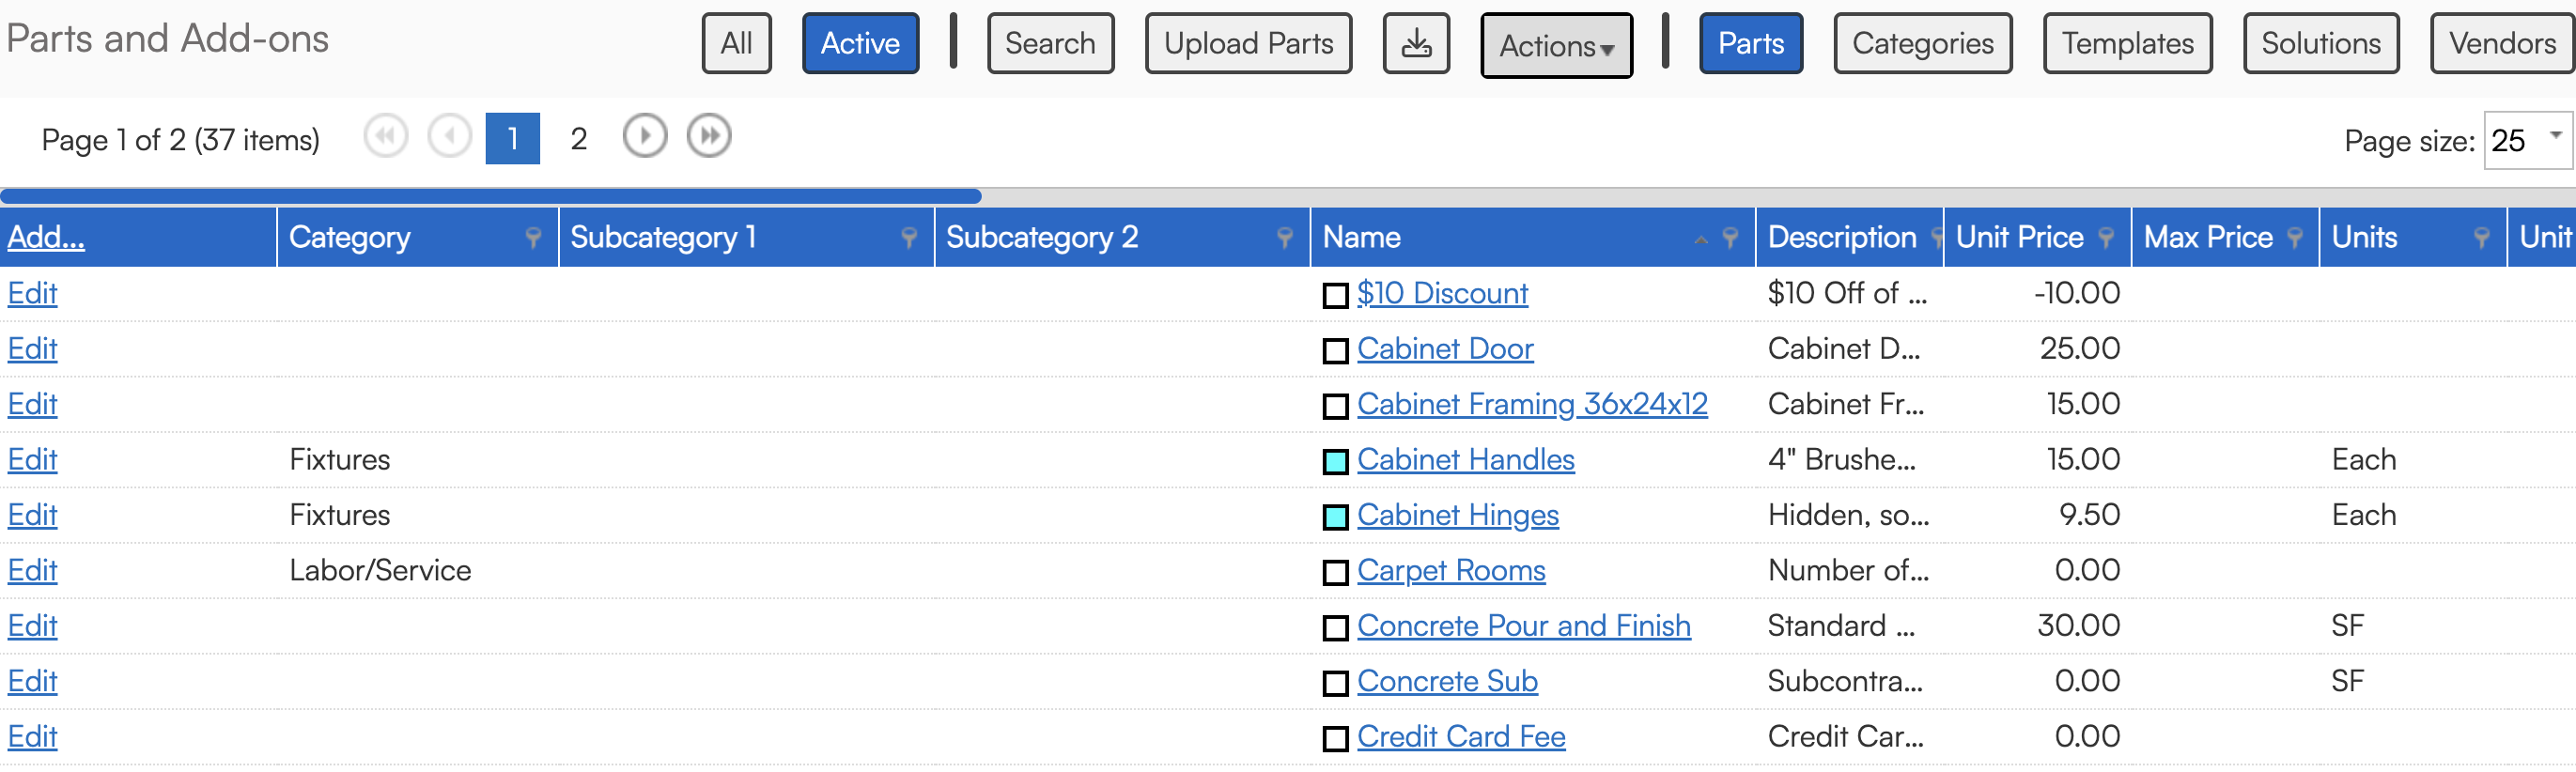
In Parts/Add-Ons, you will find the Parts Grid.
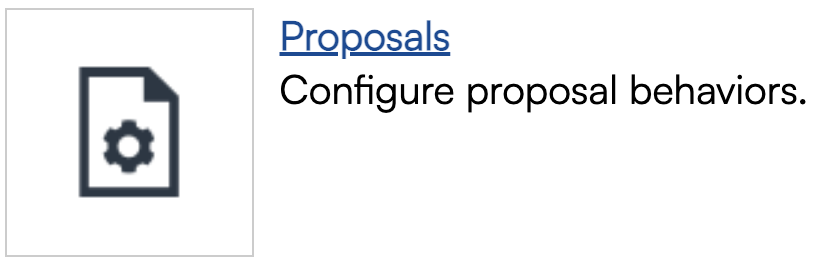
Go to Control Panel > Proposals to find some additional settings related to Parts.
In Proposals Settings, you can increase the length of descriptions shown for parts and services on your invoices by enabling Long Line Descriptions to increase the character maximum to 2048.

Only Users with the correct level of permissions can access these areas of serviceminder. To manage User settings go to Control Panel > Users > Edit and grant/deny Permissions.
Parts Grid
The Parts Grid page shows you all parts in list format. You can filter by All or just your Active parts (meaning that Inactive parts will not show in this view).
You can also Search or Download (look for the download arrow icon next to Actions) and Upload a list of parts if you choose to make bulk changes.
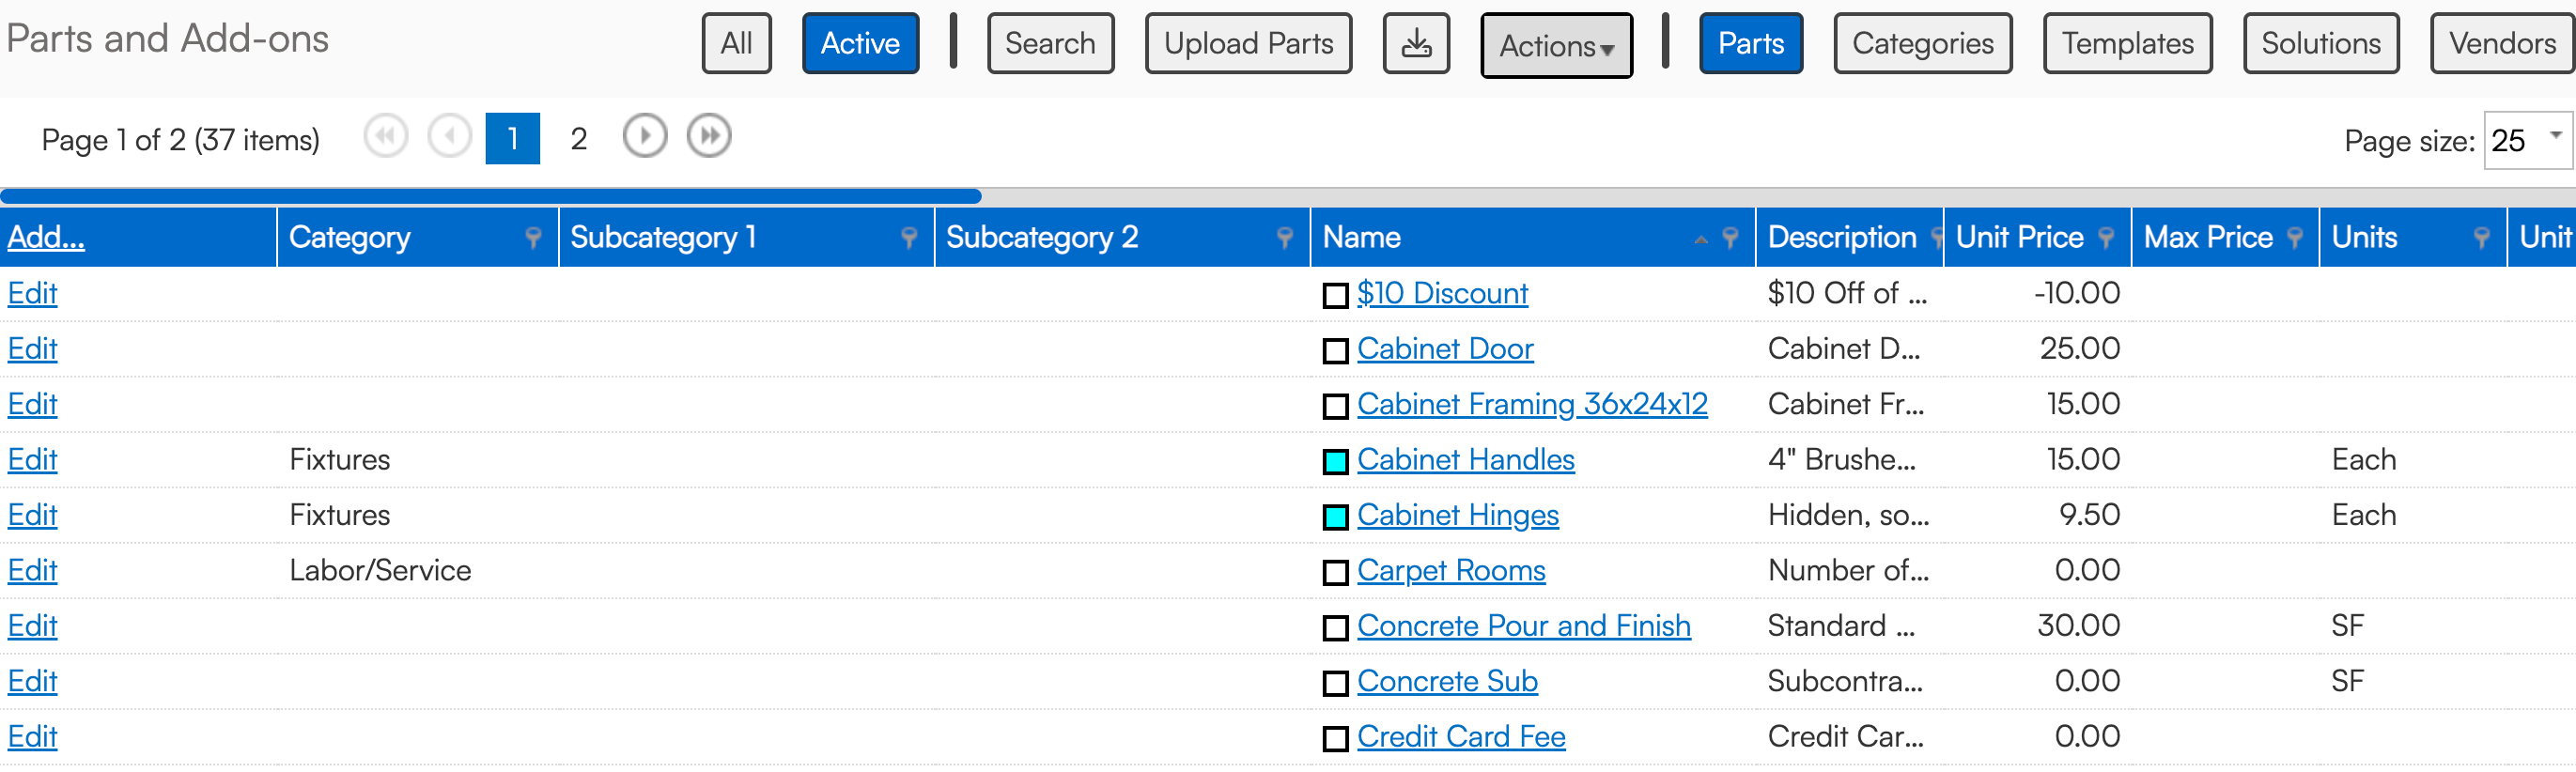
Actions Button
There are two options when you click on Actions.
- Clean Up - this will allow you to disable or delete your unused parts. This includes all parts that are not used in any invoices or proposals.

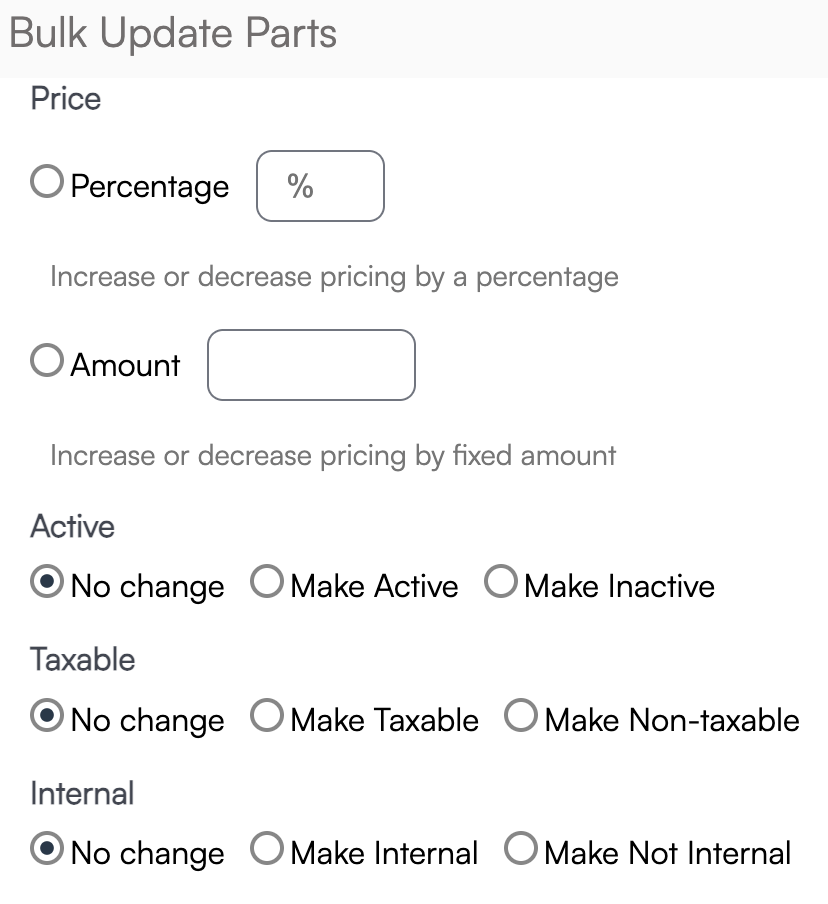
- Update - this is a Bulk update option, so you can quickly adjust price based on a set dollar value or percentage. You can also bulk update all parts to be taxable, internal, or active/inactive.


Download and Upload Parts
Download: Click the download button to export your parts list. The file is formatted for re-upload with no changes required.
Upload: You can upload edited spreadsheets, but keep these rules in mind:
- File must be saved as a .CSV.
- No blank rows or columns.
- Column headers must match serviceminder’s format.
If you do receive errors, just adjust the spreadsheet accordingly and try to re-upload. The system will give you a success message if it has gone through correctly.
If you are still experiencing issues, email support@serviceminder.zendesk.com and attach the spreadsheet that you want to upload.
Parts Details Page
Clicking on THE NAME of the part will take you to the Parts Details page.
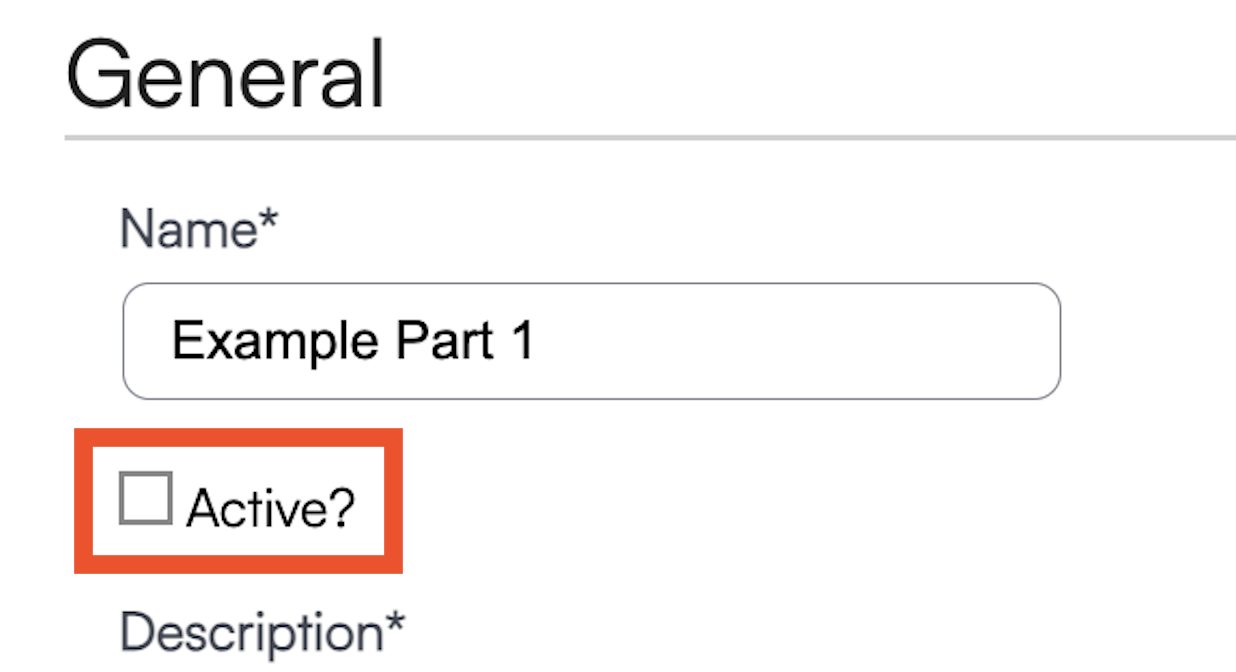
Clicking EDIT next to the part name will take you to the configuration settings for that part. Learn more about Part Settings.
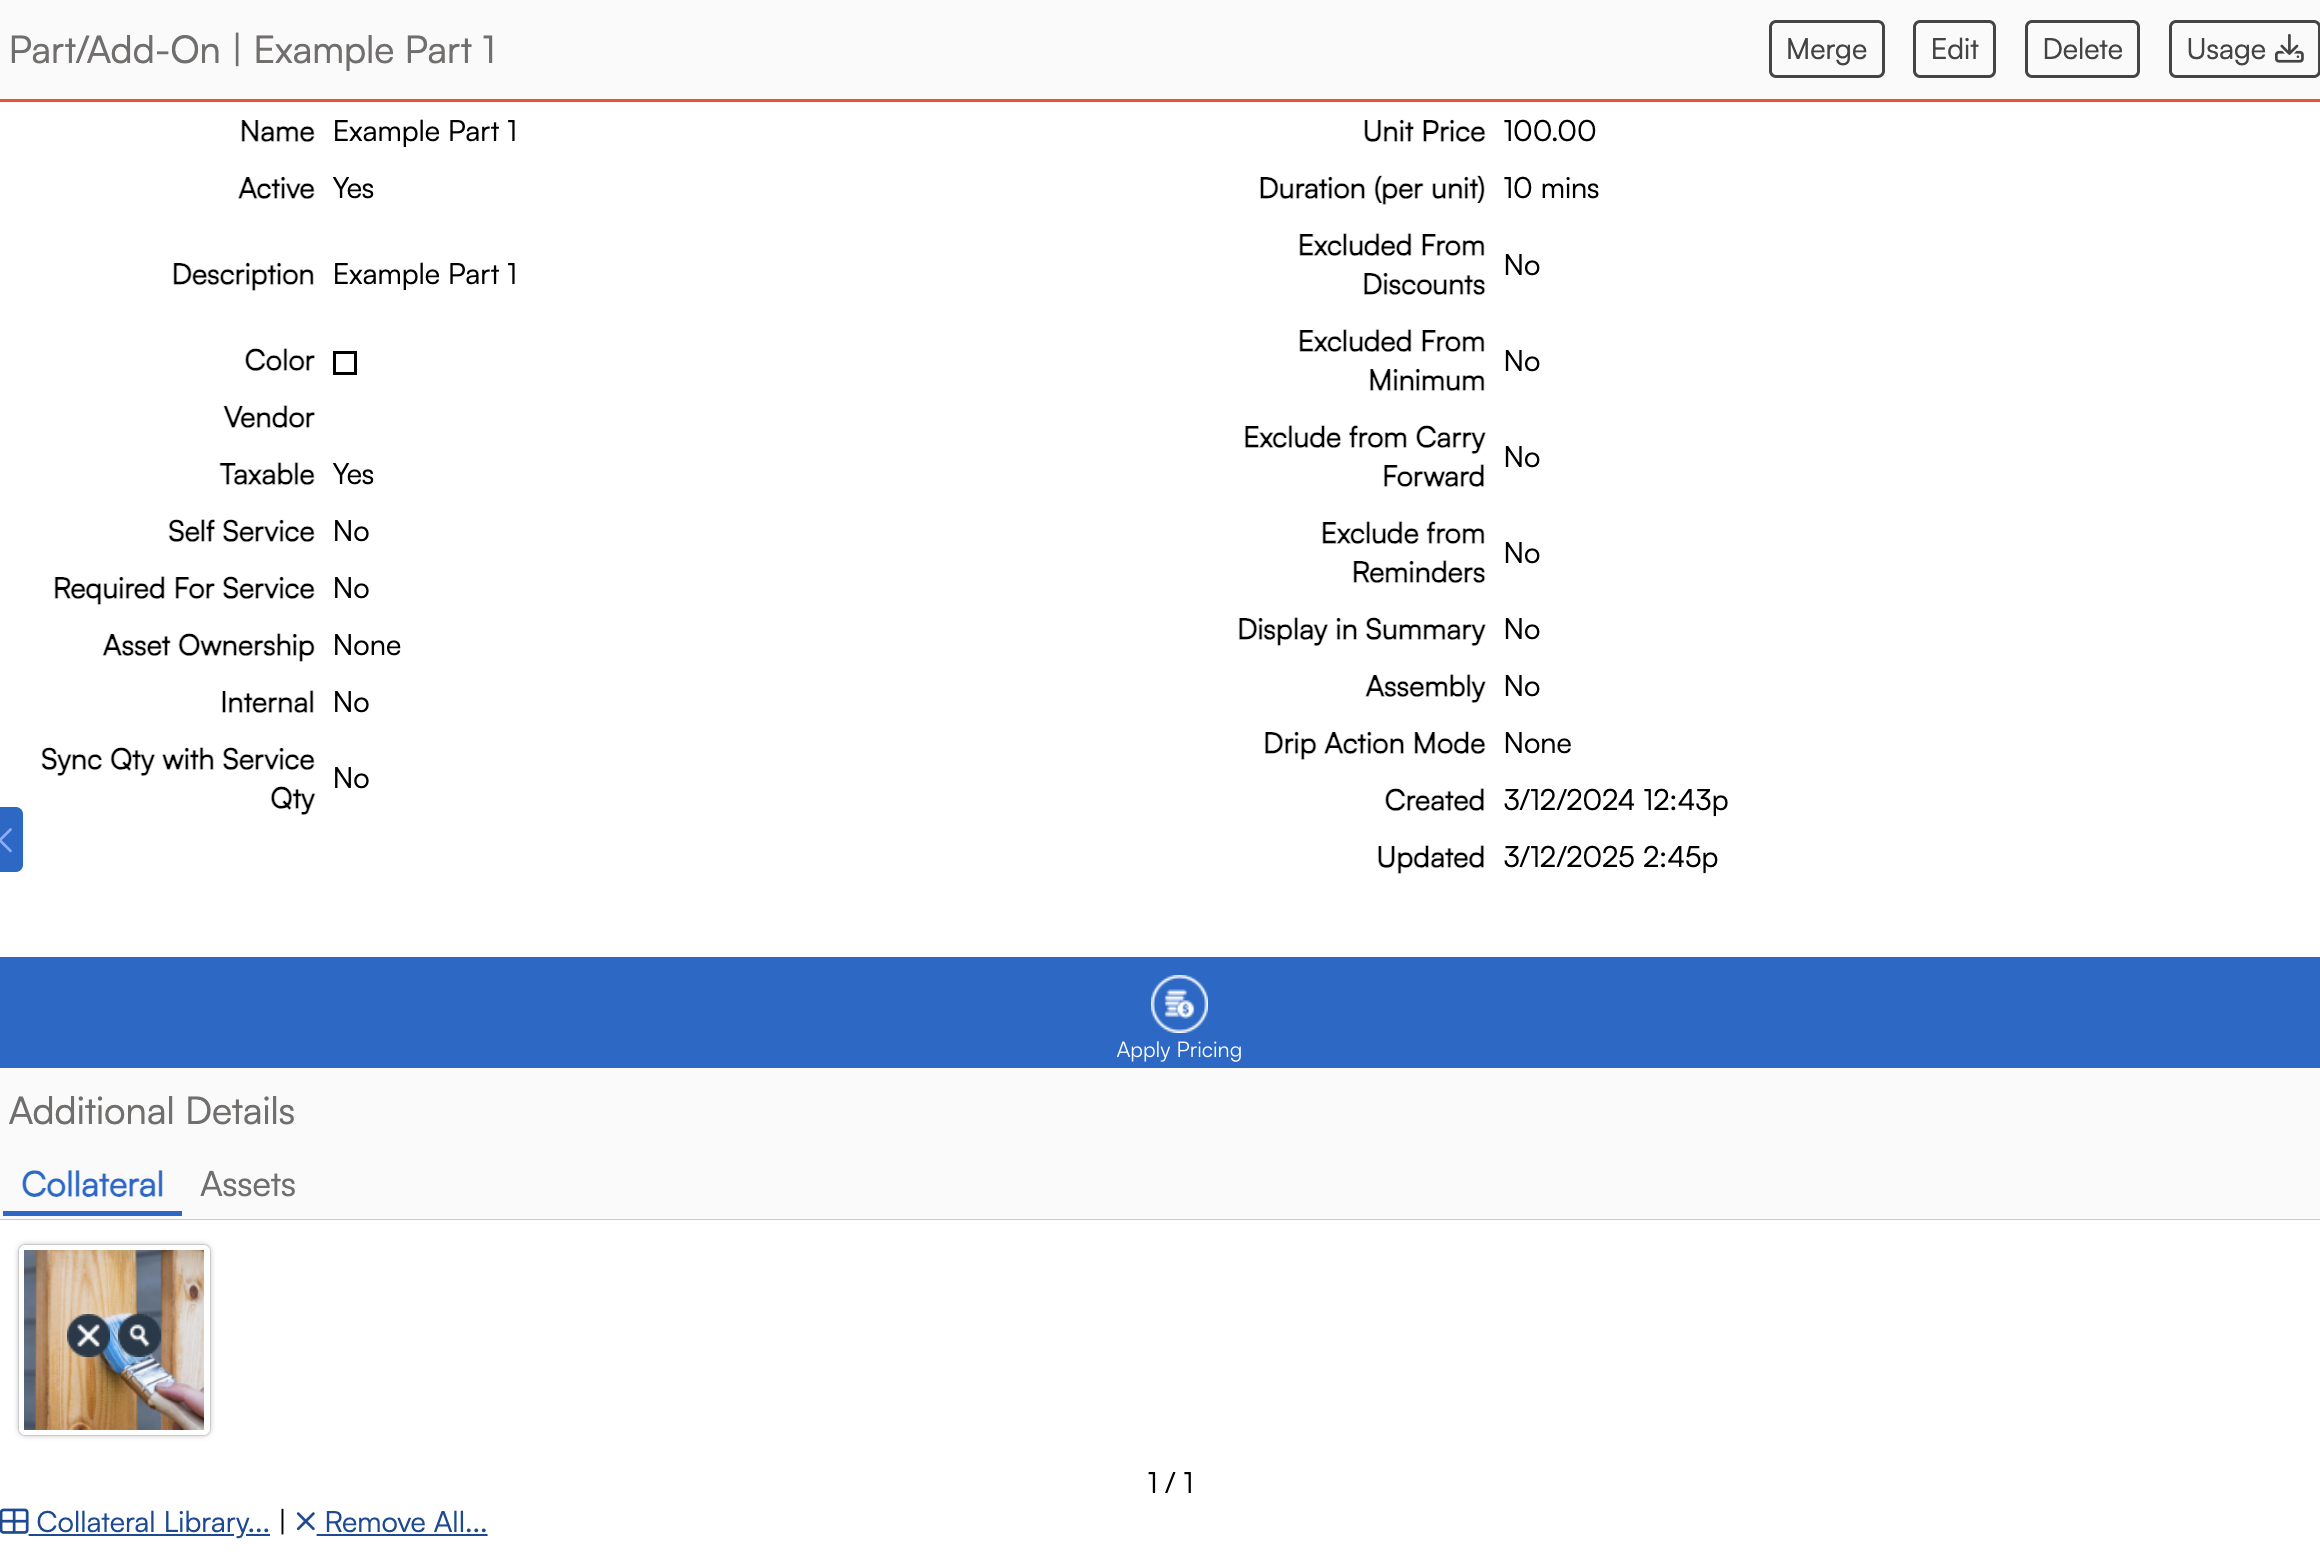
Clicking on Usage at the top will download a .csv report of where that part is used.
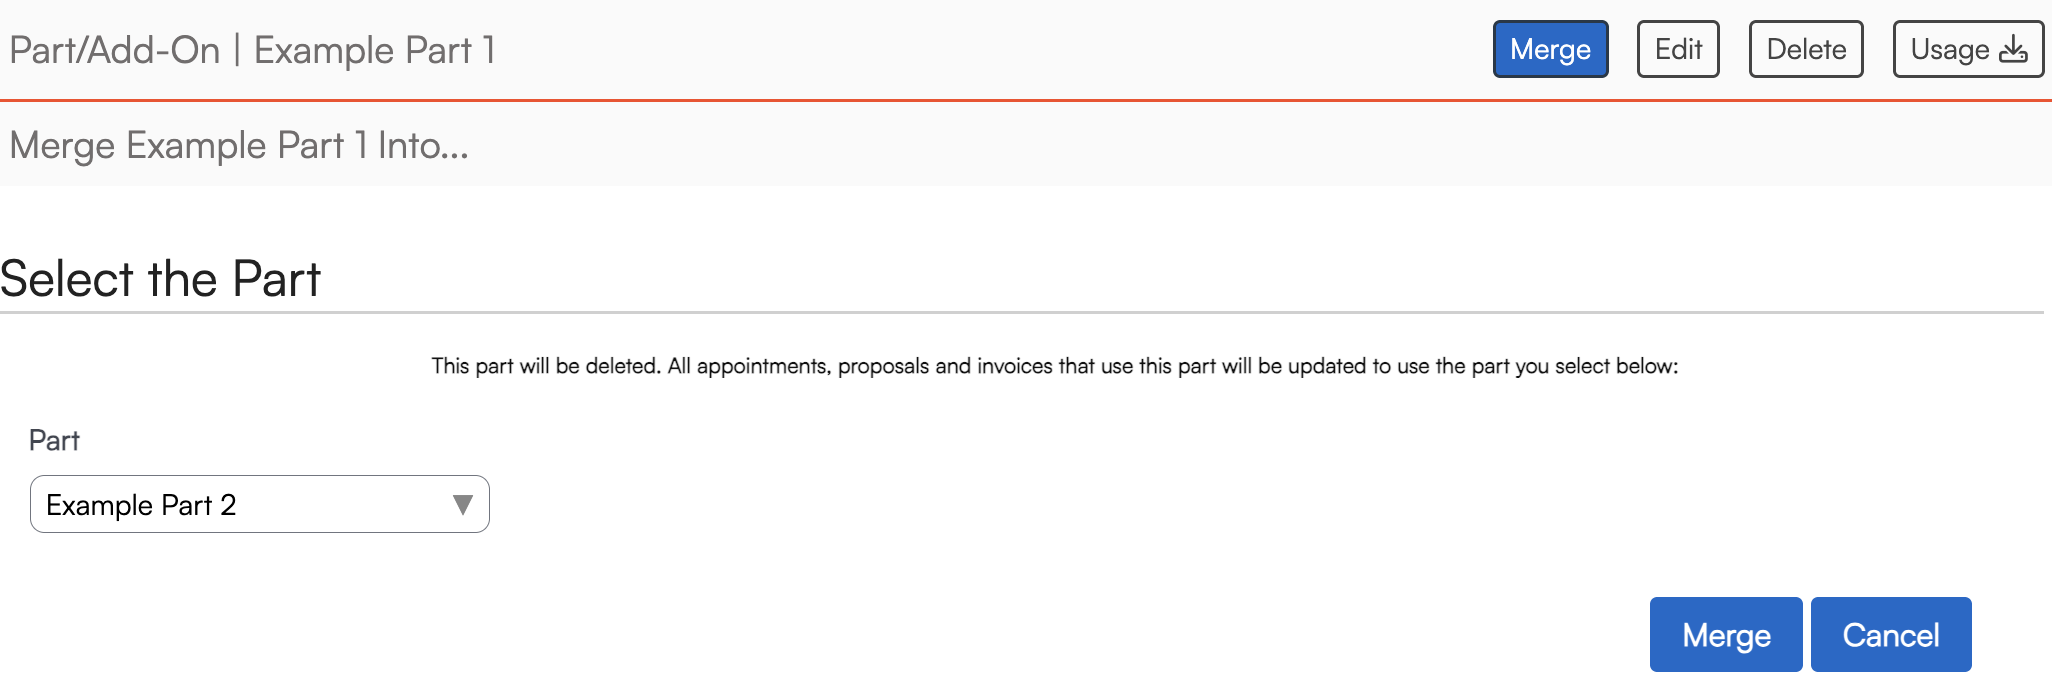
Merge allows you to combine this part into another. This part will be deleted and all appointments, proposals and invoices that use this part will be updated to use the part you select in the dropdown menu.
Hide Part Pricing
There are two ways to do this:
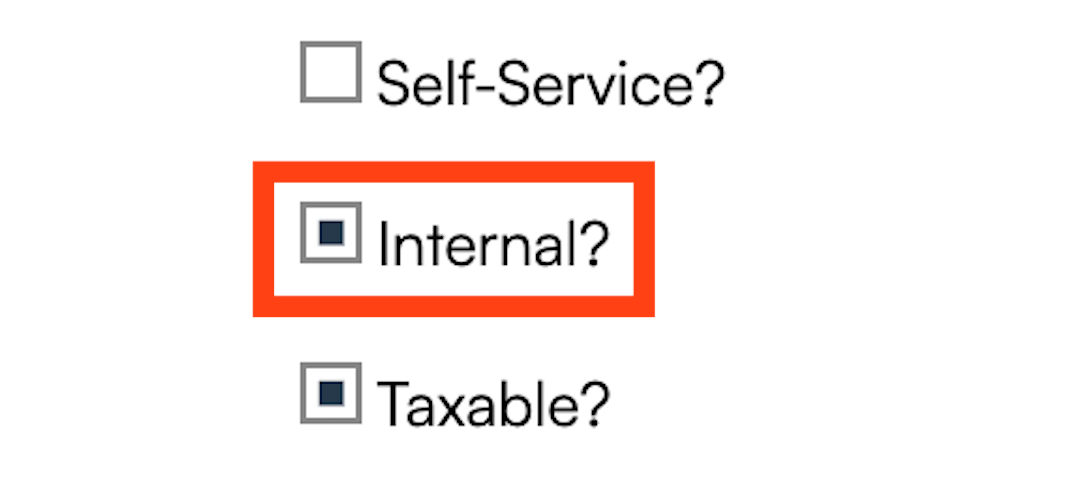
1. Set it at the Part level (Control Panel > Parts and Add-Ons > Edit). Check the Internal box so that the pricing does not show on the customer view. The pricing will roll up to the Service line, rather than part-by-part cost.
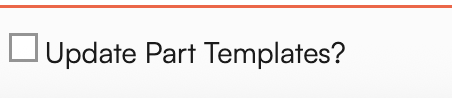
If the part belongs to a template and you make a change, be sure to check the Update Part Templates box at the very bottom of the screen to update all templates associated with that part. Otherwise, it will not be consistent across all proposals and invoices.
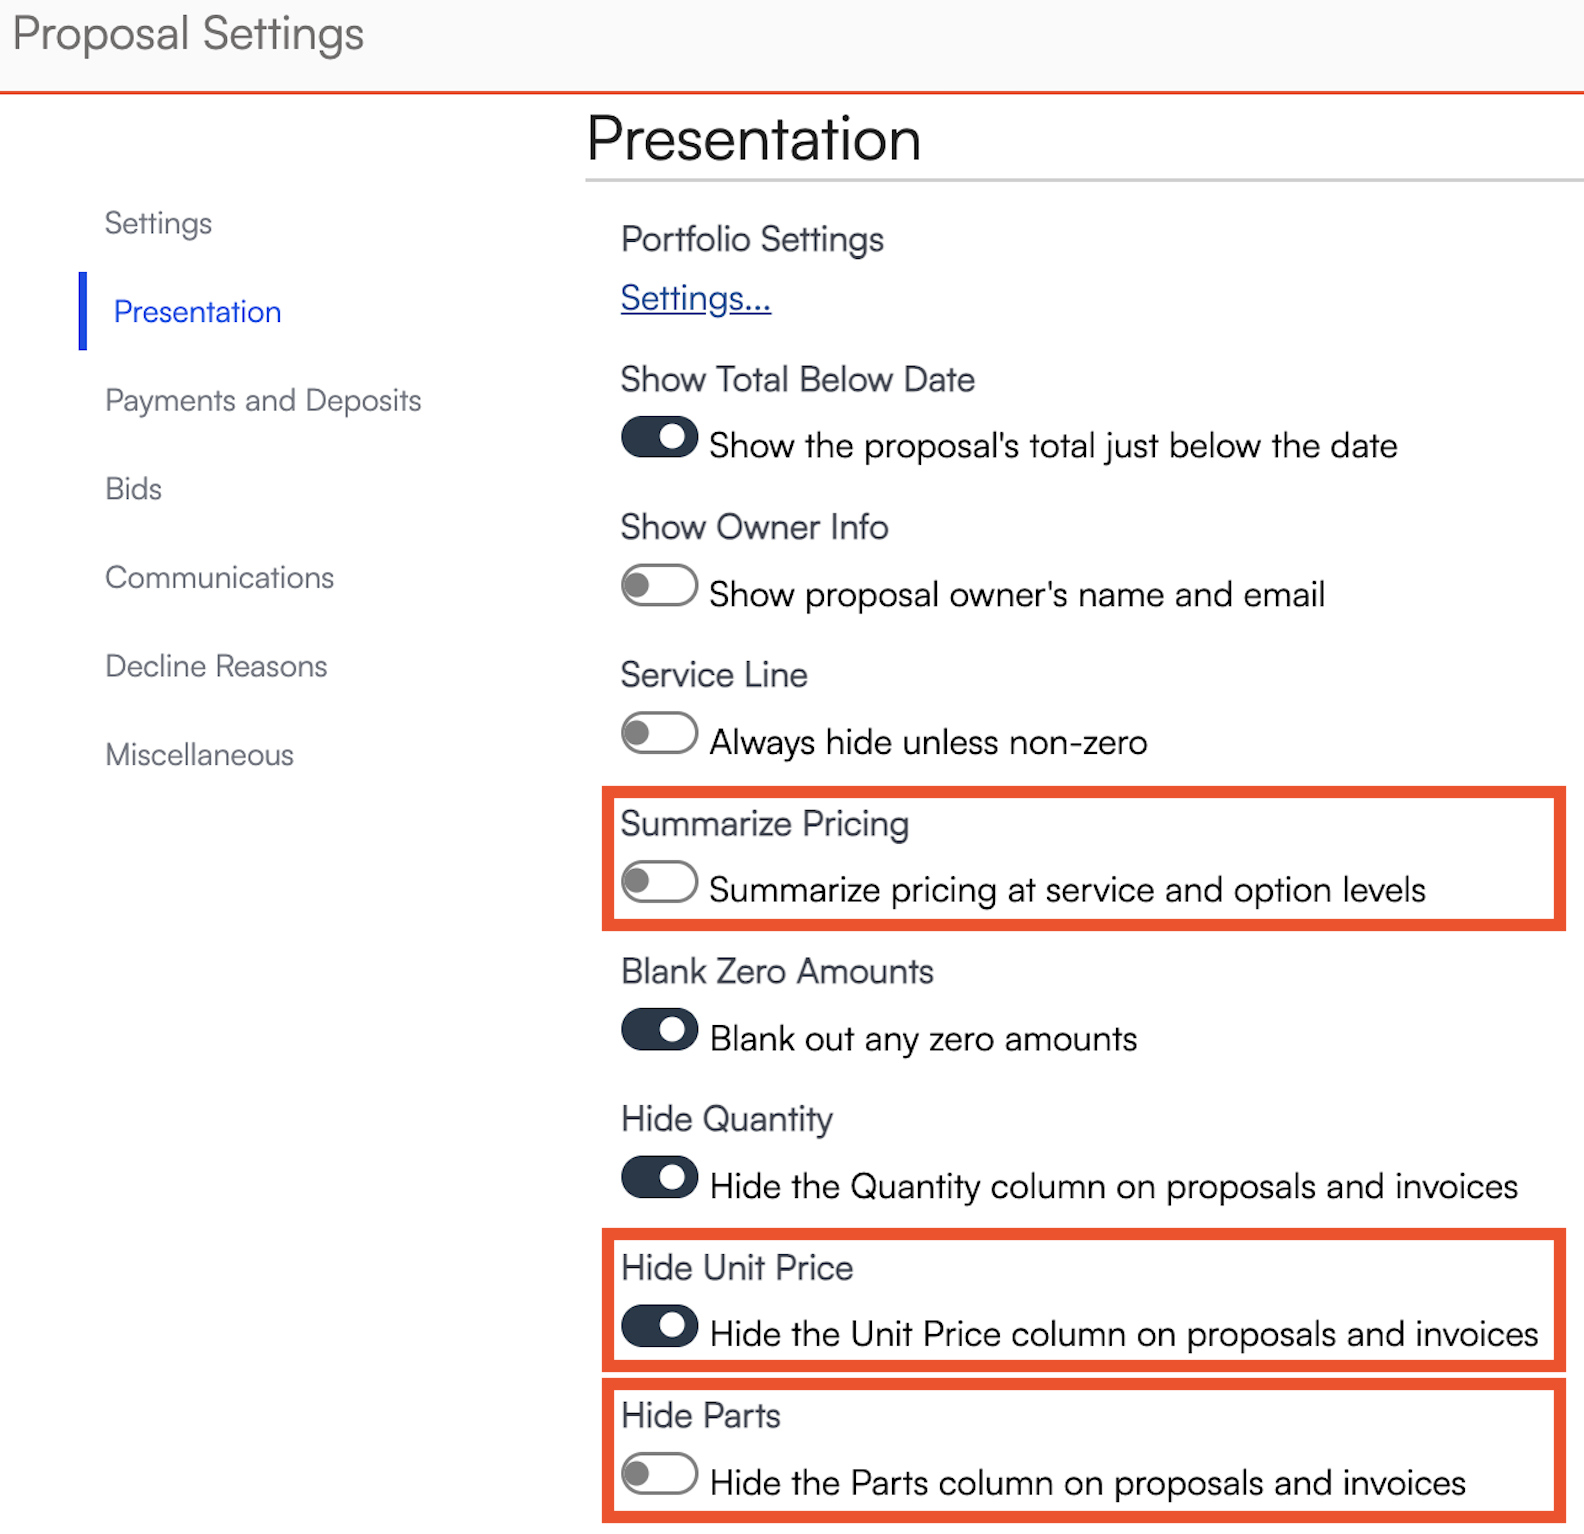
2: Set it at the Proposal level to impact all parts universally (Control Panel > Proposals > Presentation) by enabling on one or more of the following settings:
- Hide Unit Price: hides the unit price column on proposals and invoicing
- Hide Parts: completely hide parts from proposals and invoices
- Summarize Pricing: rolls up the price of all parts to the service line (or the option line, if there are options on the proposal or invoice)
If you turn the parts on as internal and keep the box unchecked at the proposal level, everything will stay hidden. The Part-level setting overrides the Proposal-level setting.
FAQs
Is there a way to set a minimum number in the quantity?
The only way currently to set a minimum for a part is to add it to build a proposal template with that part and set a quantity there.
How do I bill $100 for the first hour, then $50 per additional half hour?
Edit your Service to just have a Base Price of $100 and Duration set to 1 hour.
Then, you can create a "30-min overage" Part and have a Base Price of $50 and Duration of 30 min.
Whenever finishing the appointment, add that part as a line item. Your quantity for that overage part will be the number of 30 min blocks past the estimated time to finish. If it took 2 hours, then you would add a quantity of 2 to the "30-min overage" part.
Why can’t I delete a part?
If a part is linked to proposals, invoices, or reporting, it cannot be deleted. Instead, mark it Inactive:
- Inactive parts cannot be used in new proposals or invoices.
- They are hidden when viewing “Active” parts in the grid.