Overview
ServiceMinder makes it easy to capture leads directly from your website or marketing landing pages by using HTTP POST requests. This allows you to seamlessly integrate lead capture forms with platforms like InstaPage, Unbounce, or custom-built websites. Whether you're using FORM POST or JSON POST methods, ServiceMinder’s lead capture process ensures that new contacts are automatically created or updated in your system. This article outlines how to set up and configure lead capture forms using API keys, supported fields, and configuration options.
API Keys
For capturing leads, you can create API Keys to hook up your different lead sources to push those into serviceminder automatically.
- An API key is created to use with our webhook: the key can either be brand-scoped or at the organization level.
- A brand-scoped key will be one key for the whole brand and set up to distribute leads based on the zip code entered in the web form - so each location will get their leads as long as the postal codes are set up.
- If a lead comes in with a zip that doesn't match a location, it can go into a "parking lot" so the leads aren't totally lost.
- An organization level key will need to be created individually in each different organization (location) so it will be unique to that org and it won't distribute leads based on zip. Any leads entered on a form with that key will go into that corresponding location, no matter what.
- Deciding which to use may depend on how the web form is setup/managed; for some clients, the web team finds it easier to just have individual, unique keys tied to different forms, or they may want to have one master brand API key (as long as postal codes are being gathered in the form.)
- One key can be used in multiple forms
You can create an API Key by going to Control Panel > API Keys and clicking Add.

You'll provide the basic details about your API Key and configure a few specific settings for it.
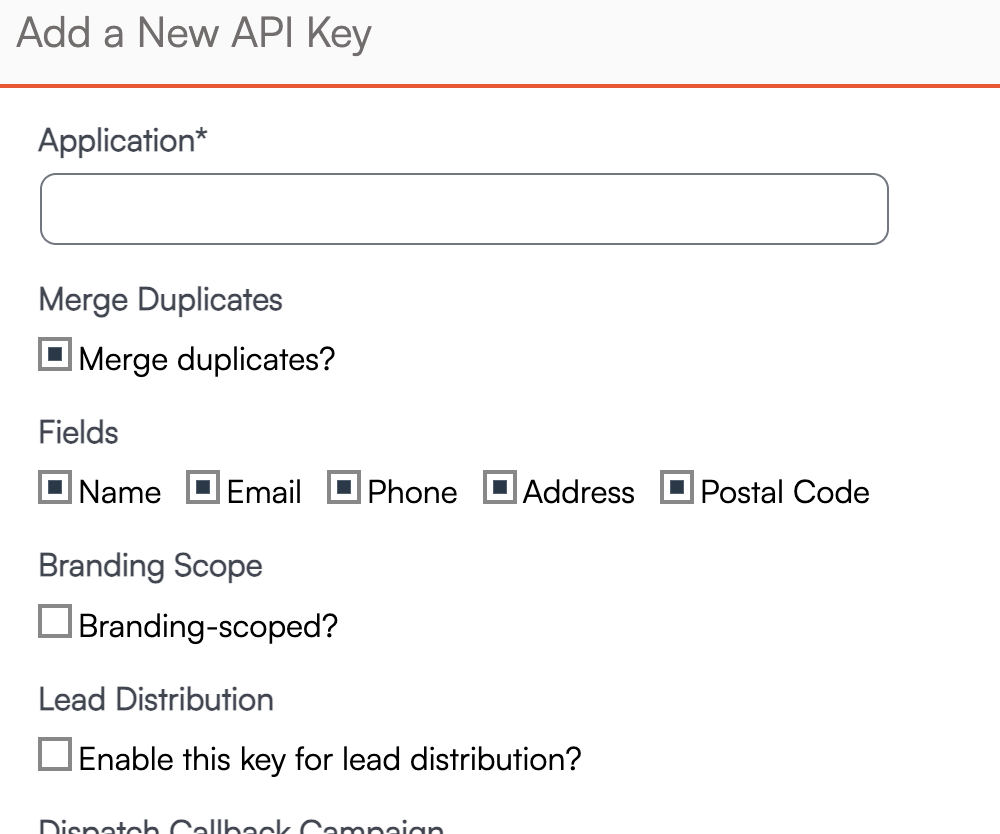
For a Lead Capture form, the important fields to consider are:
- Merge Duplicates - If leads come in with the same details, do you want them to automatically be merged with the existing contact?
- Fields - Which fields do you want to cross-reference when deciding to merge?
If a duplicate contact is merged with a different lead source from the original contact record, this new lead source will be tracked in the system and tied to the invoice. Learn more about that HERE.
- Lead Distribution - This decision is made at the brand level when deciding to distribute leads to various territories/locations within the brand. If you are a single organization, do not check this box.
- If you enable Lead Distribution for the API key, we'll use the zip/postal code from the form to distribute the new lead] to the correct organization. You can read more about Lead Distribution here.
- Owner Distribution - If you have Contact Owners enabled, you can distribute leads that come in via this API key in a round-robin style.
- Lead Notification - If this box is checked, an email will be sent to the designated Lead Notification email address (set up in Control Panel > Notifications).
- Default Lead Source - This will place all leads that come in from this API key into a specific Channel and Campaign, if designated.
Once you have your API key, you'll then configure your form's ACTION to point to the URL. We recommend creating a separate API key for each form you create. This will allow you to better track which form a contact came from.
The leads are pushed over using a webhook (along with your unique API key.) There are two methods, FORM POST and JSON POST. *This information can be/may need to be passed over to your web team.
FORM Post
Use FORM POST to submit data directly to ServiceMinder using a standard HTML form. The form’s ACTION should point to the following URL (with your API key at the end):
https://serviceminder.com/service/contact/addupdate/api-key
Field names must match the expected format. You can view supported fields HERE.
Supported FORM POST fields include (* = required field):
| Field Name | Details |
|---|---|
| Email* | Primary email address |
| Name* | or FirstName and LastName as separate fields |
| Company | Optional company name |
| Address1* | Primary address |
| Address2 | Address continued, if necessary (e.g., appartment number) |
| City* | City |
| State* | State or Province |
| PostalCode* | Zip/postal code |
| Phone1* | Main contact number |
| Phone1Type | e.g., Mobile, Home, Work |
| Phone2 | Optional secondary number |
| Phone2Type | e.g., Mobile, Home, Work |
| Notes | Saved as a note titled "Form" on the contact |
| ContactType | Maps to Contact Category - e.g., “Customer” or “Prospect” |
| Channel | Marketing source channel. |
| Campaign | A unique campaign within the channel.
If it doesn't exist, we'll create it. If not supplied, we will leave blank |
| Tags | Comma separated list of Contact Tags to add to the contact |
| ReferredByHash | The contact.hash value from the referring contact |
| RedirectURL | If this field is included, serviceminder will return a 302 redirect response to the value in the field rather than a JSON payload with the results |
| HashKey | The contact.hash value from the contact you want to update. This can be embedded in a hidden field in the form |
In addition to the above standard fields, you may also include custom contact fields defined in your account. The field name for each custom field is shown on the custom field details page labeled "Form Field." Custom fields will all start with a "cust_" prefix.
The posted form returns a JSON-formatted response with the following properties (if a RedirectUrl value is not present):
-
Result => A value of 0 indicates success. A -1 indicates an unexpected error. A 1 indicates a validation error (such as missing name or email fields)
-
ContactId => The internal identifier of the added (or updated) contact.
-
Message => A text message with either the error info or validation info
If a value of 0 is returned for Result, then the operation was successful and you can redirect on to the next page. Any other value indicates that the data was not saved and so you should either allow the user to correct and re-submit or you may want to log the data for processing later.
JSON Post
Use JSON POST to push lead data into ServiceMinder from your backend or automation platform. Submit a JSON payload to the following endpoint:
https://serviceminder.com/api/contacts/addupdate
Payloads must be encoded as application/json and include valid key-value pairs. You can view our full API documentation at: https://serviceminder.com/api
Supported JSON POST fields include (but are not limited to)***:
| Field Name | Description |
|---|---|
|
Email* |
The email address of the lead |
|
Name* |
or FirstName and LastName as separate fields |
|
Company |
Optional company field |
|
Address1* |
Primary street address |
|
Address2 |
Optional second line of address |
|
City |
City name |
|
State* |
State, province, or region |
|
Zip* |
Zip/postal code |
|
Phone |
Primary phone number |
|
PhoneLabel |
Type of phone (e.g., Mobile, Work, Home) |
|
Category |
E.g., 'Customer' or 'Prospect' |
|
Channel |
Name of the marketing channel |
|
Campaign |
Campaign name under the channel |
|
Tags |
List of contact tags |
|
ReferredByHash |
Hash of the referring contact |
| Notes*** | Saved to the contact's note history with the title 'Form' |
|
CustomFields*** |
Key-value pairs for custom fields |
* Required field
**Notes and CustomFields are Objects and must include structured key-value data (e.g., notes with a title and text, or customFields with field names and values).
***For a complete list of supported fields visit https://serviceminder.com/api#ServiceMinder.Areas.api.Models.Contact
