Overview
Settings and Navigation
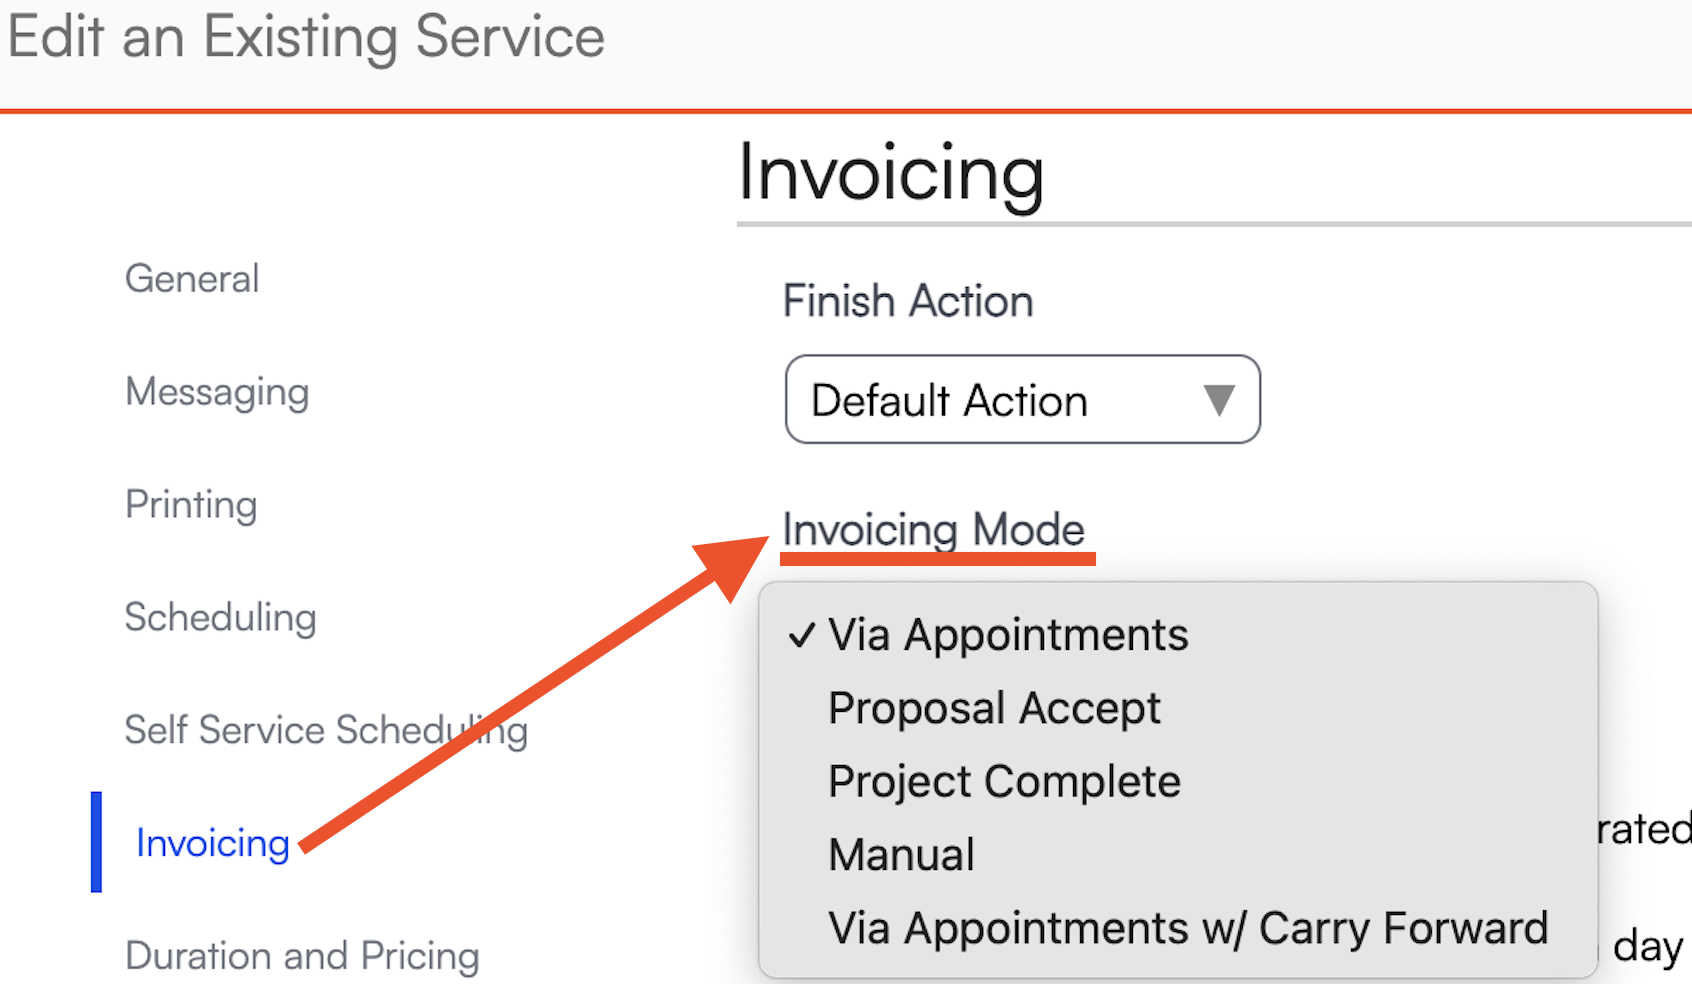
To configure invoicing for a project, go to Control Panel > Services > Edit, scroll to the Invoicing section, and set the Invoicing Mode to Project Complete. For more details, refer to Service Settings: Invoicing Mode.
If these projects will usually involve appointments that span multiple days, go to Control Panel > Proposals and set the default appointment duration. This will cause all extra time over that amount to spill into a second appointment.

Creating and Managing a Project
Scheduling Appointments from a Proposal
- Create the proposal.
- Click the Schedule button at the top of the proposal to set up the first appointment.
- If a proposal has only one appointment, it will not be considered a project.
- Any proposal with multiple appointments automatically converts into a Project and appears in the Projects Snapshot until all appointments are finished and the proposal is complete.
Adding Additional Appointments
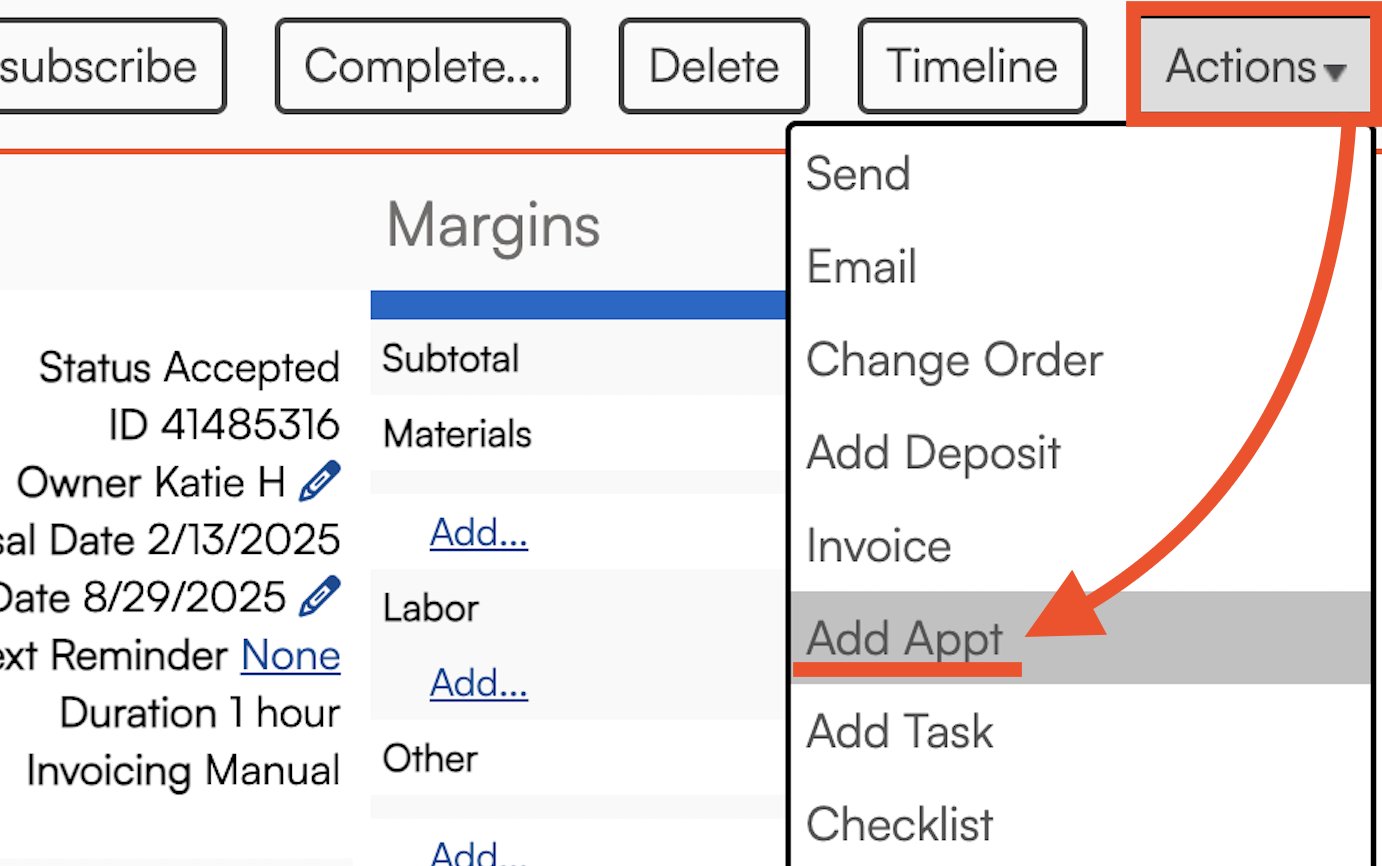
To schedule additional appointments, go to the proposal and click Actions > Add Appt.
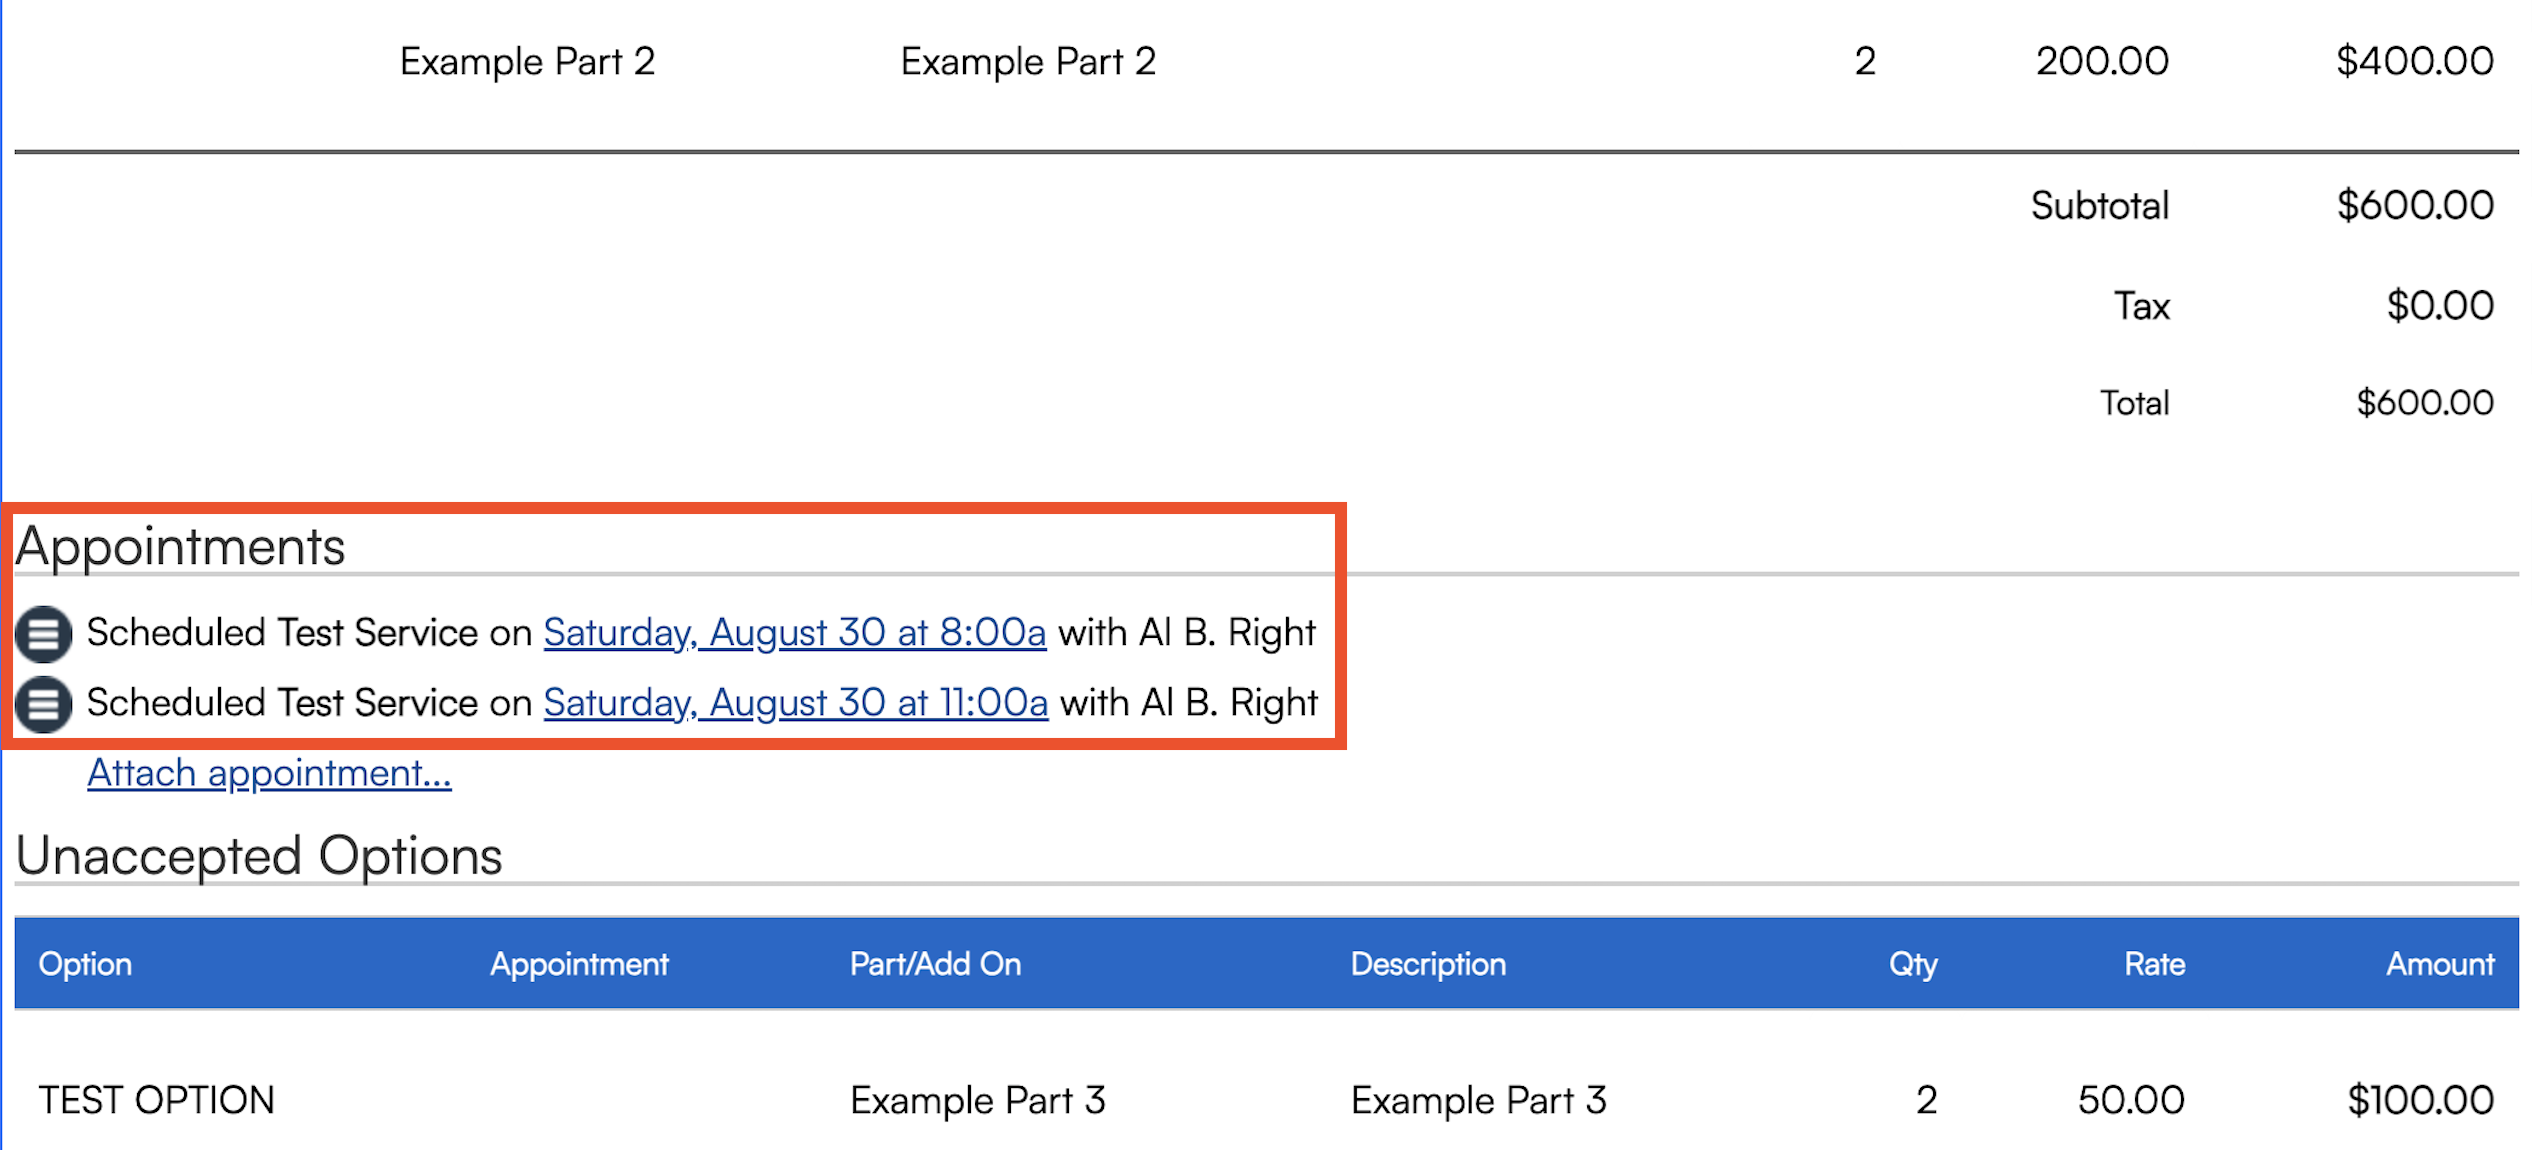
All scheduled appointments will be listed at the bottom of the proposal.
Completing or Canceling a Project
- A project is marked Complete once all attached appointments are finished, and it will no longer appear in the Projects Snapshot.
- If a customer decides not to proceed, you can clear the acceptance to cancel the project.

Tracking and Visualizing Projects
Gantt Chart View
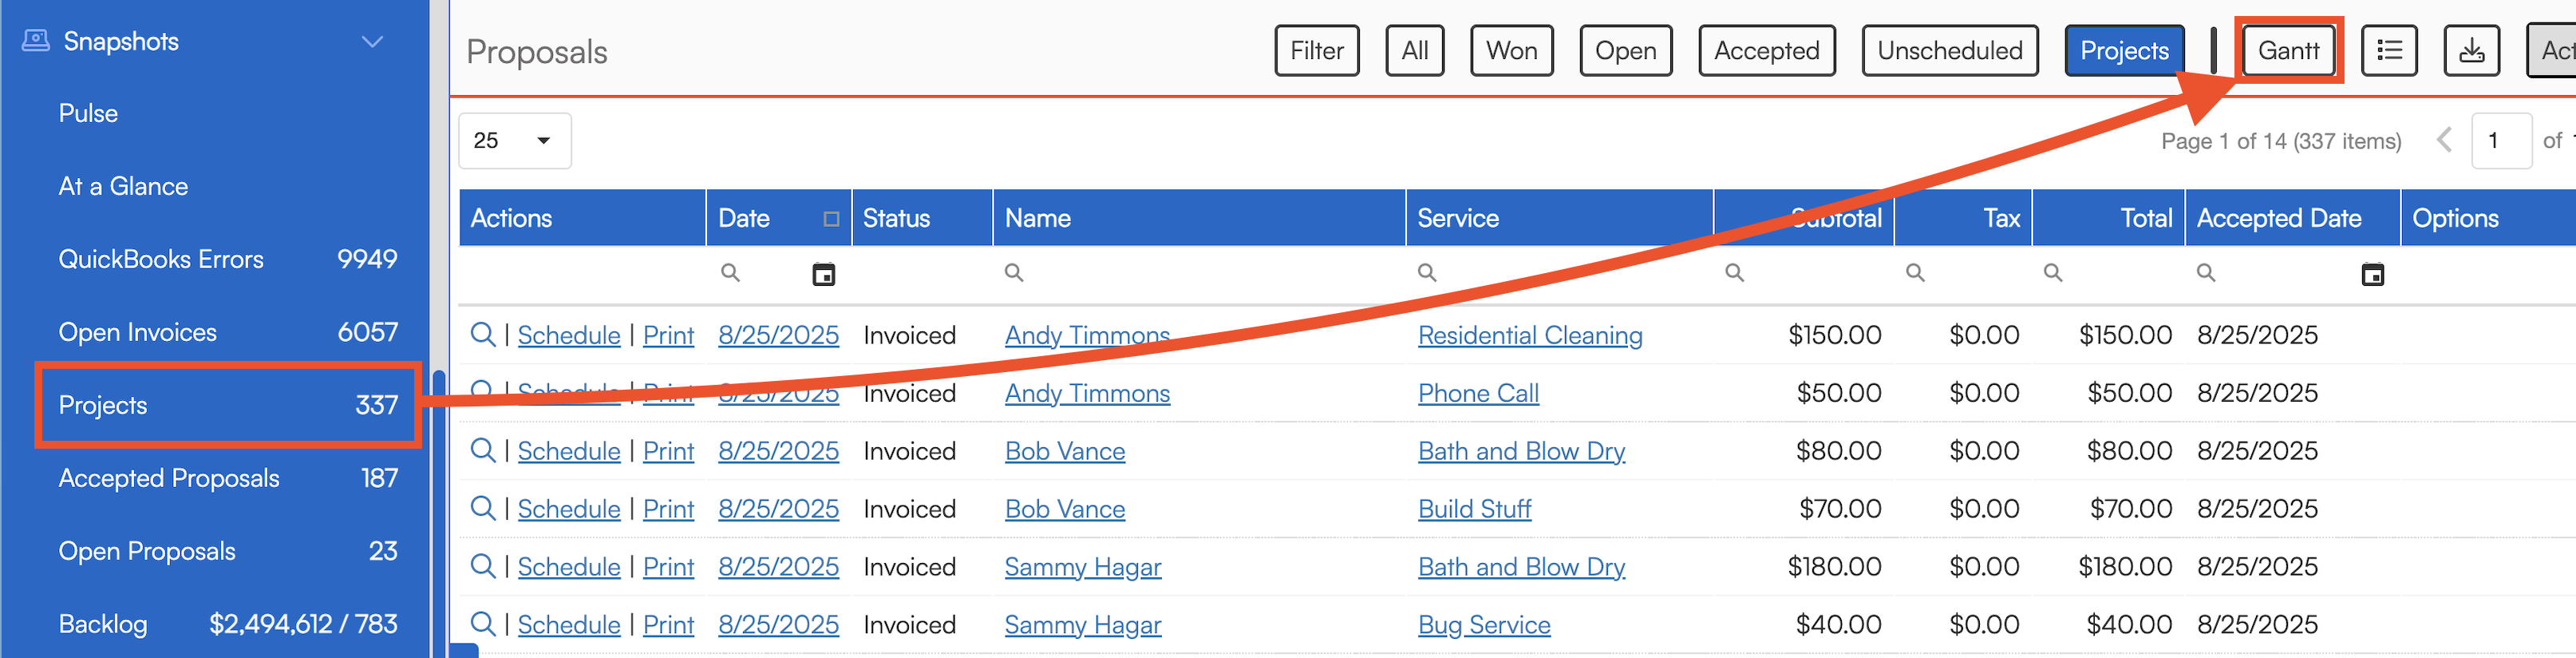
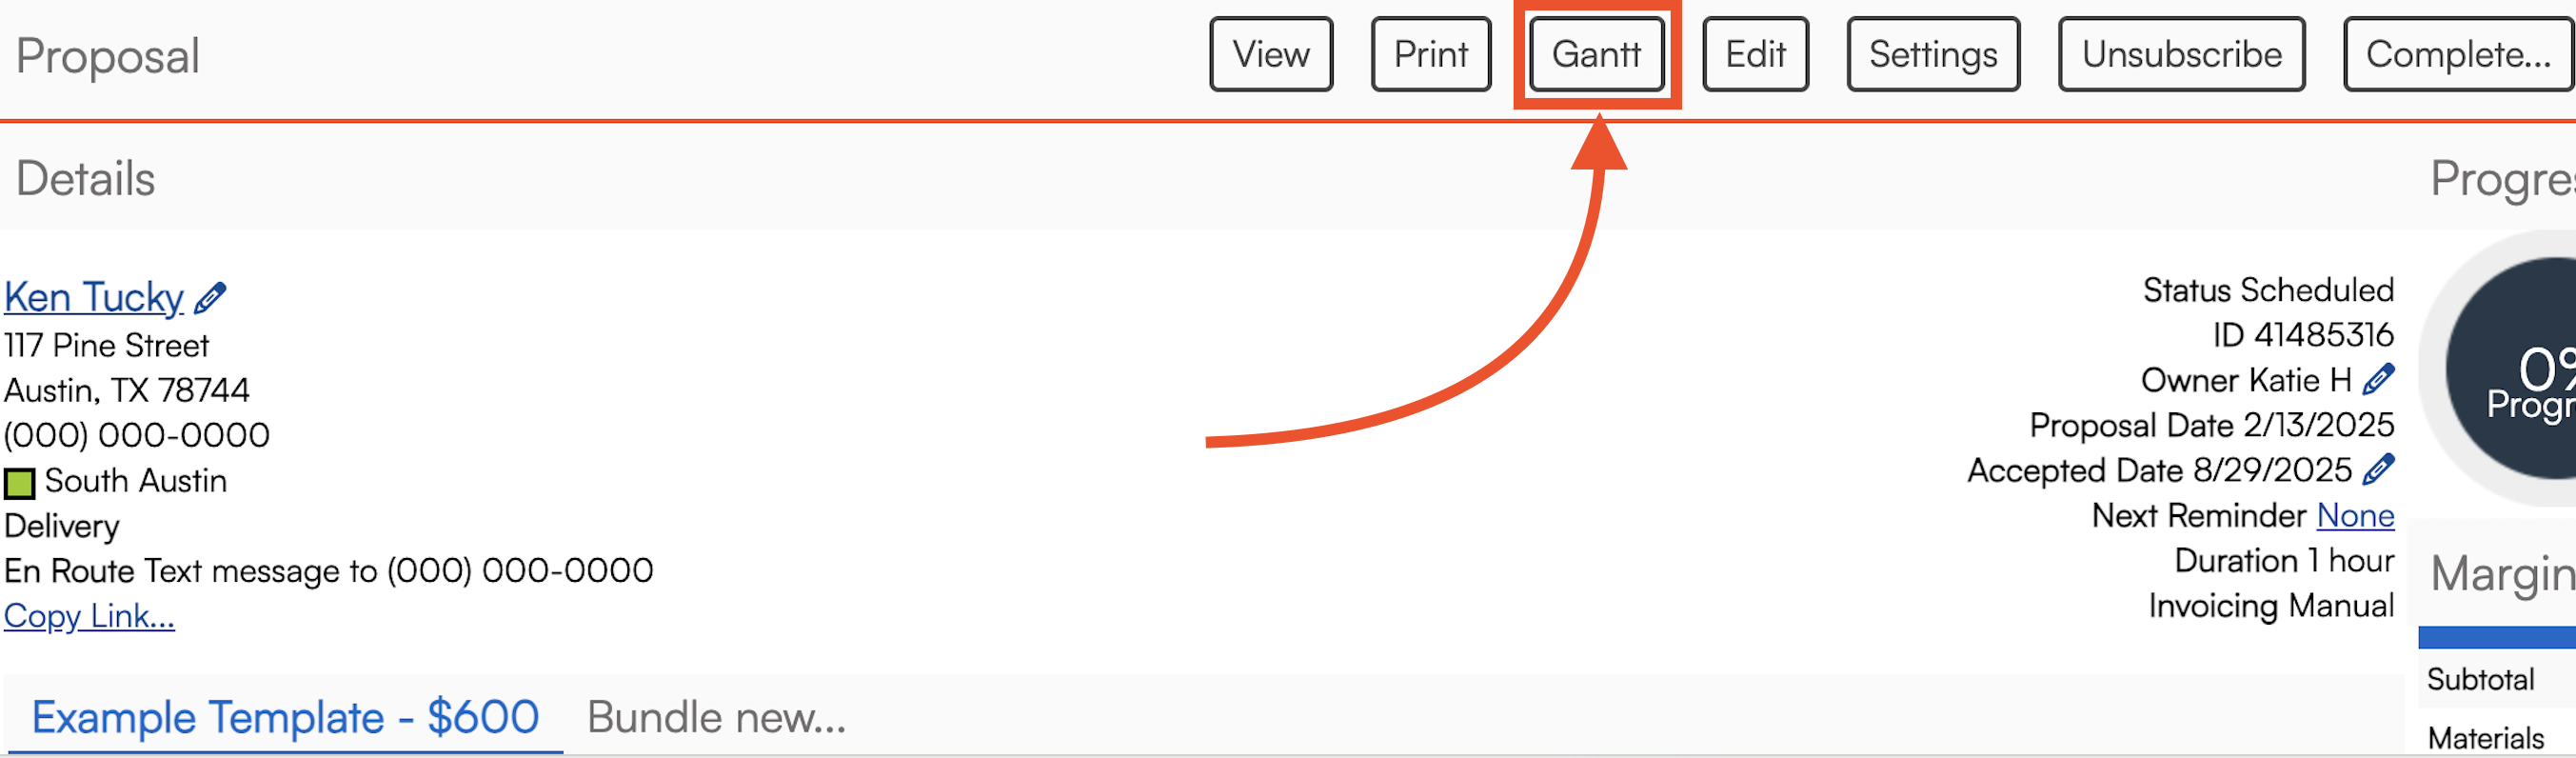
A gantt chart is a bar chart that illustrates a project schedule. Once a job has been designated as a Project, you can view a gantt chart directly from the proposal or from the Projects Grid snapshot. It provides a read-only visualization of project activities and their dependencies.
The Gantt button on the Projects Grid will show all projects at once.

The Gantt button on a project proposal will show all appointments related to that one proposal.

Disabling Project Tracking
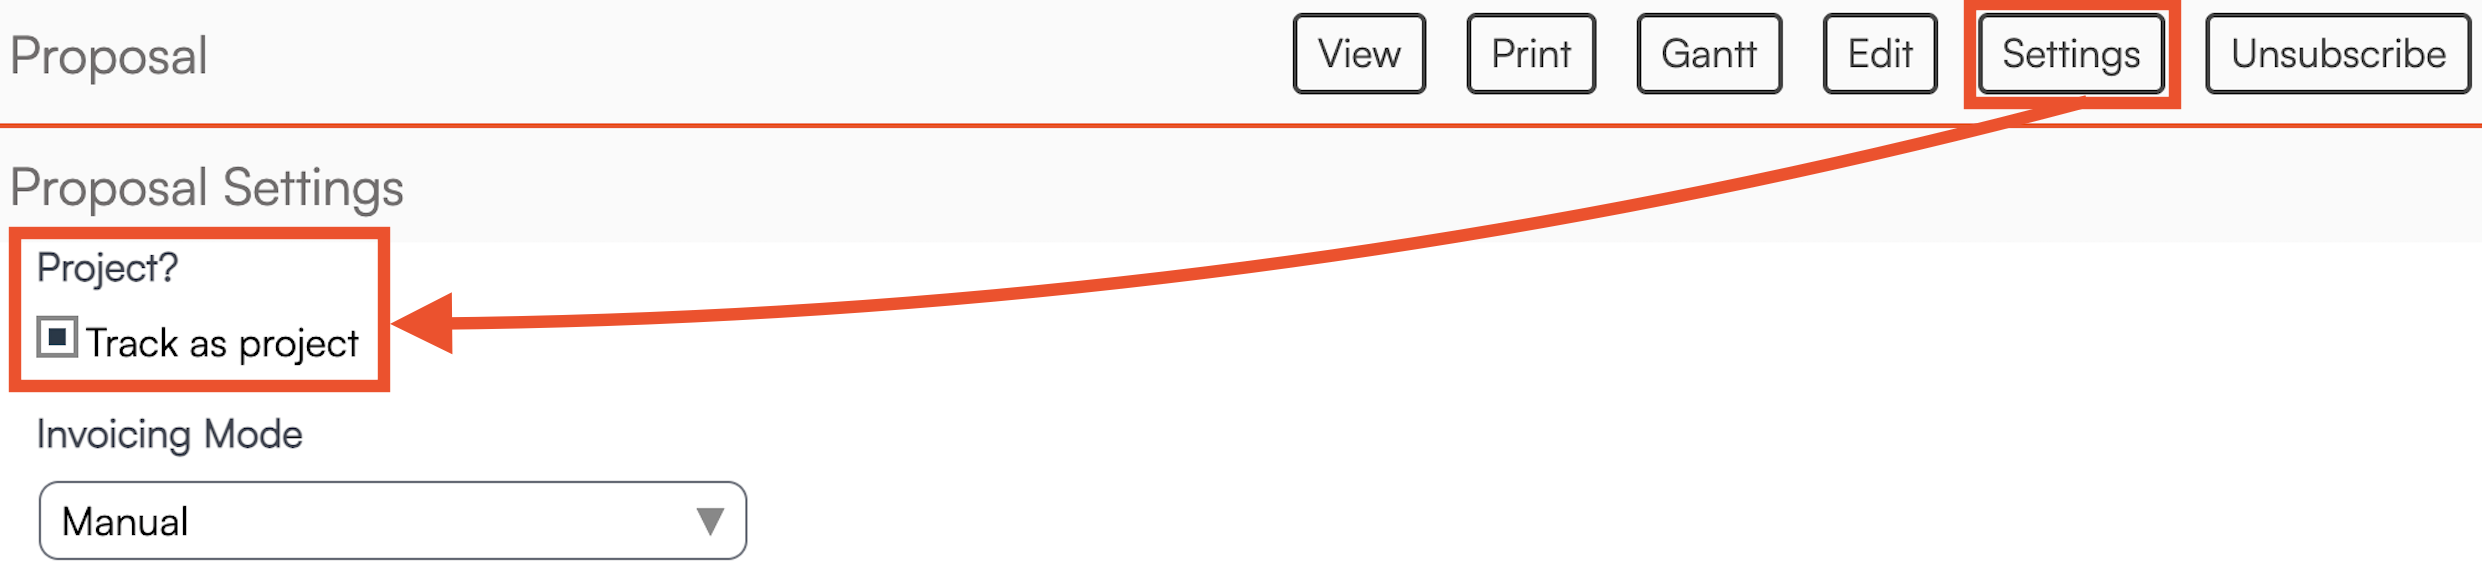
If you do not want to track a proposal as a project, you can turn this off by viewing the Proposal and clicking Settings at the top of the page. This will open up a set of options for this individual proposal. Uncheck the Project box to stop tracking it as a project.
Project Invoicing Options
If you plan to collect payment for a project in installments, you have a couple of options.
1. Generate one invoice and use the Maximum Payment Amount setting to collect partial payments.
On the invoice, click Settings and enter a dollar amount in the Total Payment Limit box. If you enter something here (either a number/dollar amount or percentage of the Max Amount), then the customer will NOT be able to pay an amount higher than that limit. This is typically used when a business is taking “progress payments” on a job. Max Amount is merely the total of this invoice. It does NOT take into account payments already made.
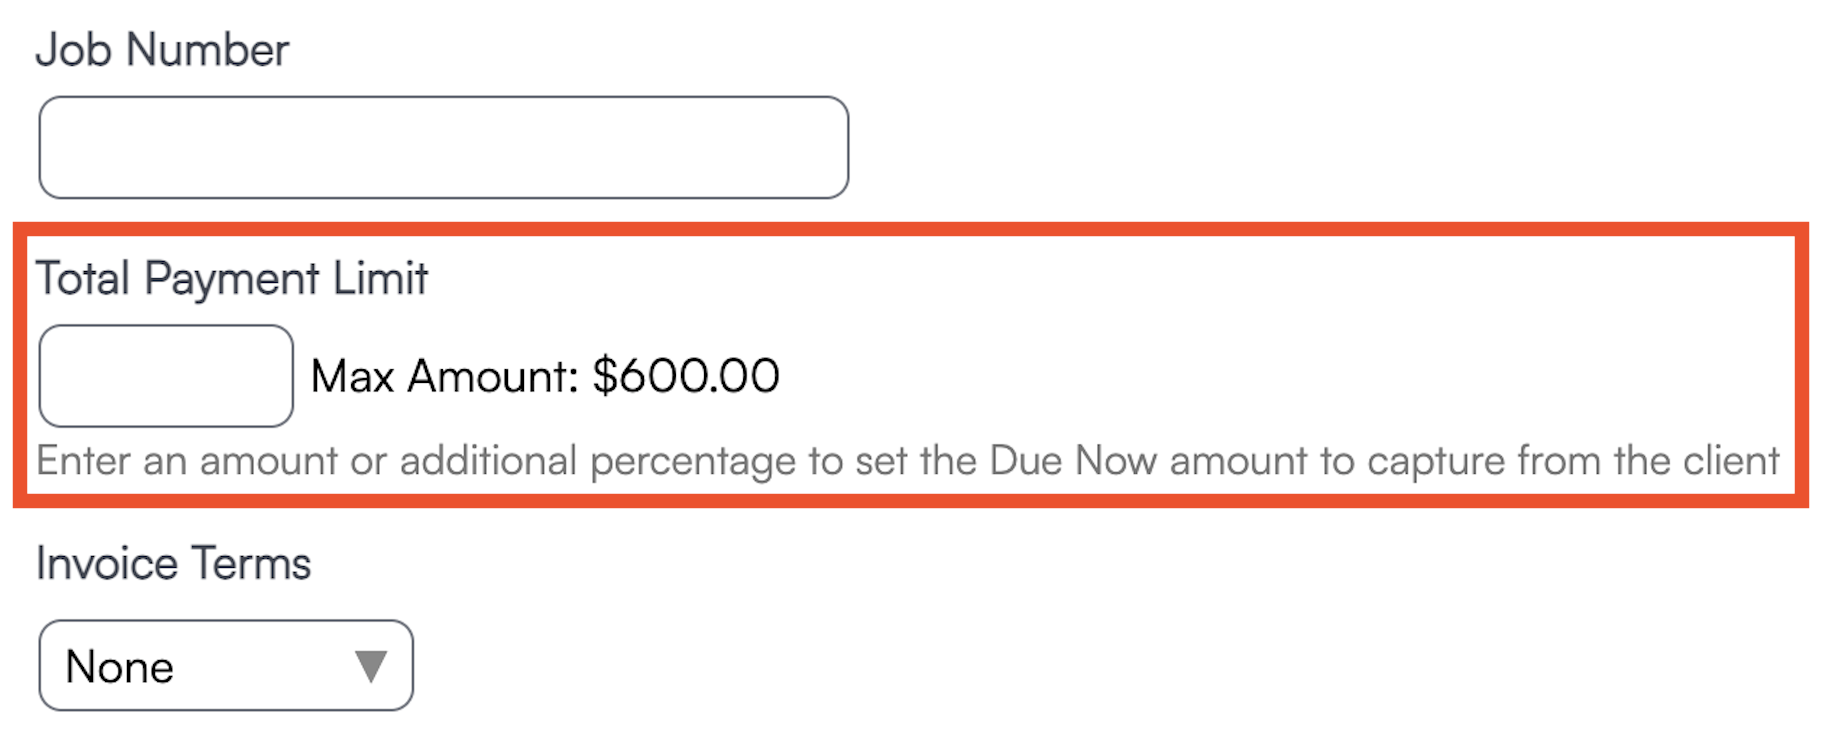
For example, if the invoice total was $1000.00, and the customer has already paid 10% ($100.00), and you want to collect an additional $100, then you would enter 20% or $200.00 in the box. The customer-facing invoice view would say “Due now: $100, Payments made: $100, and Balance due: $800.”

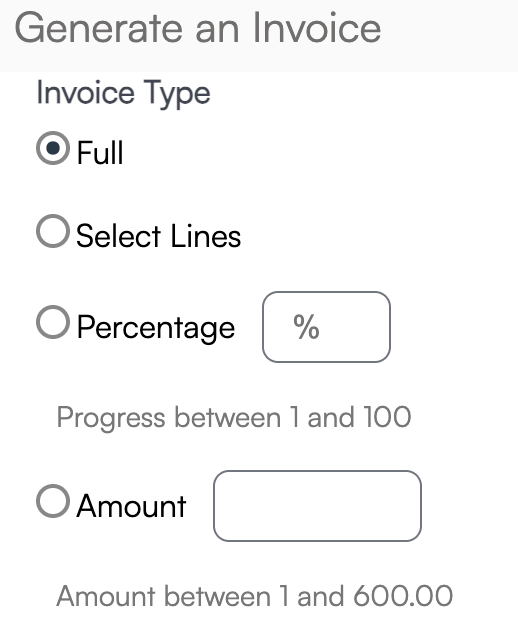
2. Generate multiple invoices for a set percentage, partial total, or certain line items of the proposal.
FAQs
How do I close Invoices under Projects?
You can go to a proposal that's been accepted/invoiced/scheduled and there will be a Complete button at the top. This will change the status to Complete, which clears it out of the Projects grid. If appointments for that invoice or proposal are still in progress, they will be kept in an open state.
What are Visits on the Projects?
Visits are the number of appointments tied to the Proposal. This works best for Subscription Style Services where there is a set number of appointments for the service.
If your service is based on recurring - such as weekly or monthly - then the Visit number will not be accurate since it will be constantly updating. If you're business is based on recurring appointments, you should not be using the Projects Grid and we recommend using the Appointments Grid as your source of truth.
To learn more, please review Recurring Appointments.
