Overview
To set up routing effectively, you'll need to define GeoZones, configure service settings, and build a route schedule. This guide walks you through each step, from creating GeoZones to assigning services and scheduling appointments. Follow these instructions to streamline your route management and ensure efficient scheduling.
This article will review:
Setting Up Your Routes
Step 1. GeoZones
To use routing, you'll need to first define a set of GeoZones that will ultimately define where on the map you'll be going on which days of your route schedule. For example, say you have a service that you deliver weekly. Using Maps, you'll create GeoZones for each day of the week.

Step 2. Service Settings
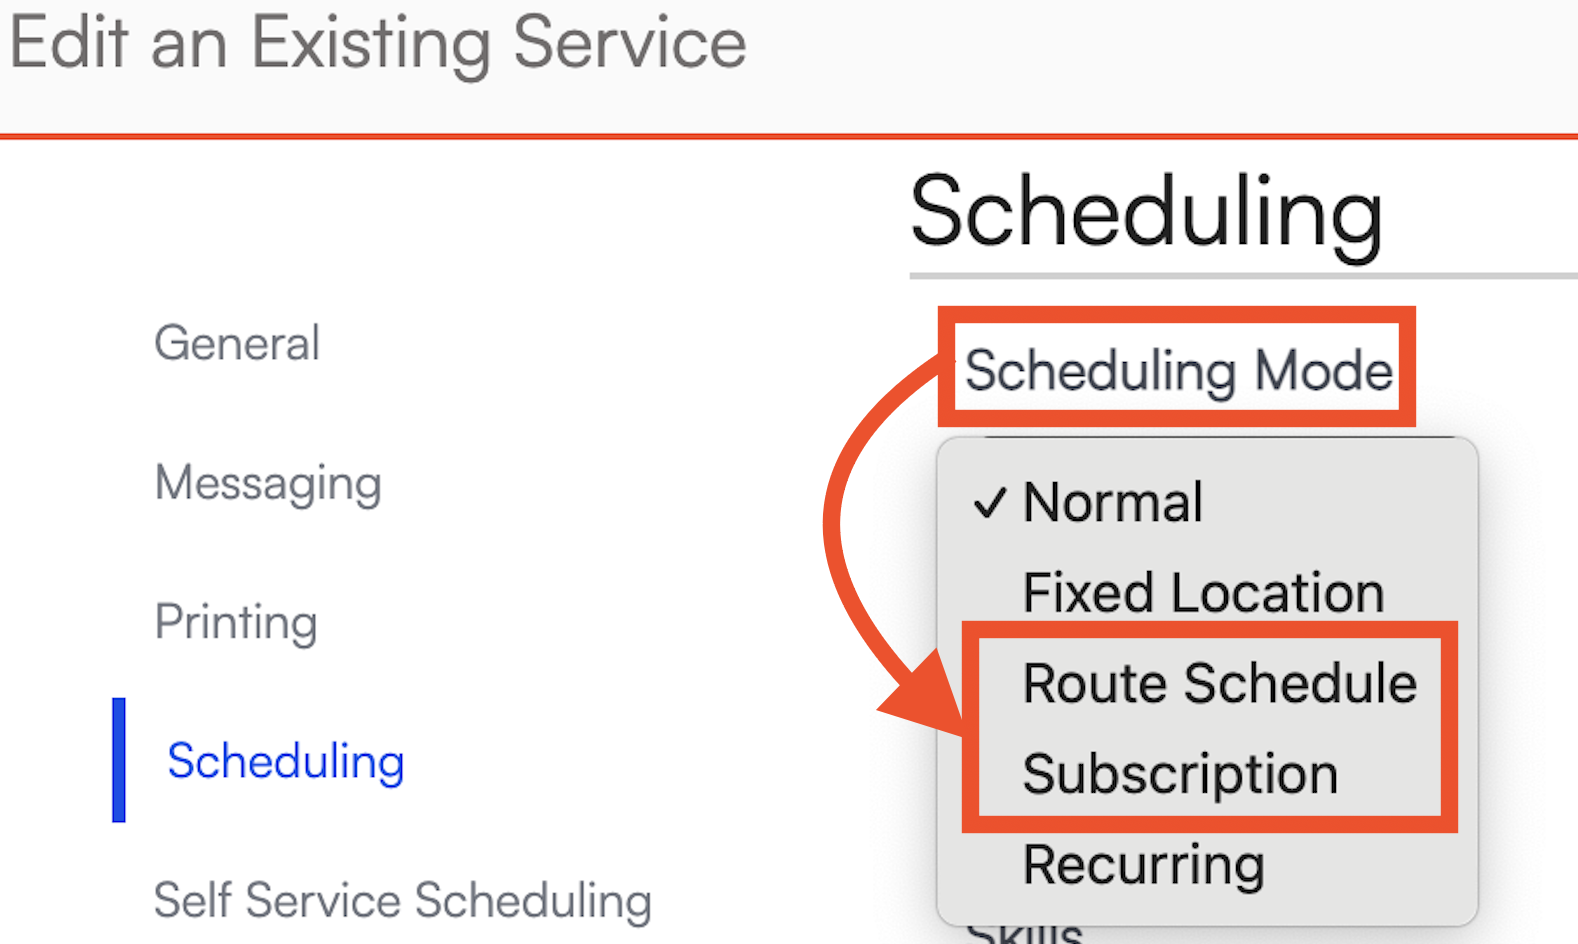
In Control Panel > Services make sure you have at least one service that has the Scheduling Mode set to either Route Schedule or Subscription.
You will also need to configure the Recommended Interval and Total Visits on the service details page. This will influence how the route is built. Learn more about Subscription Style Service settings here.
Step 3. Build the Route Schedule
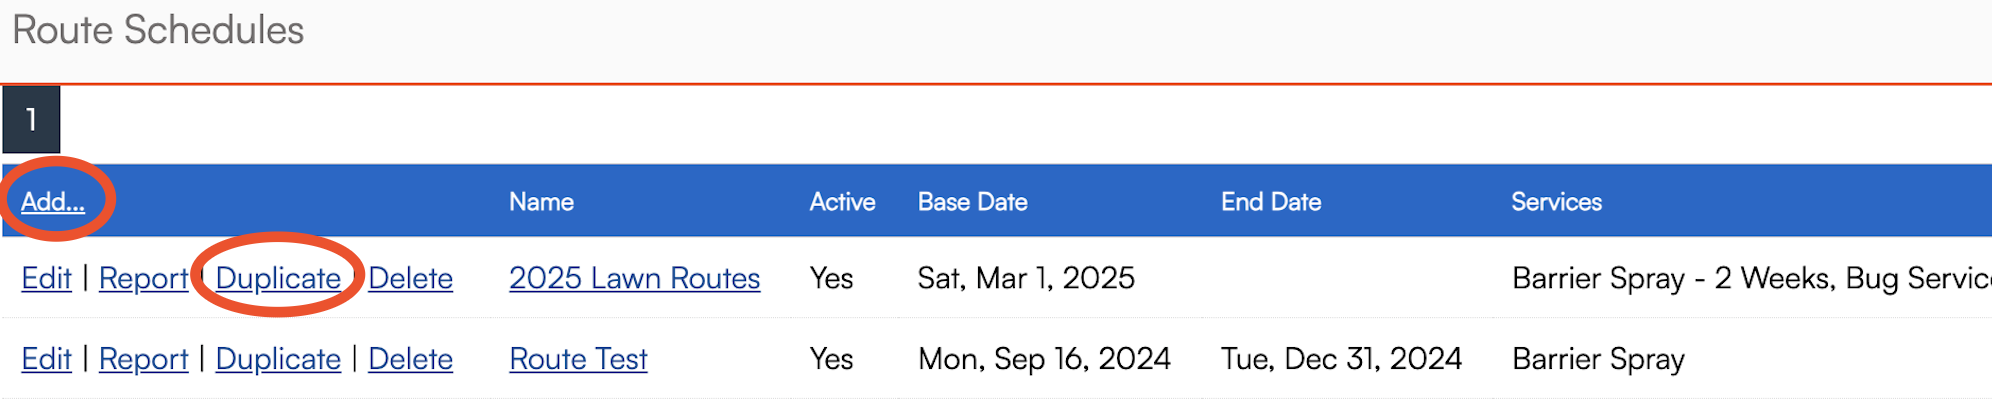
Back on the Services Grid, click the Route Schedules button in the top right .

Here you can create a brand new route schedule or duplicate an existing schedule.
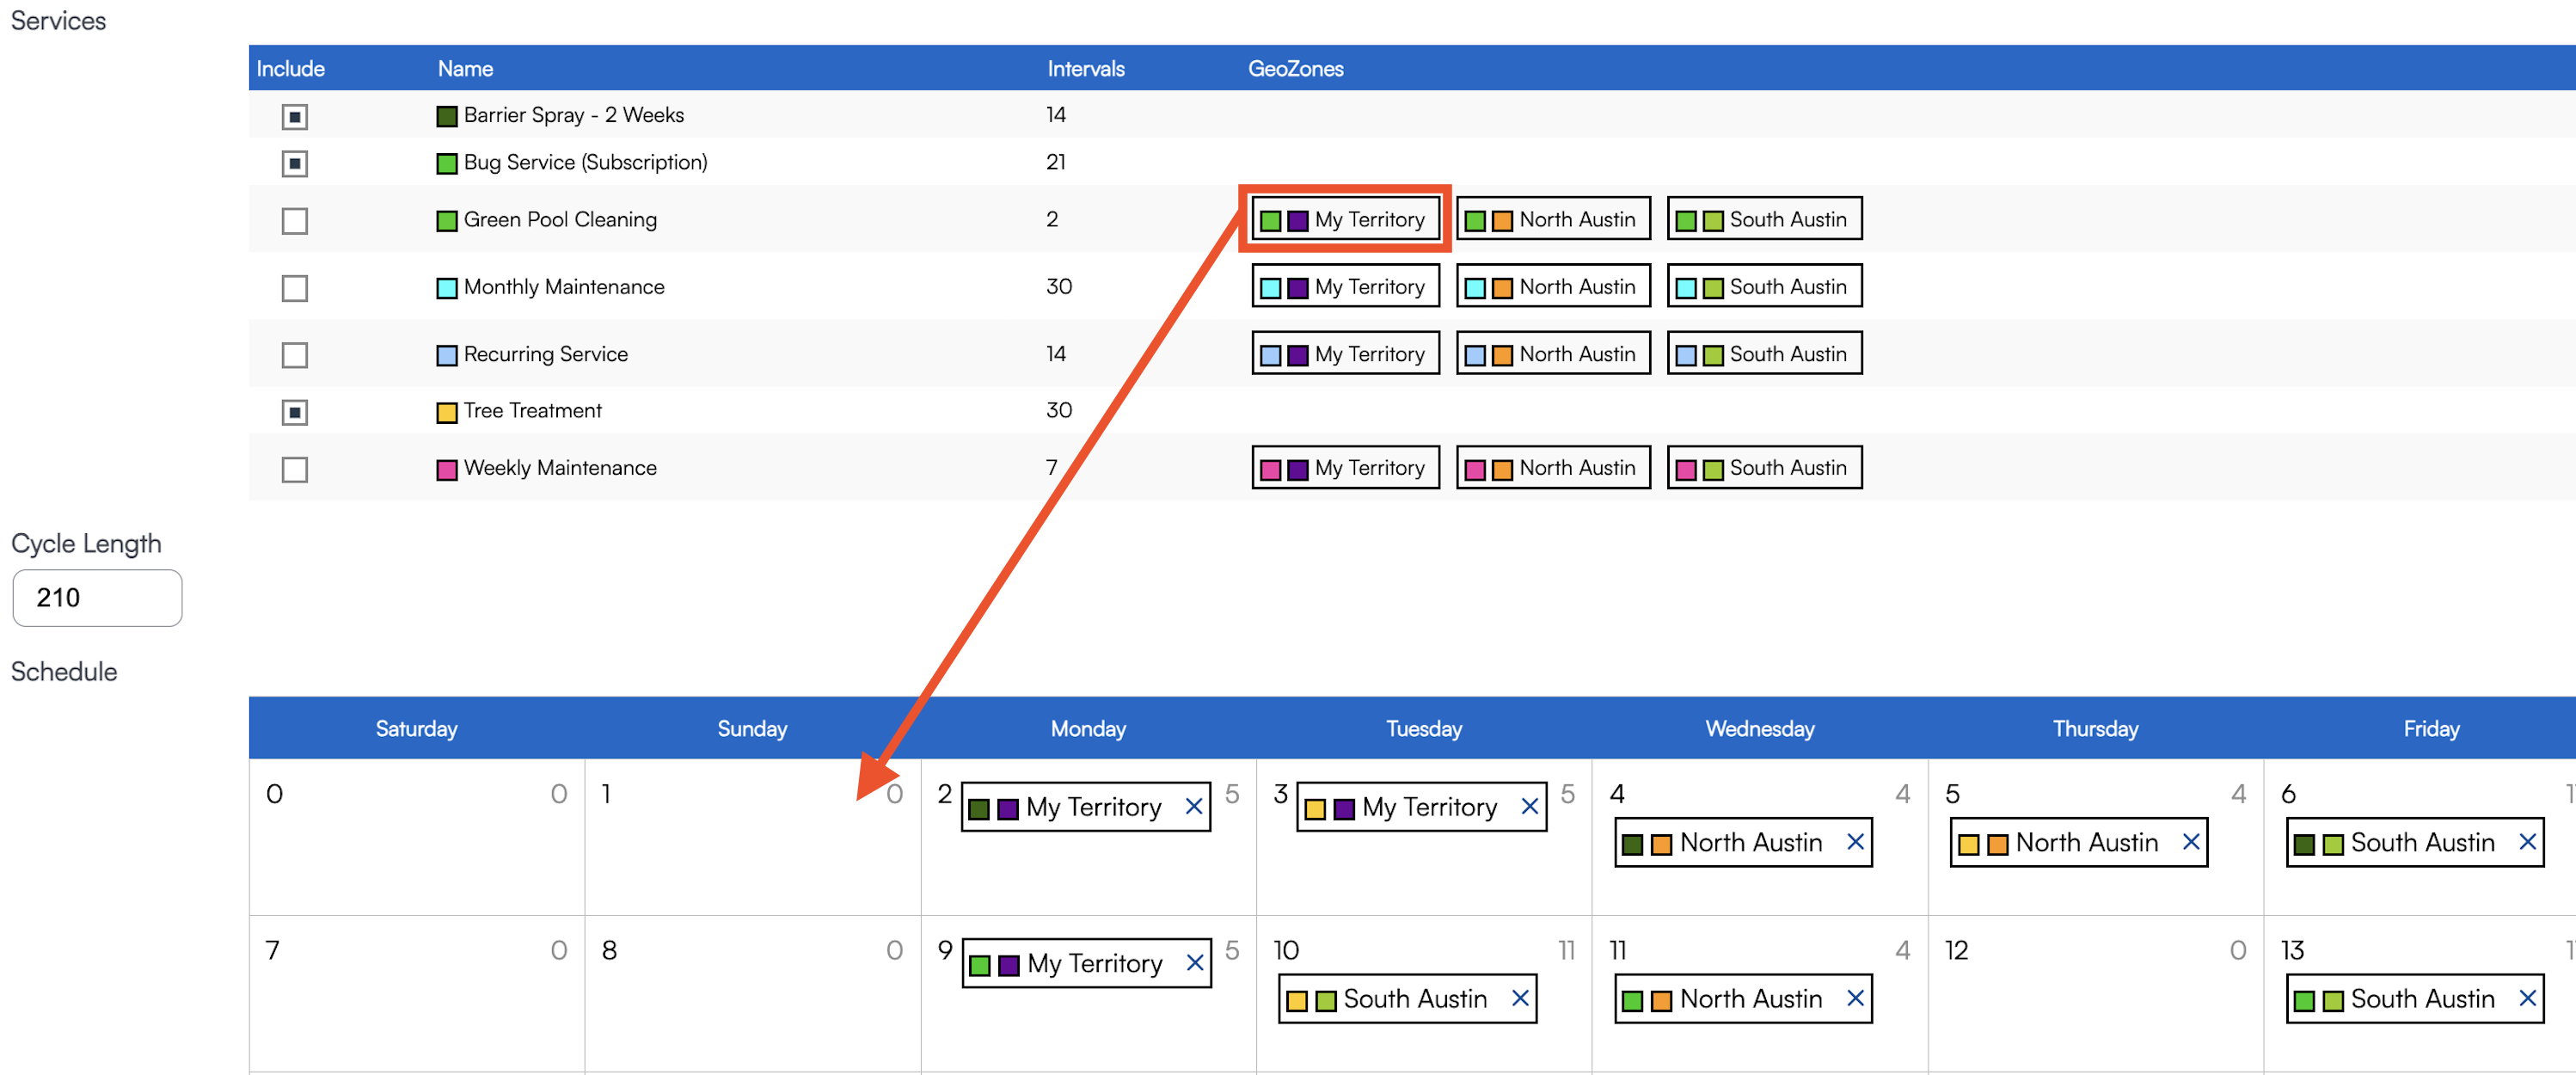
When creating a Route Schedule from scratch, complete the following steps:
- Name your Route
- Choose a Base Date (start date) for the season. An End Date is optional.
- Select which Services you'd like to include in this Route by checking the boxes. Notice the Intervals next to each service - those are dictated by the Recommended Interval that you previously set on each service details page.
- Click and drag the GeoZones for each service onto the day of the week you want to complete those appointments.
- Click Add at the bottom of the page to save the route.
If you accidentally drop it in the wrong spot, click the x, removing it and repeat the process to drag it to the correct spot. Clicking and dragging will only move it for that one specific date, it will not readjust the entire sequence of appointments. You CAN drag and drop if you want to adjust a single day (i.e., you know the team will not be working that date).
Cycle length is the minimum number of days that has to pass before the entire calendar route schedule can start over. It will calculate automatically if you have the Recommended Interval and Total Visits configured for your services, but it can also be manually adjusted, just like the End Date.
Scheduling with Routes
When scheduling appointments, as soon as you select a service that is related to a route schedule, you will see a calendar view that lets you adjust the default scheduling of the appointments. We look at the service and the contact's GeoZone(s) to determine which day(s) of the route schedule cycle you'll be in their area.

FAQs
What happens when a job is cancelled in the field?
It will appear in the queue. Form there, it can be added back to a scheduled for for the same day, or “bumped to another day and have an email (options) sent to the customer. This is what the MOVE button is for.
