Overview
This article outlines how to manage invoice behavior in serviceminder, including default settings, user permissions, approval workflows, payment configurations, and invoice terms. Whether you're looking to automate approvals, control payment limits, or customize terms for specific clients, this guide will help you tailor your invoicing process to meet your business needs.
This article will review:
Settings and Navigation
Most invoice-related settings can be found under Control Panel > Invoices. These control how invoices are generated, displayed, and processed.
Invoicing permissions for users can be configured under Control Panel > Users > Edit > Permissions.

Some service-level settings may also impact invoice behavior. Navigate to Control Panel > Services > Edit to explore invoicing options specific to a service. Learn more about Service Invoicing Mode here.
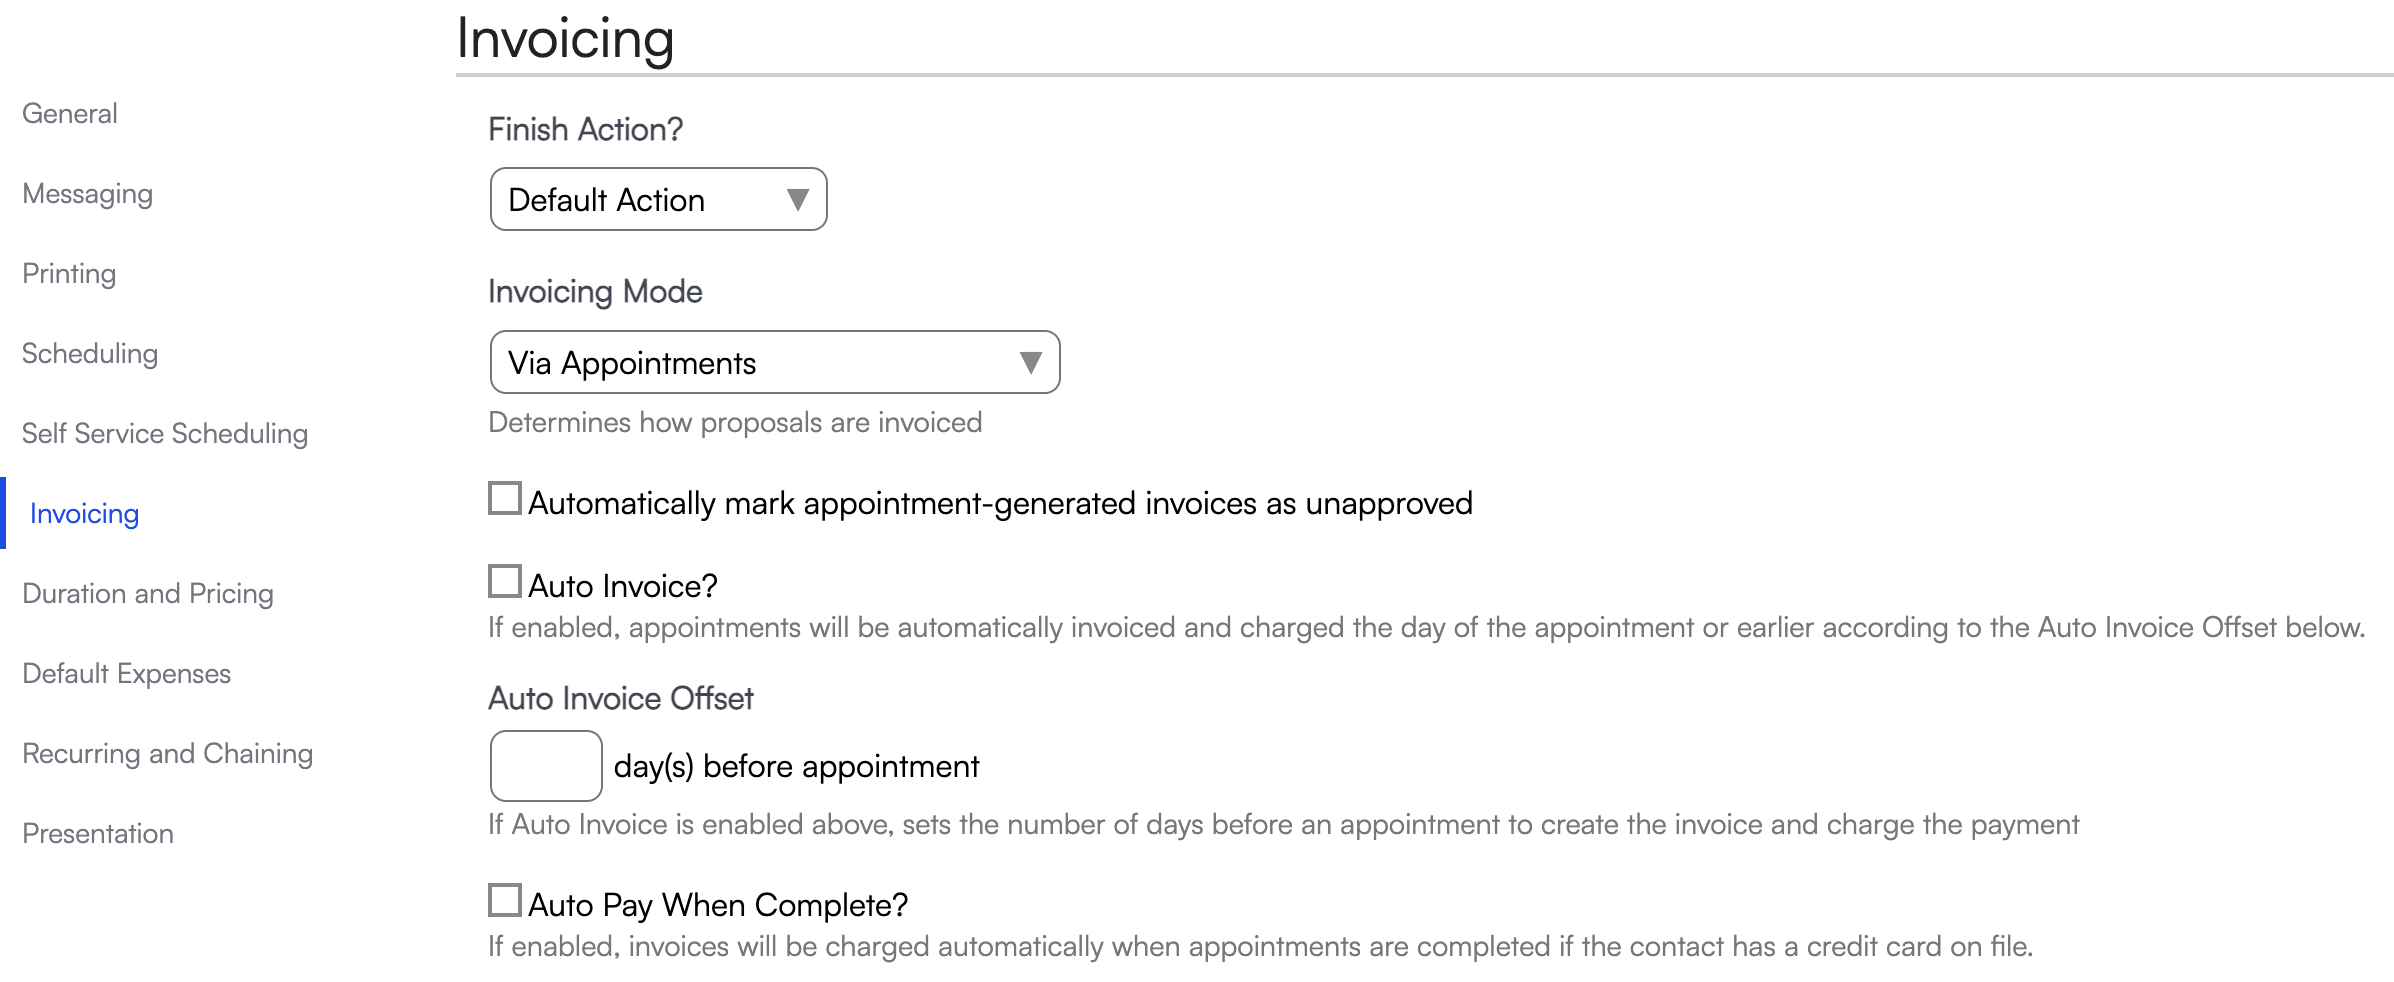
General Invoice Settings
Tax Rates
Click the Manage Tax Rates link to configure taxes for your organization.
Use the Default Tax Rate dropdown menu to set a tax rate that will populate as default if no other tax rate is set.
View our Setting Up Taxes article to learn more.
Invoice Number and Invoice Number Template
Invoice Number: This sets the starting number for your invoices.
Use extreme caution when changing this value. If you set it as a number that is smaller than already-existing invoices, it can result in invoices being overridden in QuickBooks due to duplicate IDs.
Invoice Number Template: This field is used to customize invoice numbers. Place {id} where the invoice number should go. (ex: Inv-{id} would create the invoice number format Inv-1234)
Invoice Due Days
The number of days after invoice creation that payment should be due. Use 0 for immediate.
Appointment Invoice Mode
Determines the behavior of the Invoice button on appointments. Can either create an unapproved or an approved invoice when an invoice is generated from an appointment.
See the Approved/Unapproved Invoices section below to learn more.
Appointment Inventory Mode
If the mode is Normal then the technicians add parts/items to the appointments as needed/as they finish. They will default to whatever the part's "internal" setting is.
If the mode is Internal then they will have an "inventory" action available on the appointment and they can record any parts/items they use on the appointment there -- those will automatically be 0 and also marked as internal, regardless of what the part is set to.

Send $0 Invoices
Some businesses choose to create invoices for $0. If you want these to send to customers, check this box. Otherwise, those will not automatically send invoices or receipts if you have Invoice specific Notifications turned on.
Please review Invoice Notifications for more information.
Payments Settings
Consolidate Payments
Check the Consolidate Payments checkbox to enable the ability to consolidate what a contact owes you into one monthly payment.
To learn more about these settings, please review Automatic Payments
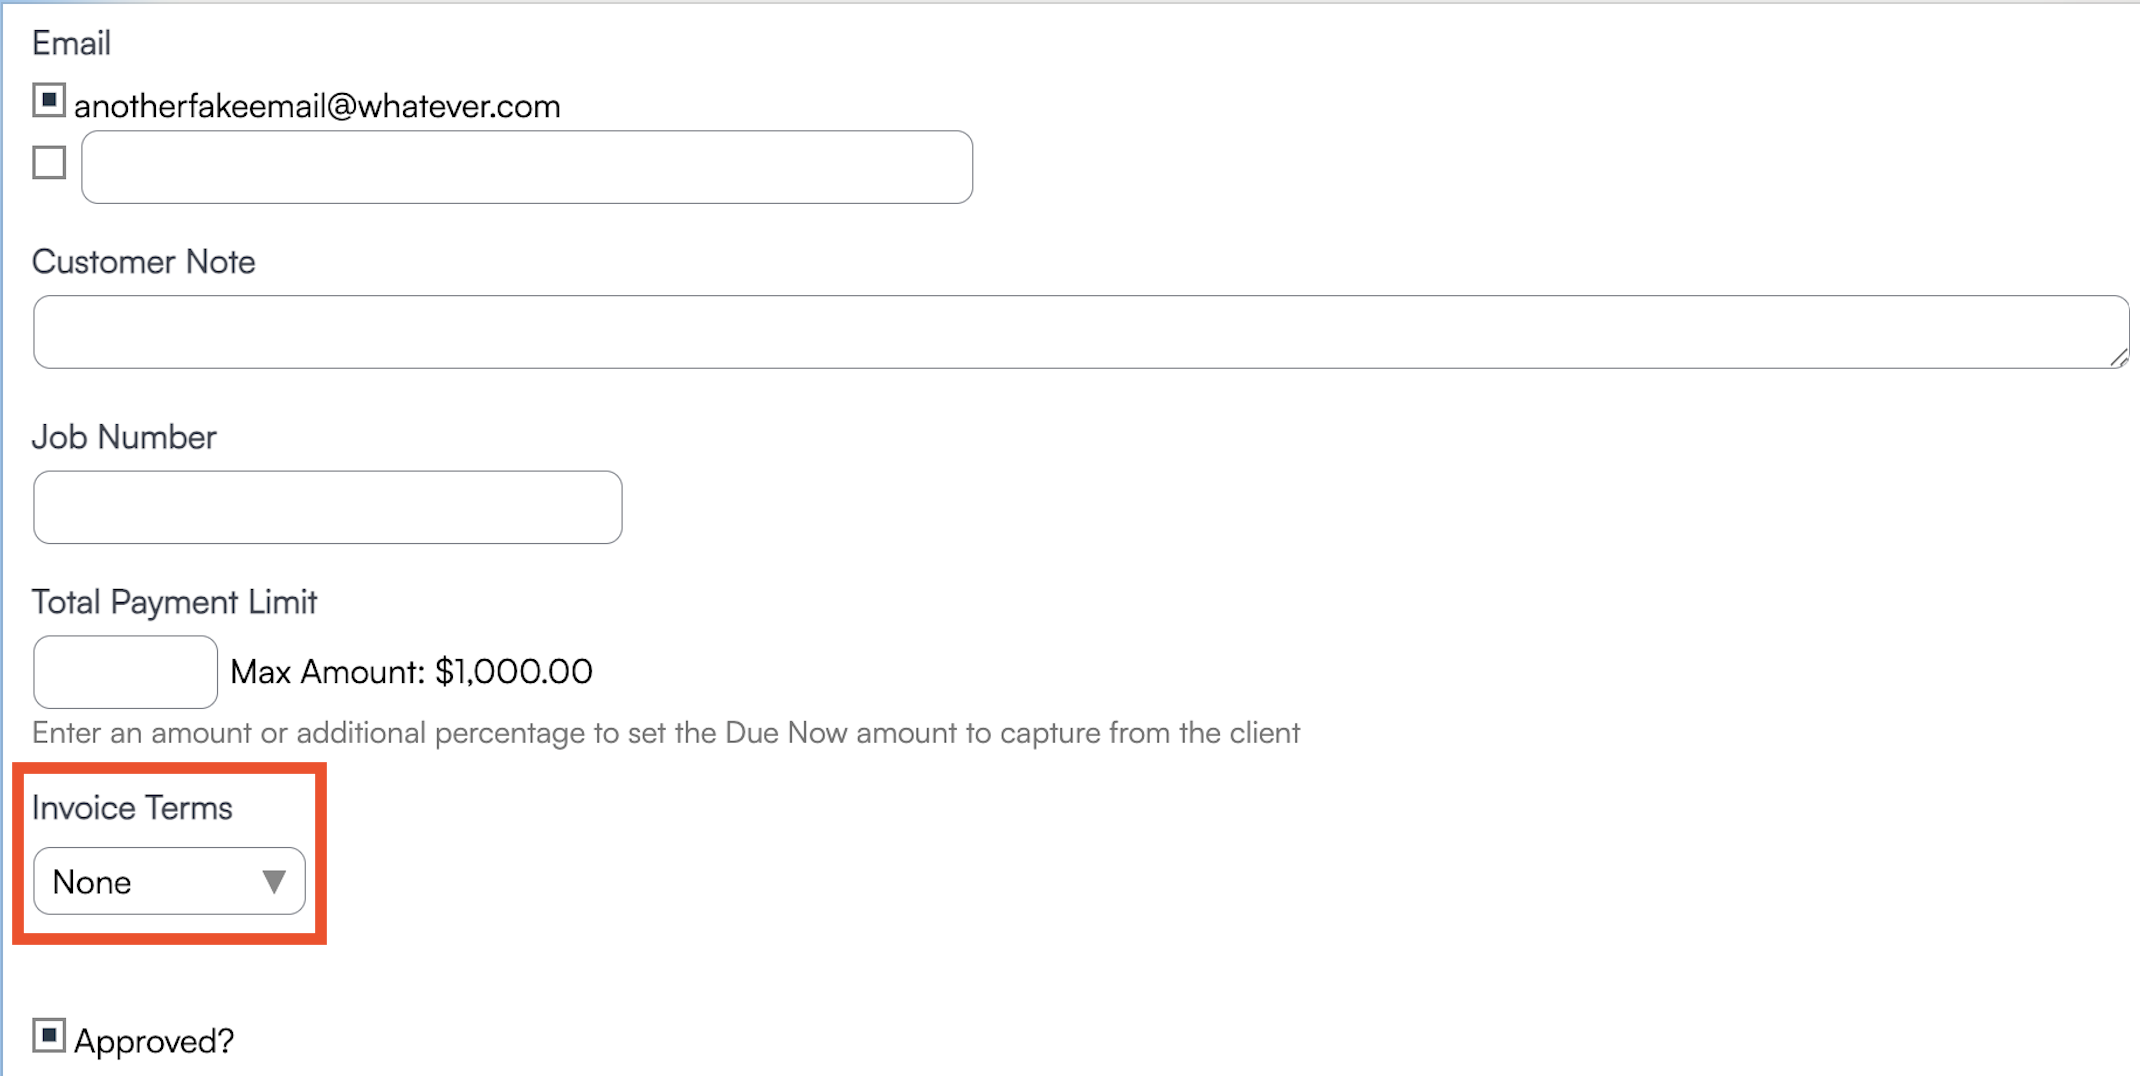
Total Payment Limit
On an individual invoice details page, click Settings at the top of the page. Here, you can adjust the Total Payment Limit, which controls how much you are collecting from the customer at a time. Please note that this value reflects the total you want the customer to be able to pay, including past payments. If a customer has already paid $100 and you want to collect another $100 payment from them, you want to set this amount to $200.

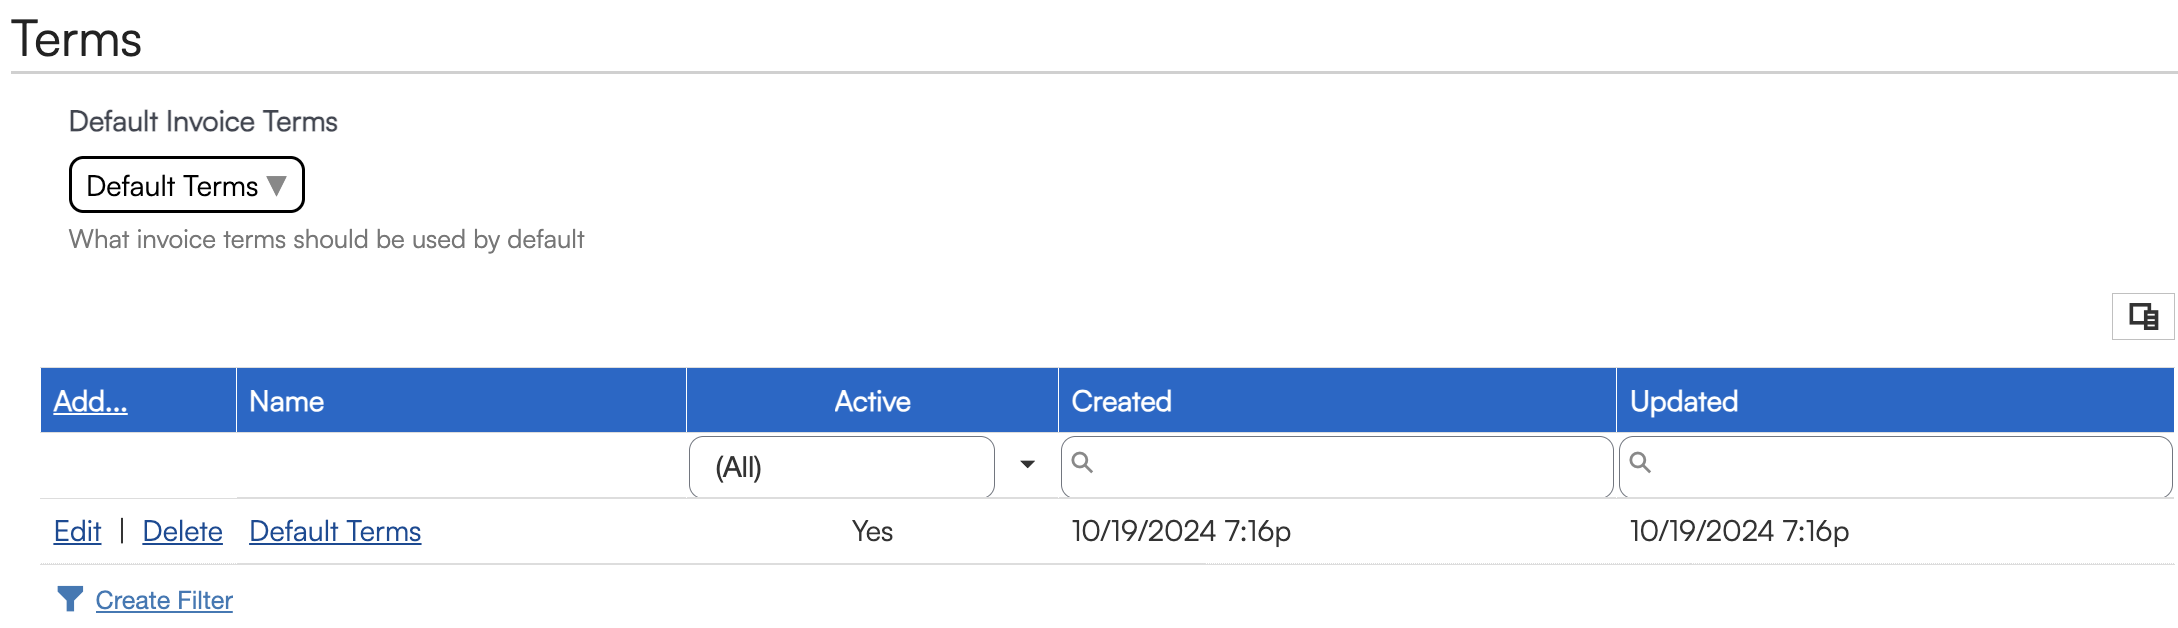
Terms
Invoice terms are separate from Terms and Conditions for proposals. This section only shows on Invoices.
Setting up Terms
This setup is in Control Panel > Invoices. Scroll down to "Terms" and you'll see the serviceminder standard Default is already created (Due upon Receipt). This default is easily edited by the user. To add additional terms, click "Add" on the table.
Contact-specific Terms
To create a custom set of terms for a specific contact, go to that contact and Edit. Scroll down to find the Terms setting:
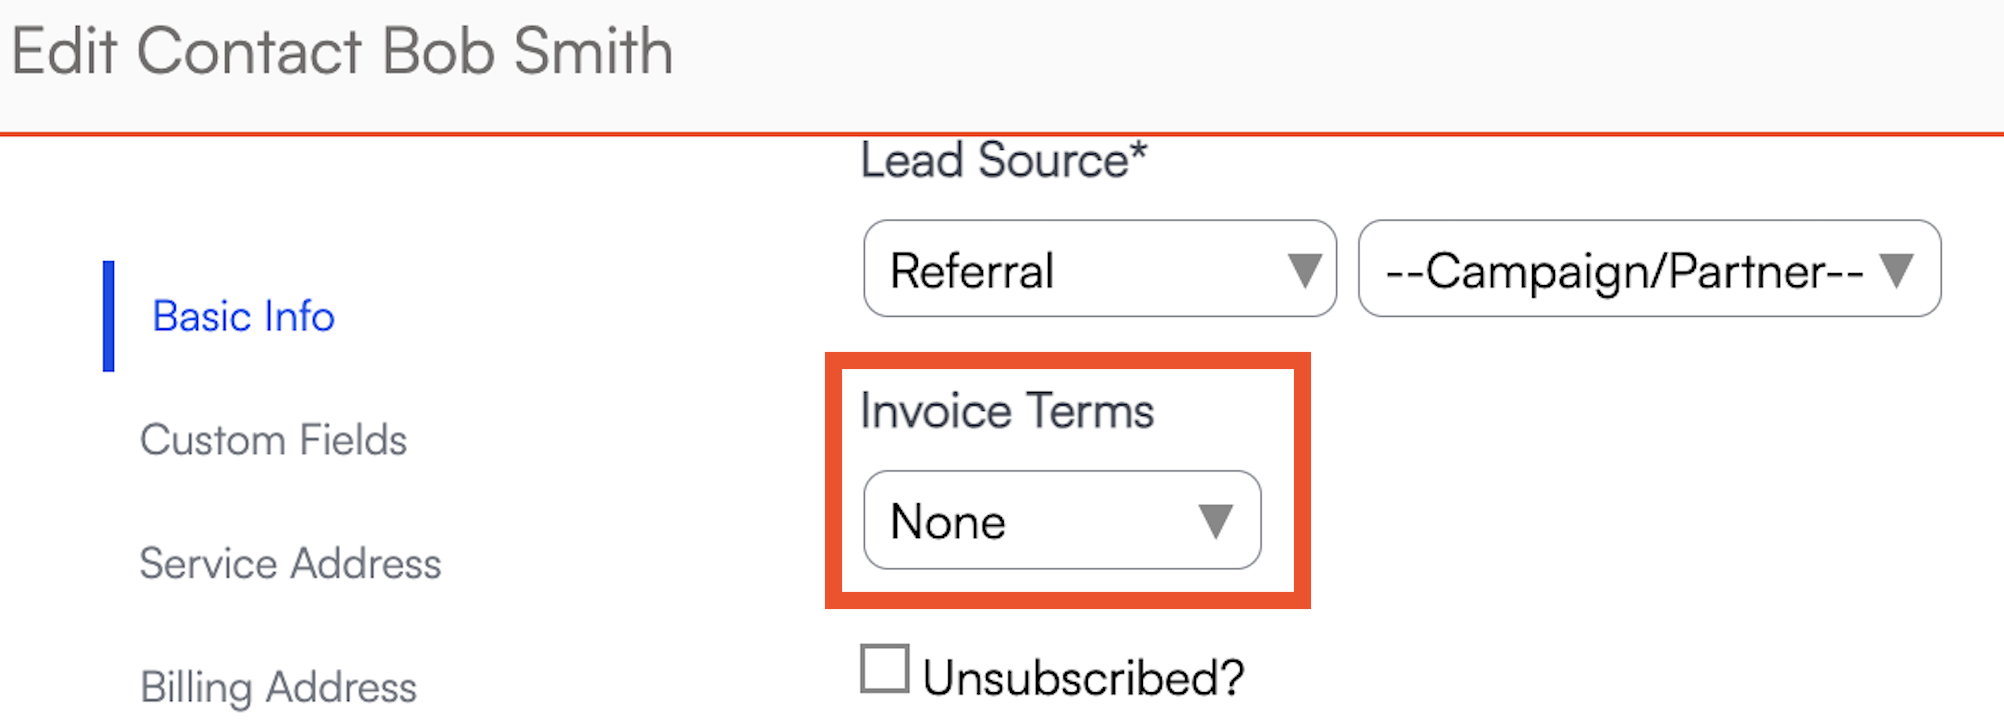
Choose the desired Invoice Term for that customer. This will override any Default organization terms. A user may also go back to Control Panel>Invoices to create as many additional terms as desired.
Invoice-specific Terms
An invoice will automatically present the Organization's default terms, or, if the Invoice is for a Contact who has been assigned unique terms, then any invoice for that Contact will have those terms applied.
A user may change a unique Invoice's terms, as well. After an Invoice is created, go to Settings and select the desired Terms, then save.

You can also set up custom Invoice Above the Fold text. Learn more about that in our Terms and Conditions article.
Approved/Unapproved Invoices
There are three ways to control whether an invoice requires approval before being sent to the customer:
All Invoices By Default
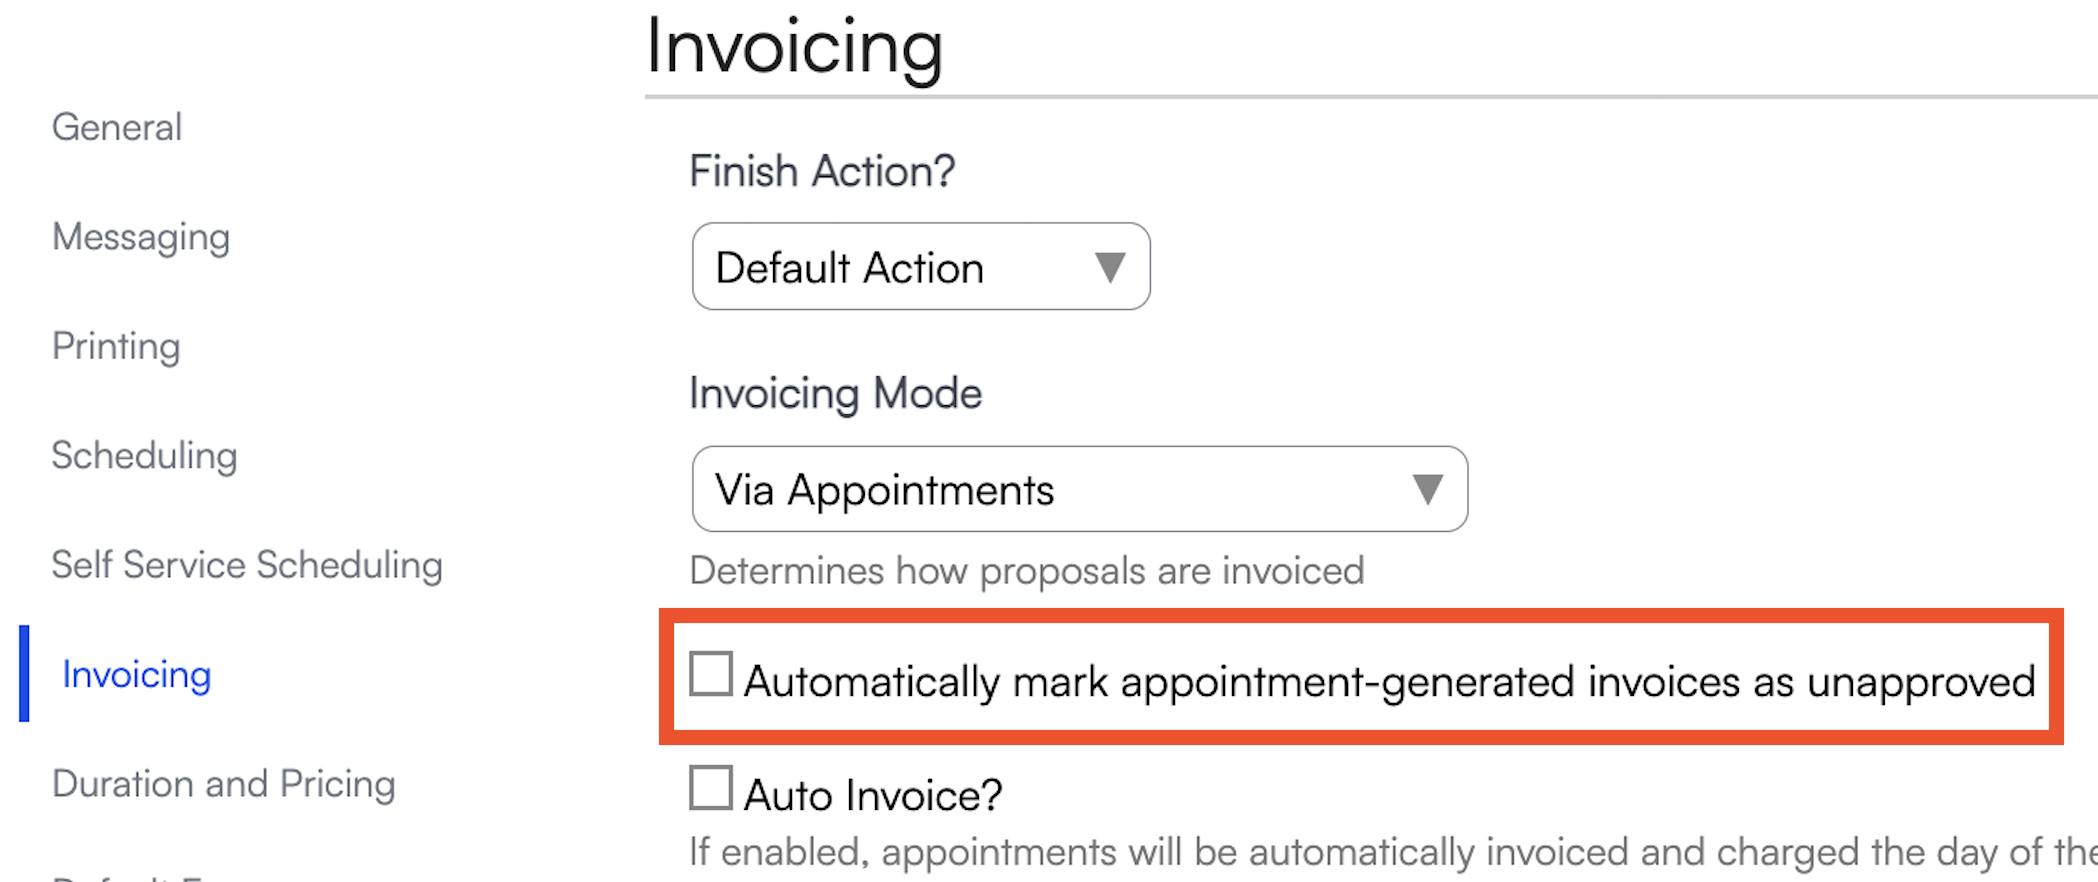
To have all invoices generated from appointments marked as "Unapproved":
-
Go to Control Panel > Invoices
-
Locate Appt Invoice Mode and select Unapproved

By Specific Service
To mark only invoices from a specific service as unapproved:
-
Go to Control Panel > Services > Edit [Service]
-
In the Invoicing section, check the Mark Invoices Unapproved box
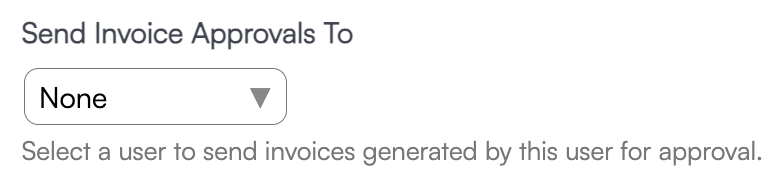
By Specific User
To require approval for appointment-generated invoices that are created by a specific user:
-
Go to Control Panel > Users > Edit [User] > Permissions tab
-
Under Send Invoice Approvals To, select the approver's name
Cease Invoice Reminders
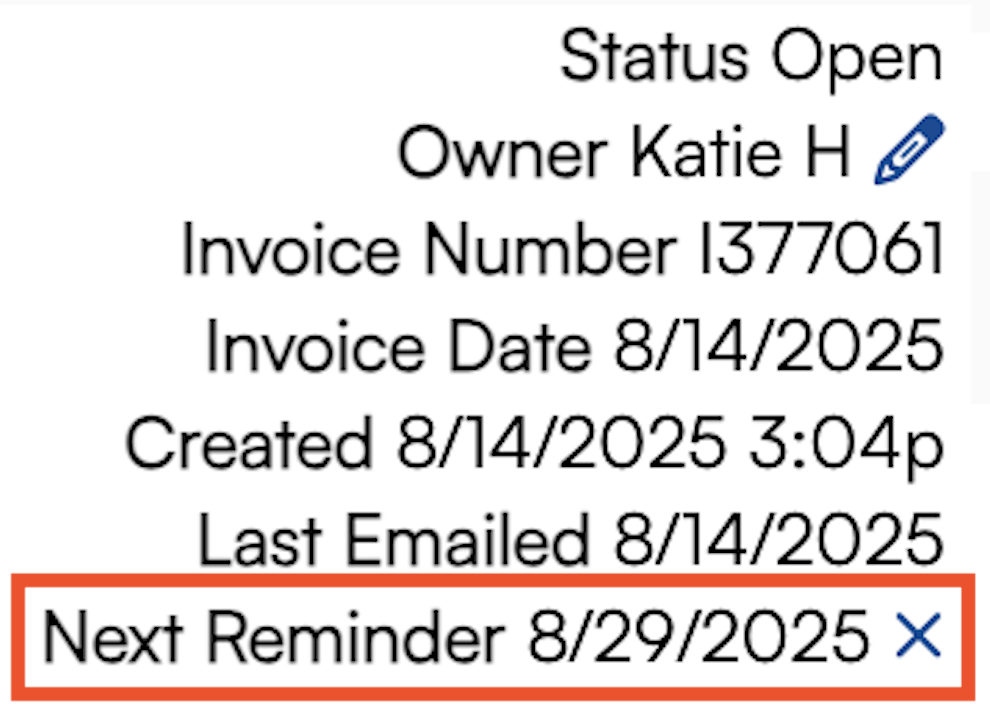
To stop reminders for any particular Invoice, you can head to the Invoice's Details page and look in the upper right corner of the Invoice body. If there is an upcoming reminder, it will appear with an X to remove it. Removing a reminder like this will indefinitely prevent further reminders from sending for that Invoice until you choose to send the Invoice again.
FAQs
If I go in and complete a proposal, will it create an invoice?
If you are wanting to close the appointment and not generate a new invoice, you'll want to change the service settings to the following:
- Finish Action > Close Appointment
- Invoicing Mode > Manual
Go to Control Panel > Services > Edit Service. Scroll down to Invoicing section to adjust these settings.
How can we show service date on the invoice?
To have agents send invoices to you for approval, approve them before charging the customer, and decide whether the customer receives the invoice and/or receipt, follow these steps:
Require Invoice Approval: Go to Control Panel > Invoices, set Appt Invoice Mode to Unapproved Invoice, and click Save.
Assign Approval to Yourself: Go to Control Panel > Users, click Edit next to the agent, open the Permissions tab, and set Send Invoice Approvals to to your name.
Restrict Agent Approval Rights: On the same page under Permission Overrides, set Invoices: Approve to Deny, then click Save.
Control Customer Notifications: Go to Control Panel > Notifications, open the Turn Notifications on/off tab, scroll to Invoices, and uncheck:
Invoice (to prevent invoice creation notifications)
Invoice Receipt (to prevent payment receipt notifications)
Click Save.
This setup ensures agents submit invoices to you for review, you approve and charge the customer, and you can choose whether customers receive notifications.
The Send button on the invoice is not sending to the Customer.
Make sure that your notifications for invoices are enabled. In Control Panel > Notifications, the first page and the top checkbox - this is the official "Go Live" box to check when you're ready to start invoicing customers.

What are serviceminder's Organization default terms?
For a new account, default terms for an Organization are "Due upon Receipt, " but this is easily changed in Control Panel>Invoices.
What if I want a Contact to have different invoice terms, depending on the job?
In this case, you would change the terms at the Invoice level.
