Overview
Looking to get more familiar with the new NeoLight theme? Look no further! This page will review all of the major navigational changes between Classic and NeoLight.
This article will review:
Navigation Menu
A Few Items Have Moved
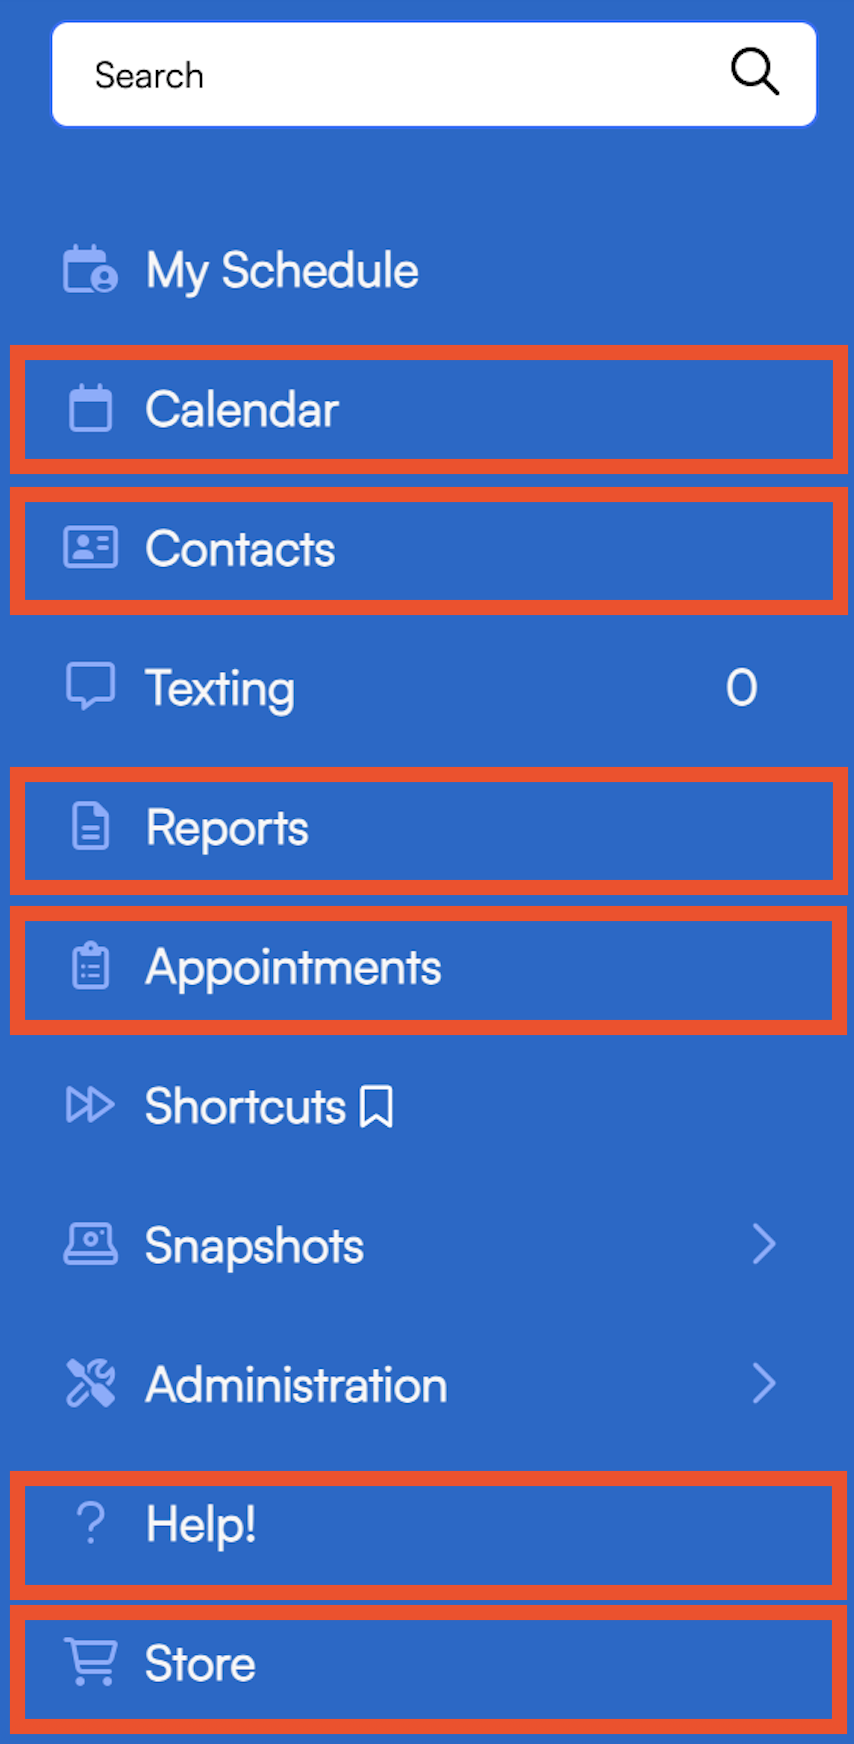
The following items can now be found in the navigation menu:
- Calendar
- Contacts
- Reports
- Appointments
- Help
- Store

Other items from the top menu have moved into the Tools section of the Control Panel:
- Maps
- Campaigns
- Marketplace

Choose which organization you are working in using the dropdown menu at the bottom of the menu:

Navigation Menu Features
- Expand and Collapse menu sections
- Bookmark frequently visited pages
- DragandDrop to reorder menu items

Details Pages
Collapsible Details
Contacts and Appointments details pages have the ability to collapse information for simpler viewing.

Custom Fields Above the Fold
When creating custom fields, you can choose whether or not you want it displayed "Above the Fold." Displaying it above the fold will mean you can see it without having to expand the details section.

Actions Menu
Details pages for Contacts, Appointments, Proposals, and Invoices now have an Actions menu at the top of the page. This replaces the dark blue toolbar that used to be located at the bottom of each details page.

Find the following actions on each page:
- Contacts Actions
- Inventory: Adjust part counts for that contact
- Email: Send an Ad Hoc email to that contact
- Add Task: Create a Task connected to that contact
- Recurring Billing: Initiate a Recurring Billing plan for that contact
- Drip!: Start a Drip Campaign for that contact (requires the Drips add-on)
- Copy Contact: Create a duplicate record of that contact
- Open Issue: Open an issue to track with that contact (requires Feedback & Issues add-on)
- Appointments Actions
- Email: Send an Ad Hoc email related to that appointment
- Print: Print the appointment details
- Add Deposit: Add a deposit to that appointment
- Add Tip: Add a tip to that appointment
- Quick Finish: Finish the appointment using the scheduled start and finish times
- Invoice: Generate an invoice manually from that appointment
- Send: Send the automated email template for that appointment
- Copy: Duplicate that appointment
- Open Issue: Open an issue to track with that appointment (requires Feedback & Issues add-on)
- Proposals Actions
- Send: Send the automated email template for that proposal
- Email: Send an Ad Hoc email related to that proposal
- Change Order: Create a Change Order to add or remove items from the proposed job
- Add Deposit: Add a deposit to the proposal
- Invoice: Generate an invoice manually from the proposal
- Add Appt: Add an appointment to the proposal
- Add Task: Create a Task connected to that proposal
- Checklist: Attach a checklist to the proposal
- Bid: Create a bid to send to subcontractors
- Bundle: Create a bundle of proposals to offer choices to the customer
- Copy: Duplicate that proposal
- Open Issue: Open an issue to track with that proposal (requires Feedback & Issues add-on)
- Invoice Actions
- Send: Send the automated email template for that invoice
- Email: Send an Ad Hoc email related to that invoice
- Split: Split the balance into multiple invoices
- Fin Chg: Create a finance charge for delayed payments
- Copy: Duplicate that invoice
- Open Issue: Open an issue to track with that invoice (requires Feedback & Issues add-on)
Calendar Tooltips and InfoZoom
Hover your mouse over an appointment to see a tooltip appear. Click on that tooltip to see an expanded InfoZoom text box. Both of these options provide quick ways to review additional details about appointments on any view of the calendar.

Customize the information in these tools in Control Panel > Scheduling > Presentation using Shortcodes.

